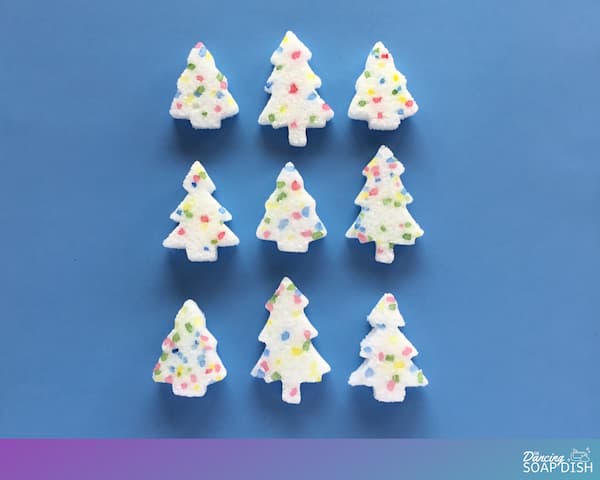
Christmas Tree Bath Salt Cakes
Dress up your Christmas bath salts this year with these gorgeous Christmas Tree Bath Salt Cakes.
Equipment
- Plastic Zip Lock Bags
- Ceramic bowls
- Glass, Ceramic or Metal Mixing Bowl and Spoon
- Tray lined with Parchment Paper
- Toothpick or Skewer
Ingredients
- 4 Tbsp Rock Salt
- Colouring Red, Blue, Yellow & Green
- 1 Cup Epsom Salt
- 2 Tbsp Baking (Bi-Carb) Soda Sifted
- 2 Tsp Carrier Oil
- 20-30 Drops Essential Oils
- 2 Tsp Water
- 1 Christmas Tree Cookie Cutter
Instructions
Colored Rock Salt
- Fill four (4) plastic zip-lock bags with a tablespoon each of rock salt. Add a different colour of food colouring/soap colouring to each bag, zip shut, and shake until salt is evenly coloured. Pour salt out into separate bowls and leave to dry (overnight is preferable).
Salt Cakes
- Place a cookie cutter in the top left of your paper-lined tray and fill it with 4-5 pieces of each colour of rock salt (I like to pick out the biggest pieces). Use a toothpick or skewer to arrange the rock salt pieces into your desired positions.
- Add Epsom salts and sifted baking soda into a non-plastic bowl and mix well. Add carrier oil, essential oils, water, and then stir until fully incorporated. Your mixture should be damp but not so soggy that the salt starts to dissolve.
- Spoon your salt mixture into your cookie cutter and use your fingers to push it down firmly on top of the rock salt pieces. Keep filling your cookie cutter until you can pack it down level with the rim of the cookie cutter.
- Slowly and carefully lift the cookie cutter to reveal a formed salt cake. If you shape starts to sag or melt it means your mixture is too moist. You can add more Epsom salt to the mixture to counteract this.
- Repeat steps 1-4 until all of your Epsom salt mixture is gone.
- Set your salt cakes aside to dry overnight, then flip them over to dry for another 12 hours.
Directions for Use
- To use, drop 2 cakes into a bath for kids (use all cakes for an adult) or 3-4 in a bucket for a relaxing foot soak. To give as a gift, place salt cakes in a cellophane bag and tie off with a pretty ribbon.
Notes
Store your bath salt cakes in a plastic zip-lock bag for colour and scent longevity.
Troubleshooting Tips: If your salt cake does not remove easily from your cookie cutter, your salt mixture is too dry. Add some more water and try again.
If your salt cake starts to sag or lose its shape after being removed from the cookie cutter, your salt mixture is too wet. Add some more salt and try again.