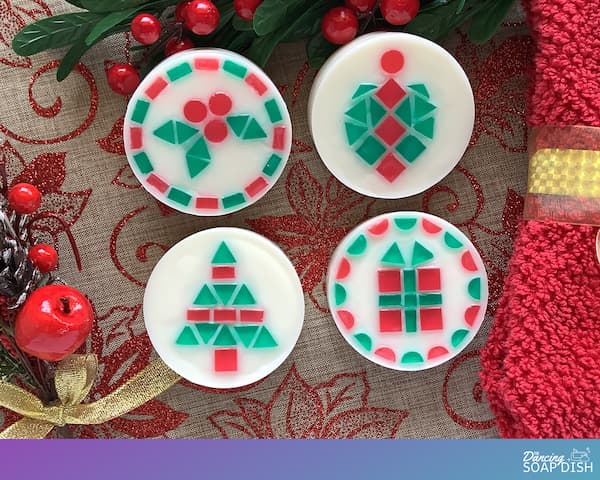
Mosaic Christmas Soap
Wow your family and friends with these gorgeously festive mosaic Christmas soap bars.
Equipment
- Alcohol in a Small Spray Bottle (rubbing alcohol, isopropyl or vodka)
- Kitchen Scales
- Glass Measuring Jug
- Bamboo or Metal Skewer
- A Pair of Scissors
- Tray lined with Grease-Proof Paper
- A Breadboard and a Sharp Knife
- Cotton Buds (Q-Tips)
- A Small (2oz) Paper Cup (Optional)
- Microwave or Double Boiler
Ingredients
- 330 g White Melt and Pour Soap Base (plus up to 5% for wastage)
- 130 g Clear Melt and Pour Soap Base
- Mosaic Tile Silicone Mould
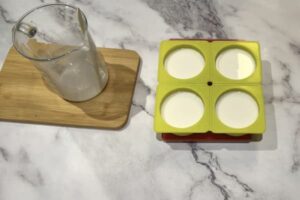
- Round Soap Mould
- Rubber Scraper
- Small Glass Measuring Cup
- Soap Colouring (Red and Green)
- Soap Fragrance or Essential Oils (optional)
Instructions
- Set out all of your equipment and ingredients ready to be used.
Mosaic Soap Tiles
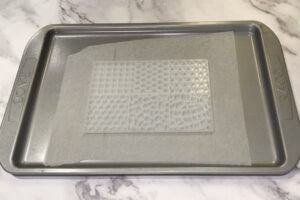
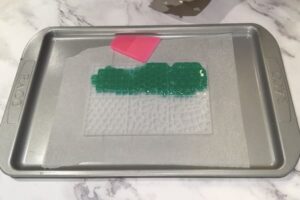
- Place the mosaic tile silicone mould on a tray lined with greaseproof baking paper.
- Weigh out 65g (~2.3 oz) of clear melt and pour soap base and cut it up into small cubes (this includes 5g for wastage).
- Put the soap cubes in a small glass measuring cup with a pouring spout.
- Melt your soap base as per the instructions in a microwave or double boiler.
- Add the green soap colouring (ie green liquid soap colouring or mica) and stir well.
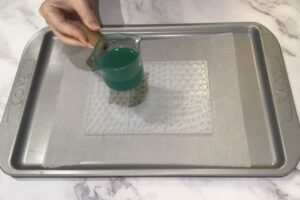
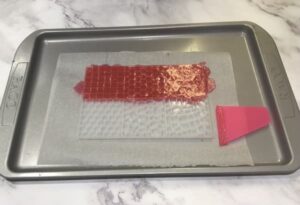
- Working quickly, pour the green liquid soap base into the circle, triangle and square sections of the mosaic tile silicone mould.
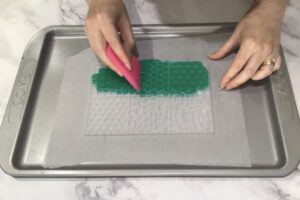
- Ensure the soap base covers the entire three sections of the mould by spreading it around with a rubber scraper and spraying alcohol to break the surface tension and remove any bubbles.
- Set the soap aside to set for 30 minutes.
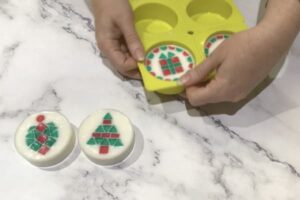
- Once the soap is set, turn the mould over and push out the mosaic soap tiles onto the paper-lined tray while bending and flexing the mould.
- Clean the mould if necessary and repeat the process to make red mosaic soap tiles.
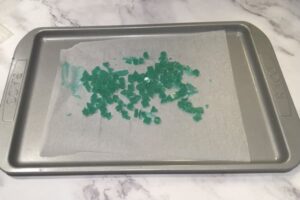
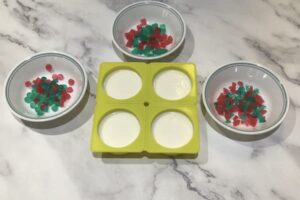
- Sort the soap tiles by shape into separate containers.
Base Soap Bars
- Weigh out 280g (~9.9oz) of white melt and pour soap base and cut it up into small cubes.
- Put the soap cubes in a glass measuring jug and add another cube (up to 5%) for wastage.
- Melt your soap base as per the instructions in a microwave or double boiler.
- Scent your soap with fragrance oils or essential oils (optional).
- Position a four-cavity, round soap mould on a set of kitchen scales and press TARE.
- Pour 70g of liquid soap base into each cavity, resetting the scales to ‘0’ between pouring each cavity.
- Spray the surface of the soap with alcohol to remove any bubbles.
- Allow the soap bars to set until they are hard to the touch. Do not remove them from the mould.
Mosaic Soap Bars
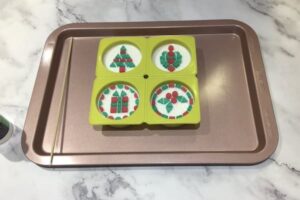
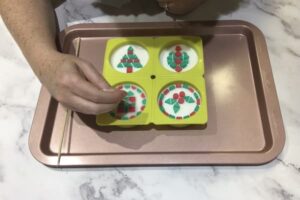
- Place the round soap bars (still in the mould) on a tray.
- Start assembling Christmas-themed mosaic tile designs in the centre of each round bar. Add a border if desired.
- Use a pair of scissors to trim the edges of the mosaic soap tiles (if necessary) as you go.
- Use a breadboard and a sharp knife to cut the mosaic soap tiles down to smaller shapes if required.
- Use a metal or bamboo skewer to carefully push all the mosaic soap tiles to exactly where you want them positioned.
- Weigh out 50g (~1 ¾oz) of white melt and pour soap base and cut it up into small cubes.
- Put the soap cubes in a small glass measuring jug with a pouring spout.
- Melt your soap base as per the instructions in a microwave or double boiler (for this part of the process a double boiler is recommended).
- Scent your soap with fragrance oils or essential oils (optional).
- Spray the surface of your mosaic soap designs with alcohol to help the soap layers adhere to each other.
- With your melted soap base in one hand, and your spray bottle of alcohol in the other, gently pour the liquid soap base around the mosaic soap tiles to ‘grout’ them into place.
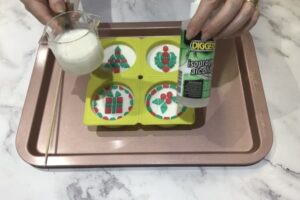
- As you pour, spray the soap with alcohol to help it fill the small gaps between the mosaic soap tiles, and to remove any bubbles.
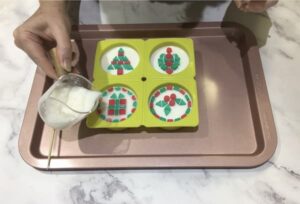
- Clean up any white soap spilled on top of the coloured mosaic soap tiles immediately with a cotton bud dipped in alcohol.
- Once all four soap bars have been ‘grouted’ pour any remaining white soap base into a small paper cup (2oz) to be used again later (optional).

- Allow the soap bars to set for three days and then demould them by pushing from the bottom as you peel back the silicone mould.