
Mosaic melt and pour soap bars are my new passion and I’m super excited to present to you my mosaic Christmas soap bars.
This post contains affiliate links. If you buy something through one of those links, I will receive a small commission at no extra cost to you. As an Amazon Associate I earn from qualifying purchases.
Thank you for supporting my site!
Table of Contents
My Inspiration for Mosaic Christmas Soap
What You Need to Make Mosaic Christmas Soap
Mosaic Christmas Soap Video Tutorial
Mosaic Christmas Soap Instructions and Printable Tutorial
My Inspiration for Mosaic Christmas Soap
If you are familiar with my work, you might have noticed that I enjoy using unconventional tools in my soapmaking projects.
I like to borrow techniques and equipment from other crafts and hobbies.
So, while browsing online recently, I stumbled across this mosaic tile silicone mould.
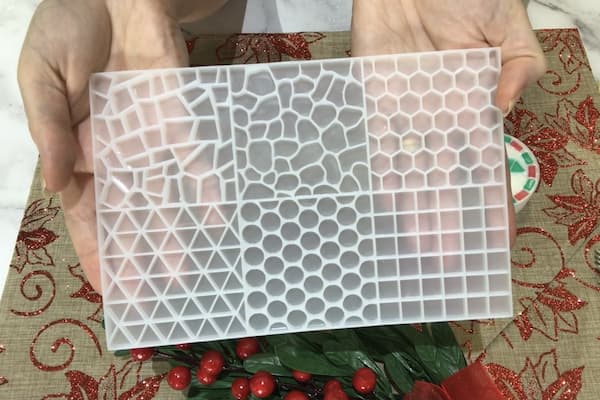
Now it is supposed to be used for resin projects, but I had a major lightbulb moment, and my mind was instantly flooded with a range of beautiful mosaic soap designs.
I was hooked.
So here is my first mosaic melt and pour soap project (yes there will be more 😊). I’ve chosen a Christmas theme as the festive season is fast approaching.
Let’s get started!
What You Need to Make Mosaic Christmas Soap
Melt and Pour Soap Base
Melt and pour soap is sold as large blocks that you can cut up and then weigh out the amount of soap you need.
I used white and clear melt and pour soap base to make my mosaic Christmas soap bars. Each of my bars weighs approximately 80g (~2.8)oz.
The mosaic tiles were poured from clear melt and pour soap base as I wanted my red and green tiles to have a vibrant colour (not a pastel colour which is what I would have got if I used white soap base).
I used a special ‘no sweat’ formula to avoid glycerine dew beading on the outside of the soap bars.
Since mosaic grout is traditionally white, I used white melt and pour soap base for the round bars that my mosaic tiles sit on, and for the soap ‘grout’ that I poured in between the mosaic tiles.
Don’t forget to add up to 5% for wastage.
Soap Moulds
To make mosaic melt and pour soap bars you need two moulds, one for the tiles and one for the base.
This mosaic tile mould makes six different patterns of mosaic tiles. For this project, I’m only interested in the circle, triangle, and square-shaped tiles. So I will only be using half the mould.
Live outside of the United States? You can also buy this mosaic tile mould from Aliexpress.
For the base, a mould that is a basic, geometric shape such as a circle, square or rectangle is ideal. I used this circular silicone soap mould for my project, but you can use any other geometric soap mould you have on hand.
Plastic or Rubber Scraper
You will find filling the mosaic tile silicone mould much easier if you have a rubber scraper on hand to distribute the melted soap base evenly across the mould.
Live outside of the United States? You can also buy rubber scrapers from Aliexpress.
Soap Colouring
Red and green soap colouring are a must when making Christmas projects. I prefer liquid soap colouring, but you can also use red or green coloured mica.
Essential Oils or Fragrance Oils
Scenting your soap is optional, but most of us prefer a pretty smelling soap bar.
For this project, I used a blend of Wild Orange and Douglas Fir essential oils at a ratio of 1:1, but you can feel free to use your favourite combination of essential oils or your preferred fragrance oil.
If you are looking for ideas, check out my list of perfect essential oil soap scents.
Small Glass Measuring Cup
I highly recommend using a small glass measuring cup to pour the mosaic tiles and the white ‘grout’ surround. An espresso measuring cup (used by baristas) is ideal as it has a double spout, a wooden handle, and can withstand high heat.
Live outside of the United States? You can also buy espresso measuring cups from Aliexpress.
Alcohol in a Small Spray Bottle
Alcohol (rubbing alcohol/isopropyl alcohol or vodka) has a number of uses when making melt and pour soap:
- Spraying the soap with alcohol once it’s poured will remove any bubbles sitting on the soap’s surface.
- Spraying alcohol between soap layers helps them adhere together.
- Spraying the soap mould with alcohol before pouring the soap helps the soap spread evenly across the bottom of the mould.
Alcohol is an absolute MUST when making mosaic soap as it helps the soap ‘grout’ fill the gaps between the soap mosaic tiles.
Additional Materials Required
Kitchen Scales – I’ve used grams in this recipe because the amounts are easier to manage compared with ounces. Most kitchen scales these days are interchangeable between grams and ounces. Check your scale’s instruction booklet for how to change your scale to measure in grams and then change it back when finished.
Glass Measuring Jug – You will need a larger (500ml/16oz) measuring jug to melt the white melt and pour soap base. I have a separate glass measuring jug dedicated to creative projects (soap making, lotion bars, lip balm etc) to avoid any cross-contamination of non-ingestible ingredients with food. I recommend you do the same.
Metal or Bamboo Skewer – Skewers are super handy for positioning the mosaic tiles. They can also be used for stirring the melted soap base and can be easily cleaned or disposed of.
Small Paper Cup – A 2oz paper cup (shot glass size) can be used to collect any unused white soap base after your have ‘grouted’ the mosaic (optional).
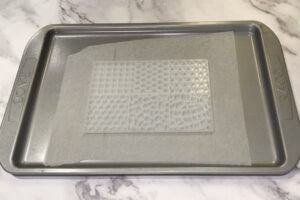
A Tray Lined with Greaseproof Baking Paper – Position the mosaic tile mould on a piece of greaseproof baking paper on an tray before pouring to allow for easy cleaning up (there will be drips) and transport while the soap is setting.
A Pair of Scissors – You will need a pair of scissors to trim the edges of the soap mosaic tiles.
A Breadboard and a Sharp Knife – For cutting mosaic soap tiles into different shapes.
Cotton Buds – You may require cotton buds/swabs during the soap ‘grouting’ stage to clean up any white soap base spilled on the mosaic soap tiles.
Microwave or Double Boiler – Melt your soap base in either a microwave or a double boiler.
Mosaic Christmas Soap Video Tutorial
To make it easier for you to grasp the process, I created a video tutorial about how to make mosaic Christmas soap bars.
How to Make Mosaic Christmas Melt and Pour Soap Bars
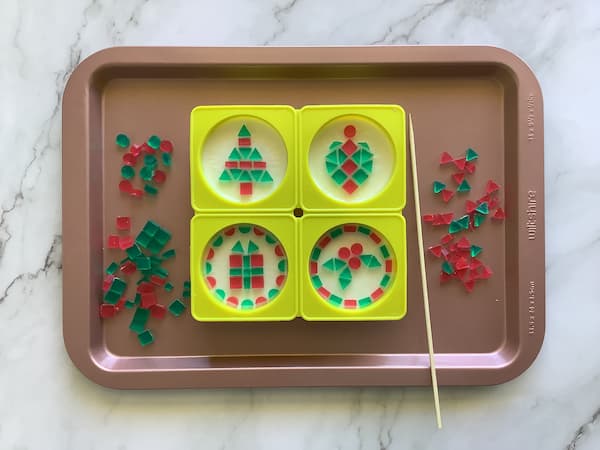
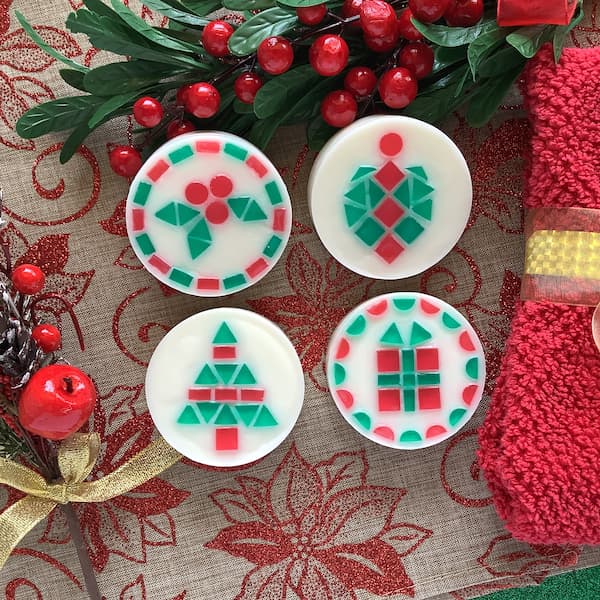
Want your mosaic Christmas soap to look like mine?
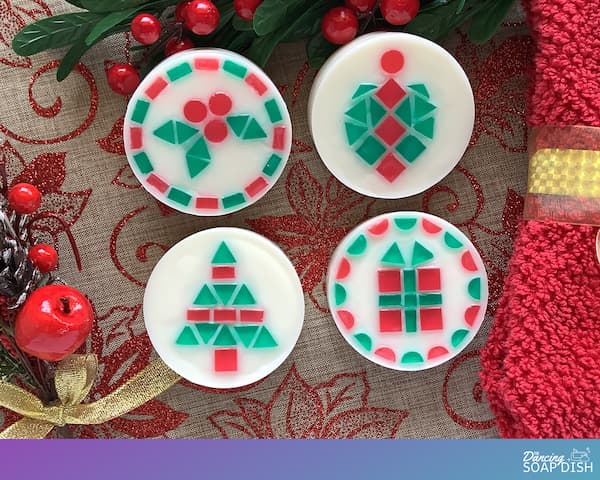
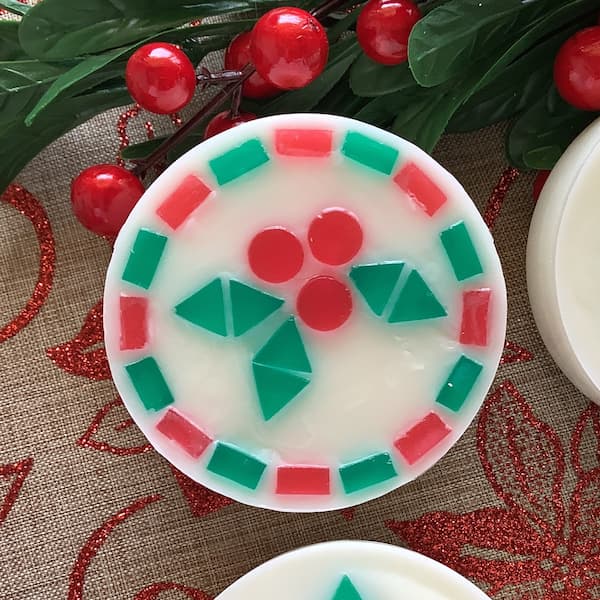
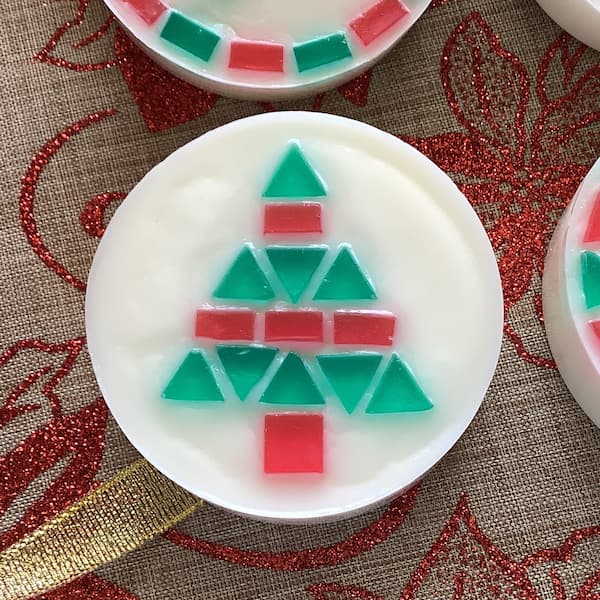
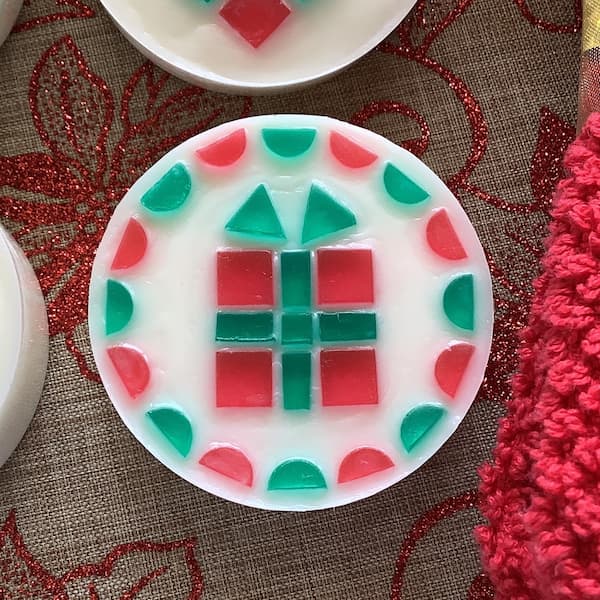
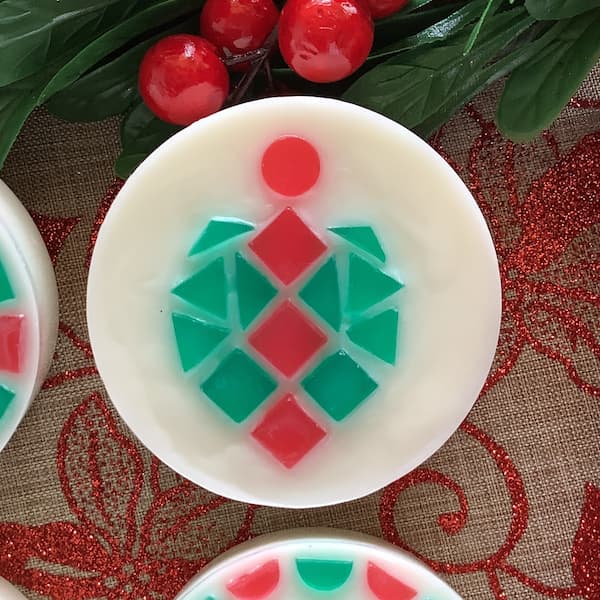
I used clear melt and pour soap base tinted with red and green soap colouring to make circular, triangular, and square mosaic tiles using a mosaic tile silicone mould.
I then positioned the tiles (in various Christmas designs) on top of round soap bars made from white melt and pour soap base and scented with Wild Orange and Douglas Fir essential oils.
Finally, I scented a small amount of white melt and pour soap base and poured it around the mosaic soap tiles to ‘grout’ them in.
Mosaic Christmas Soap Bars Printable Tutorial
Mosaic Christmas Soap
Equipment
- Alcohol in a Small Spray Bottle (rubbing alcohol, isopropyl or vodka)
- Kitchen Scales
- Glass Measuring Jug
- Bamboo or Metal Skewer
- A Pair of Scissors
- Tray lined with Grease-Proof Paper
- A Breadboard and a Sharp Knife
- Cotton Buds (Q-Tips)
- A Small (2oz) Paper Cup (Optional)
- Microwave or Double Boiler
Ingredients
- 330 g White Melt and Pour Soap Base (plus up to 5% for wastage)
- 130 g Clear Melt and Pour Soap Base
- Mosaic Tile Silicone Mould
- Round Soap Mould
- Rubber Scraper
- Small Glass Measuring Cup
- Soap Colouring (Red and Green)
- Soap Fragrance or Essential Oils (optional)
Instructions
- Set out all of your equipment and ingredients ready to be used.
Mosaic Soap Tiles
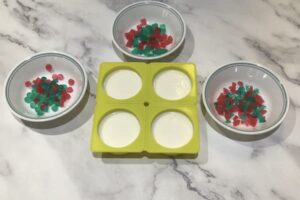
- Place the mosaic tile silicone mould on a tray lined with greaseproof baking paper.
- Weigh out 65g (~2.3 oz) of clear melt and pour soap base and cut it up into small cubes (this includes 5g for wastage).
- Put the soap cubes in a small glass measuring cup with a pouring spout.
- Melt your soap base as per the instructions in a microwave or double boiler.
- Add the green soap colouring (ie green liquid soap colouring or mica) and stir well.
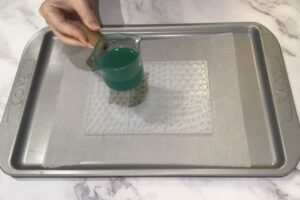
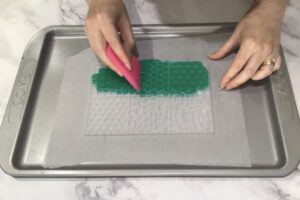
- Working quickly, pour the green liquid soap base into the circle, triangle and square sections of the mosaic tile silicone mould.
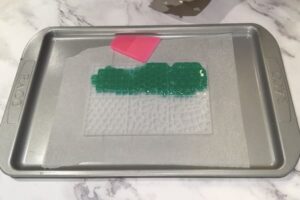
- Ensure the soap base covers the entire three sections of the mould by spreading it around with a rubber scraper and spraying alcohol to break the surface tension and remove any bubbles.
- Set the soap aside to set for 30 minutes.
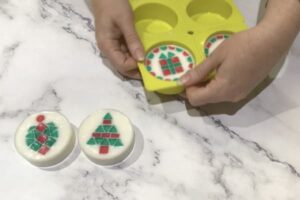
- Once the soap is set, turn the mould over and push out the mosaic soap tiles onto the paper-lined tray while bending and flexing the mould.
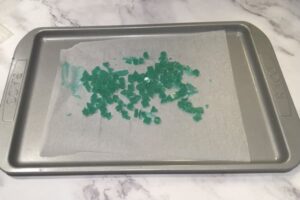
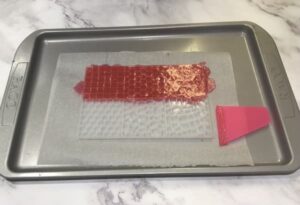
- Clean the mould if necessary and repeat the process to make red mosaic soap tiles.
- Sort the soap tiles by shape into separate containers.
Base Soap Bars
- Weigh out 280g (~9.9oz) of white melt and pour soap base and cut it up into small cubes.
- Put the soap cubes in a glass measuring jug and add another cube (up to 5%) for wastage.
- Melt your soap base as per the instructions in a microwave or double boiler.
- Scent your soap with fragrance oils or essential oils (optional).
- Position a four-cavity, round soap mould on a set of kitchen scales and press TARE.
- Pour 70g of liquid soap base into each cavity, resetting the scales to ‘0’ between pouring each cavity.
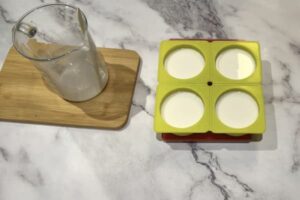
- Spray the surface of the soap with alcohol to remove any bubbles.
- Allow the soap bars to set until they are hard to the touch. Do not remove them from the mould.
Mosaic Soap Bars
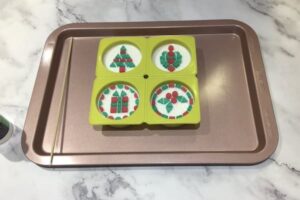
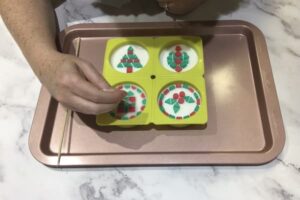
- Place the round soap bars (still in the mould) on a tray.
- Start assembling Christmas-themed mosaic tile designs in the centre of each round bar. Add a border if desired.
- Use a pair of scissors to trim the edges of the mosaic soap tiles (if necessary) as you go.
- Use a breadboard and a sharp knife to cut the mosaic soap tiles down to smaller shapes if required.
- Use a metal or bamboo skewer to carefully push all the mosaic soap tiles to exactly where you want them positioned.
- Weigh out 50g (~1 ¾oz) of white melt and pour soap base and cut it up into small cubes.
- Put the soap cubes in a small glass measuring jug with a pouring spout.
- Melt your soap base as per the instructions in a microwave or double boiler (for this part of the process a double boiler is recommended).
- Scent your soap with fragrance oils or essential oils (optional).
- Spray the surface of your mosaic soap designs with alcohol to help the soap layers adhere to each other.
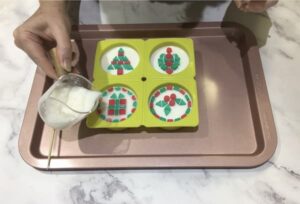
- With your melted soap base in one hand, and your spray bottle of alcohol in the other, gently pour the liquid soap base around the mosaic soap tiles to ‘grout’ them into place.
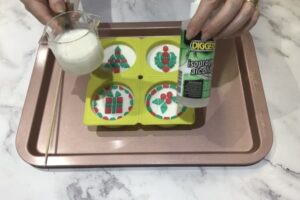
- As you pour, spray the soap with alcohol to help it fill the small gaps between the mosaic soap tiles, and to remove any bubbles.
- Clean up any white soap spilled on top of the coloured mosaic soap tiles immediately with a cotton bud dipped in alcohol.
- Once all four soap bars have been ‘grouted’ pour any remaining white soap base into a small paper cup (2oz) to be used again later (optional).

- Allow the soap bars to set for three days and then demould them by pushing from the bottom as you peel back the silicone mould.
Enjoy!


