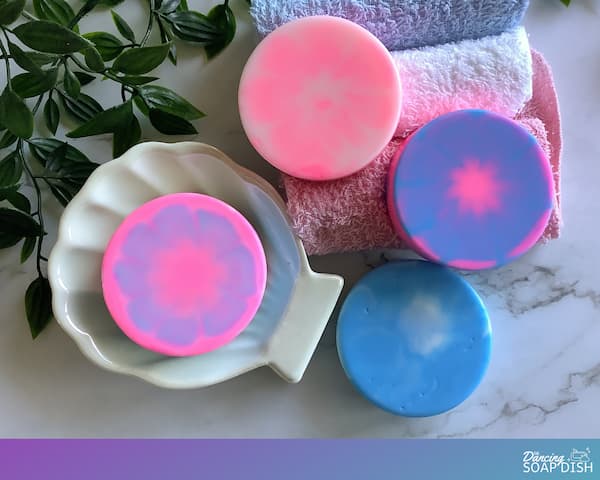
Tie Dye Melt and Pour Soap Bars
Learn how to use a special tool to make these tie dye melt and pour soap bars and master a new technique!
Equipment
- Alcohol in a Small Spray Bottle (rubbing alcohol, isopropyl or vodka)
- Kitchen Scales
- Glass Measuring Jug
- A cup of recently Boiled Water
- Paper Cups (one for each colour you are using)
- Bamboo or Metal Skewer
- Paper Towel
- Timer (a kitchen timer or your mobile phone)
- Microwave or Double Boiler
Ingredients
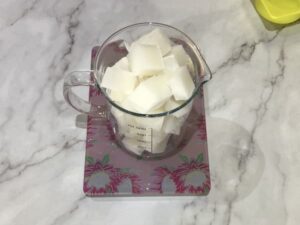
- 360 g White Melt and Pour Soap Base
- 2-3 Colours Soap Colouring
- Soap Fragrance or Essential Oils (optional)
- 4 Cavity Circular Silicone Soap Mould
- 1-2 Each Paint Pouring Tool
Instructions
- Set out all of your equipment and ingredients ready to be used.
- Weigh out 360g (~12 1/2 oz) of white soap base and cut it up into small cubes. Put it in a glass measuring jug in a microwave or double boiler. This amount includes ~5% wastage.
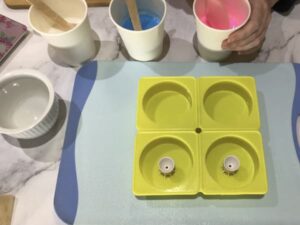
- Position a four-cavity circular mould ready to be filled. Putting it on a tray or breadboard allows for easy transportation while the soap is still setting.
- Melt your soap base as per the instructions.
- Add the soap scent (if using) and mix well.
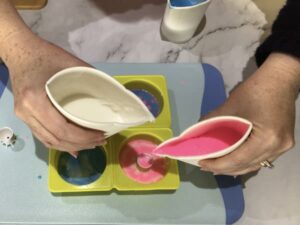
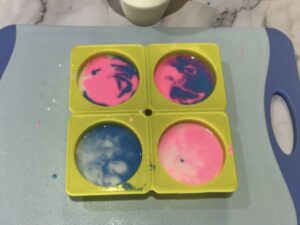
- Divide your melted and scented soap base evenly among your paper cups and use soap colouring to tint the soap in each cup to your desired colour (one may be left white if you wish). Contrasting colours work best.

- Spray the surface of the soap in each cup with alcohol to remove any bubbles as you will not be able to spray the soap once you have made your tie dye pattern.
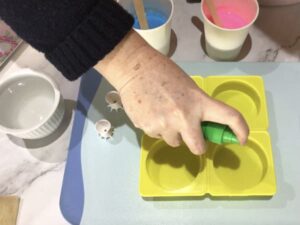
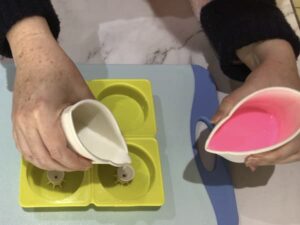
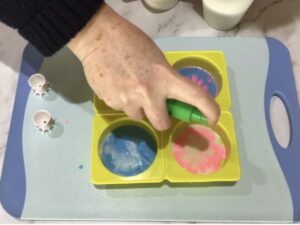
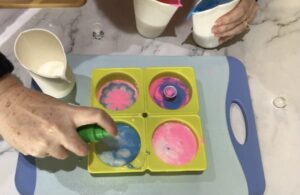
- Spray the base of one on the soap mould cavities with alcohol and position the paint pouring tool in the centre.
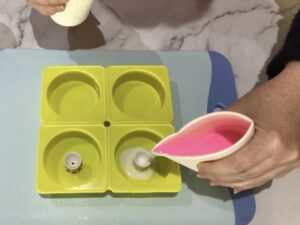
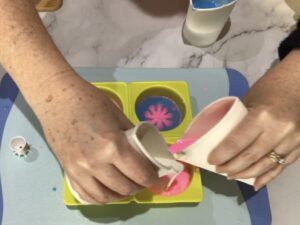
- Pinch the edge of your paper cups to make a spout, and gently pour the soap base into the funnel of the paint pouring tool (don’t let it overflow), alternating colours as you go.
- Stop once the soap has spread across the entire base of the mould (it’s ok if there are some small gaps around the edges).
- Remove the paint pouring tool from the mould cavity and drop it into the cup of boiled water to clean it.
- DO NOT spray the surface of the soap with alcohol at this stage. Spraying it will cause the different soap colours to blend together and you will ruin your tie dye effect.
- Any bubbles can be popped with your fingernail or a skewer.
- Get your next paint pouring tool ready for use or, if you only have one tool, fish the paint pouring tool out of the cup with a spoon, check that it is clean, and dry it off with a paper towel.
- Repeat steps 7-14 for each remaining cavity of the soap mould.
- Set a timer for 10 minutes.
- Once your timer has gone off after 10 minutes, check that the thin tie dye layer of soap in each mould cavity has set hard.
- Reheat the soap base in each paper cup in a microwave if required. Ensure your soap is not too hot or you run the risk of melting the existing layer when you pour the new layer on top.
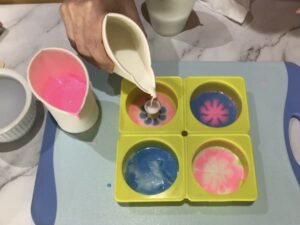
- Return to the first cavity you poured and spray the surface of the set soap base with alcohol and position the paint pouring tool in the centre.
- Gently pour the soap base into the funnel of the paint pouring tool, alternating colours as you go.
- Fill the mould to the halfway height of the paint pouring tool funnel, then remove the paint pouring tool and continue to fill the mould cavity with two colours at the same time in a swirling motion.
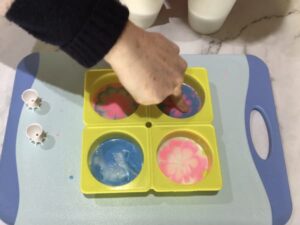
- Spray the surface of the soap with alcohol to get rid of surface bubbles.
- Continue with the remaining cavities of the soap mould until all of the soap has been poured.
- Let the soap set overnight (12hrs) and then peel back the silicone mould to release the tie dye melt and pour soap bars.