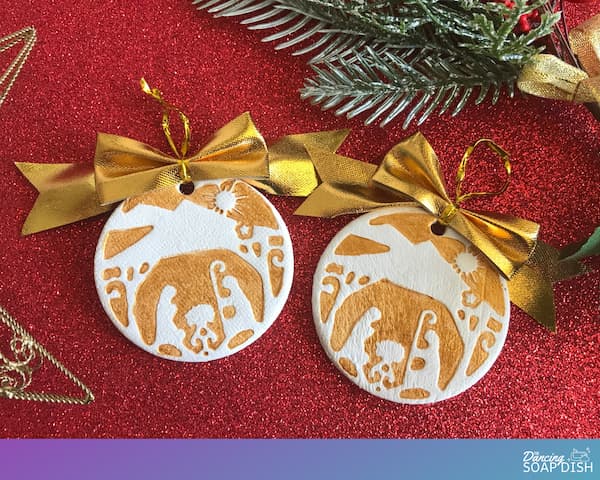
Stamped Nativity Ornaments
Give your tree some festive bling this holiday season with these stamped nativity ornaments.
Equipment
- Rolling Pin
- Plastic Tablecloth
- Paper Plate
- Drinking Straw
- Fine-Tipped Paint Brush
Ingredients
- 1 Pack White Air Hardening Clay
- 1 Each Nativity-Themed Ornament Silicone Mould
- 1 Set Nested Circular Cookie Cutters
- 6 Each Gold Christmas Bows
- Gold Acrylic Paint
- 1 Each Sponge Dabbing Tool
Instructions
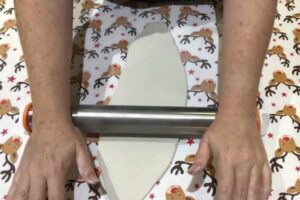
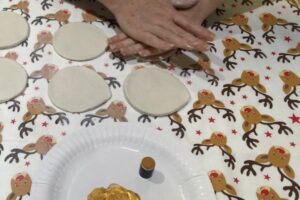
- Prepare a non-porous surface on which to roll out your air hardening clay. I like to use a plastic tablecloth.
- Roll your clay out to about 3mm or 1/8” thick with a rolling pin.
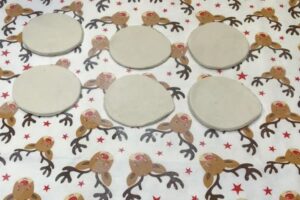
- Cut six clay discs using a round cookie cutter. The diameter of these discs needs to be greater than 7cm or 2 ¾”.
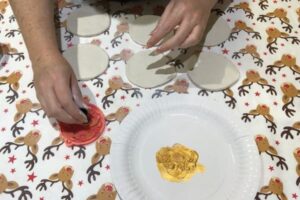
- Pour some gold paint onto a paper plate.
- Use a sponge dabbing tool, or finger sponge, to coat the surface of the nativity ornament silicone mould with a layer of gold paint.
- Turn the mould over and press it down firmly, with an even pressure, onto the surface of a clay disc.
- Release the mould from the clay disc by picking them both up and peeling back the clay from the silicone mould.
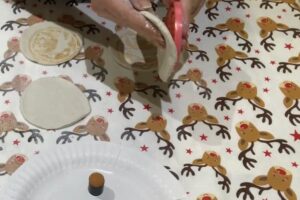
- Repeat steps 5-7 until all six clay discs have been ‘stamped’.
- Take a 7cm (2 ¾”) diameter circular cookie cutter, centre it carefully over the stamped design, and cut out each clay ornament.
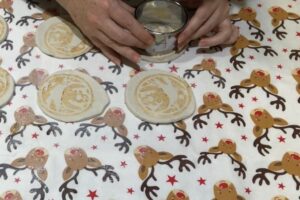
- Remove the excess clay from around the edge of the cut ornament and smooth any frayed edges.
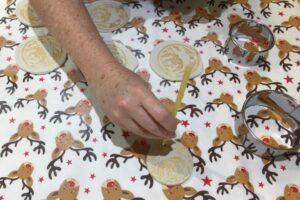
- Use a drinking straw to punch a hole in the top centre of the ornament.
- Set your ornaments aside to dry overnight. Flip them regularly so they dry evenly.
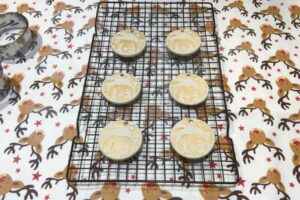
- When the ornaments are dry, give them a second coat of gold paint with a fine-tipped paint brush. Allow the paint to fully dry before handling them again.

- Take a gold bow apart by unwinding the twist tie from around the bow components.
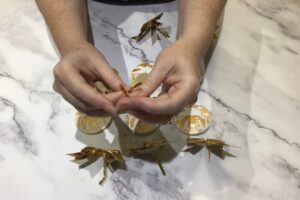
- Reassemble the bow again with a clay ornament disc in the centre. The short bow component sits in front of the disc, and the long bow component sits behind.
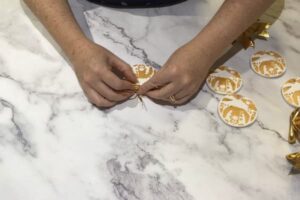
- Push the twist tie through the hole in the clay disc, wind it around the disc and bow components, then pull it tight and wind the twist tie around itself to secure the bow and clay disc in place.

- Manoeuvre the remaining length of the twist tie into a loop (so the ornament can be hung).
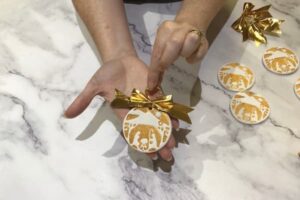
- Repeat steps 14 -17 to assemble the remaining ornaments.
- Hang them on your Christmas tree or place them in a small organza bag and gift to a teacher, friend or relative.
Notes
Wet clay can be grey in colour, but it will whiten as it dries.