
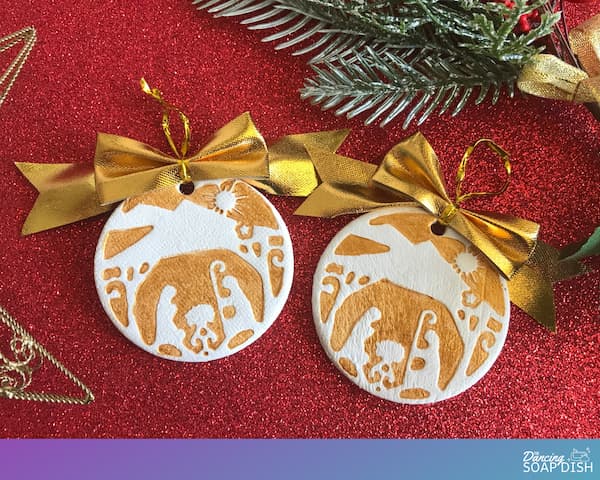
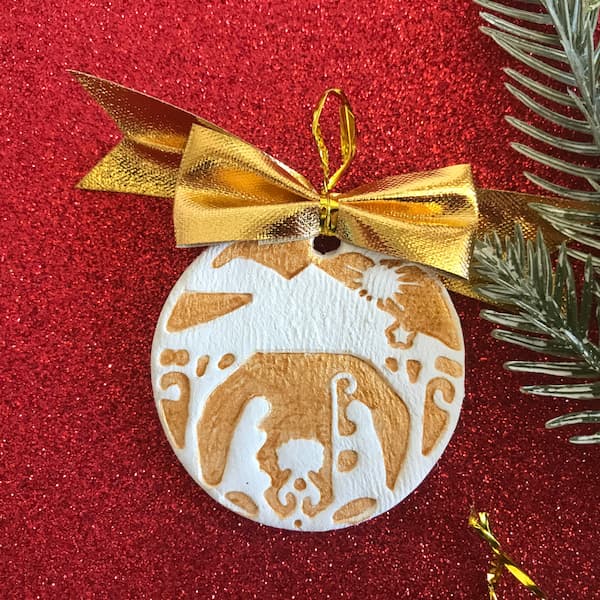
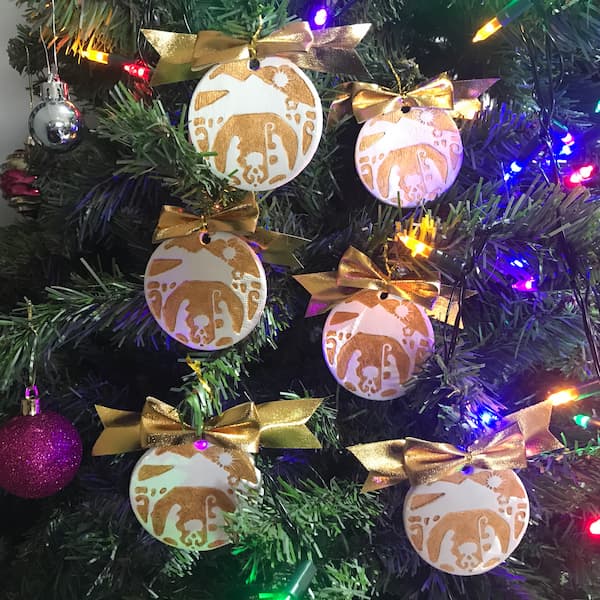
I couldn’t let the year go by without creating a new Christmas tree ornament project. So here’s my latest masterpiece, stamped nativity ornaments.
This post contains affiliate links. If you buy something through one of those links, I will receive a small commission at no extra cost to you. As an Amazon Associate I earn from qualifying purchases.
Thank you for supporting my site!
Table of Contents
My Inspiration for Stamped Nativity Ornaments
What You Need to Make Stamped Nativity Ornaments
Stamped Nativity Ornaments Video Tutorial
Stamped Nativity Ornaments Instructions and Printable Tutorial
My Inspiration for Stamped Nativity Ornaments
Every year for the past four years, The Dancing Soap Dish has published a Christmas ornament tutorial.
I was thinking this year was going to be a bust because I was running out of time and had zero inspiration.
Then I happened upon this little gem, an ornament-shaped silicone mould.
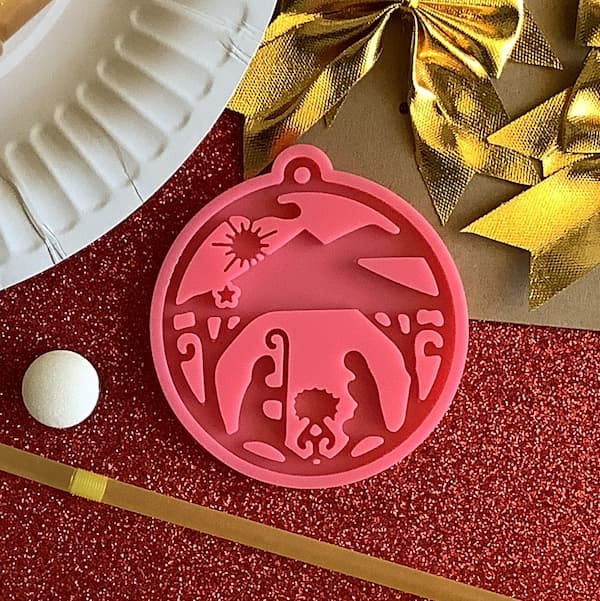
It’s supposed to be used for resin crafts, but I fell in love with the beautiful nativity design.
Not having the time or the inclination to take up resin crafting, I decided to use the mould to make a clay ornament instead.
The mould’s delicate details are too fine to be filled with clay and removed from the mould without breaking apart (ask me how I know), but they are perfect for use as a stamp.
So that’s what I did, I stamped my clay with gold paint using the silicone ornament mould.
By doing so I also slightly embossed the clay with the nativity design, adding to the stamped effect.
I gotta say I’m pretty happy with the results.
What You Need to Make Stamped Nativity Ornaments
Air Hardening Clay
I prefer to make my Christmas ornaments out of air hardening clay.
The lead up to Christmas can be a busy and chaotic time, so I have decided to skip making my own salt dough or baking soda dough. However if you have a recipe for either of those that you want to try out then this project is perfect for you. Give it and try and post your pics in the comments below.
Silicone Ornament Mould
There are many Christmas ornament silicone moulds for resin crafting available online, but I fell in love with this nativity ornament mould.
Live outside of the United States? You can also buy Christmas ornament moulds on AliExpress.
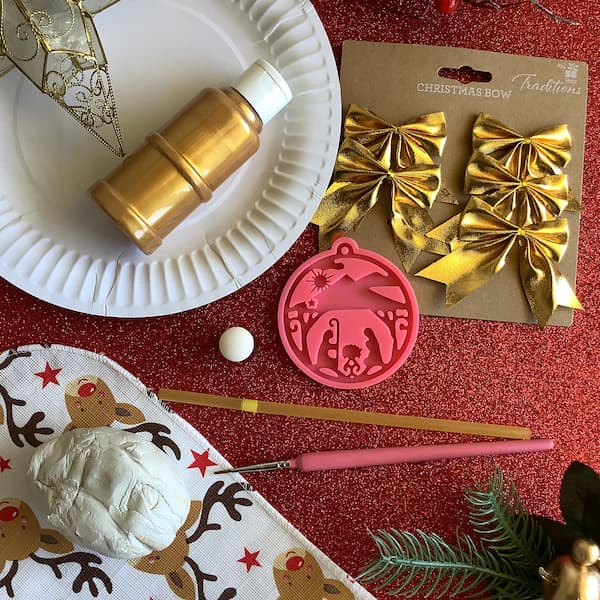
Gold Acrylic Paint
A beautiful, shiny, gold acrylic paint perfectly brings out the detail of the stamp against the white clay.
Paint Sponge / Dabbing Tool
To apply a nice and even coat of paint to my silicone ornament mould I used a finger sponge.
Live outside of the United States? You can also buy sponge dabbing tools on AliExpress.
Circular Cookie Cutters
Nested circular cookie cutters are easy to find in stores and online, but for this project it’s important that the set you use includes a cutter with a 7cm (2 ¾”) diameter, like this circular cookie cutter set.
This is because the diameter of the ornament silicone mould is also 7cm, so this is the perfect sized cookie cutter for cutting out the clay ornaments.
You’ll also require a cookie cutter the next size up. A specific size is not required for the larger cookie cutter, it just needs to be bigger than 7cm (2 ¾”).
Gold Christmas Bows
Although they’re usually used for gift wrapping, these gold Christmas bows will finish off the stamped nativity ornaments perfectly. Having the bow’s twist tie double as a hanging loop is also a plus.
Additional Materials
Rolling Pin – You will need a standard rolling pin to roll out your clay, preferably one with rings for an even thickness.
Paper Plate – A paper plate is an ideal surface for applying paint to your finger sponge.
Plastic Table Cloth – Cover your work surface with a plastic table cloth when rolling out and working with the clay. The clay doesn’t stick to it and it is easy to wipe down when you are finished.
Fine-Tipped Paint Brush – Give your ornaments a second coat of gold paint using a fine-tipped paint brush.
Drinking Straw – Poke a hole in your ornament with a plastic drinking straw.
Stamped Nativity Ornaments Video Tutorial
To make it easier for you to grasp the process, I created a video tutorial about how to make stamped nativity ornaments.
How to Make Stamped Nativity Ornaments
Want your stamped nativity ornaments to look like mine?
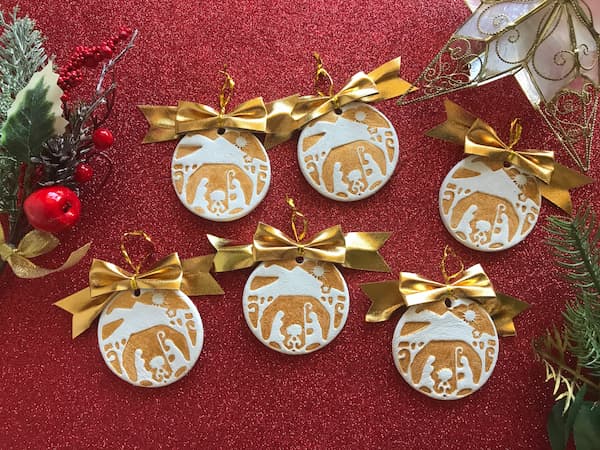
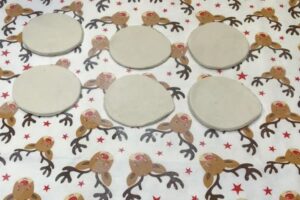
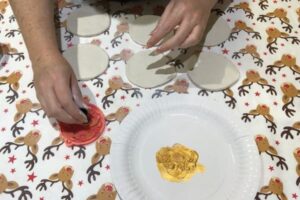
First I cut six large discs of white air hardening clay.
Then I covered a nativity ornament silicone mould with a thin layer of gold paint using a finger sponge.
I stamped the clay disks with the silicone mould and then cut out the designs with a round cookie cutter the same size as the mould. I also punched a hole in the top of the ornament with a drinking straw.
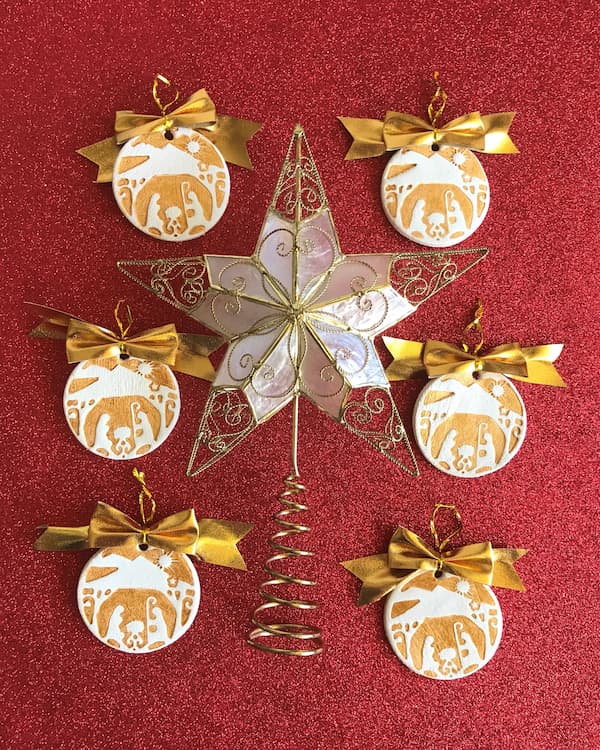
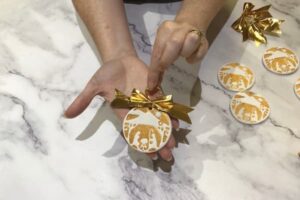
After the clay ornaments dried, I gave them a second coat of gold paint and affixed a gold bow.
Printable Tutorial for Making Stamped Nativity Ornaments
Stamped Nativity Ornaments
Equipment
- Rolling Pin
- Plastic Tablecloth
- Paper Plate
- Drinking Straw
- Fine-Tipped Paint Brush
Ingredients
- 1 Pack White Air Hardening Clay
- 1 Each Nativity-Themed Ornament Silicone Mould
- 1 Set Nested Circular Cookie Cutters
- 6 Each Gold Christmas Bows
- Gold Acrylic Paint
- 1 Each Sponge Dabbing Tool
Instructions
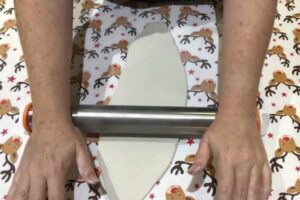
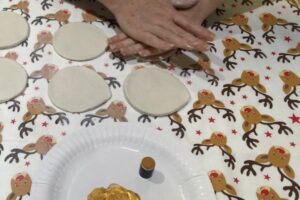
- Prepare a non-porous surface on which to roll out your air hardening clay. I like to use a plastic tablecloth.
- Roll your clay out to about 3mm or 1/8” thick with a rolling pin.
- Cut six clay discs using a round cookie cutter. The diameter of these discs needs to be greater than 7cm or 2 ¾”.
- Pour some gold paint onto a paper plate.
- Use a sponge dabbing tool, or finger sponge, to coat the surface of the nativity ornament silicone mould with a layer of gold paint.
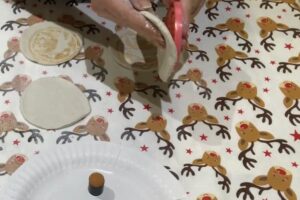
- Turn the mould over and press it down firmly, with an even pressure, onto the surface of a clay disc.
- Release the mould from the clay disc by picking them both up and peeling back the clay from the silicone mould.
- Repeat steps 5-7 until all six clay discs have been ‘stamped’.
- Take a 7cm (2 ¾”) diameter circular cookie cutter, centre it carefully over the stamped design, and cut out each clay ornament.
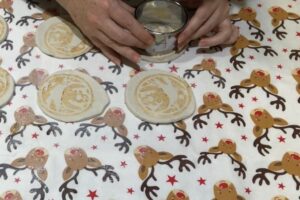
- Remove the excess clay from around the edge of the cut ornament and smooth any frayed edges.
- Use a drinking straw to punch a hole in the top centre of the ornament.
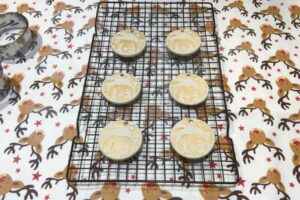
- Set your ornaments aside to dry overnight. Flip them regularly so they dry evenly.
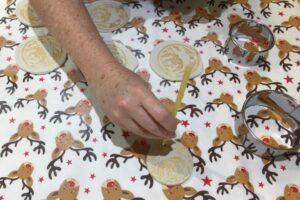
- When the ornaments are dry, give them a second coat of gold paint with a fine-tipped paint brush. Allow the paint to fully dry before handling them again.

- Take a gold bow apart by unwinding the twist tie from around the bow components.
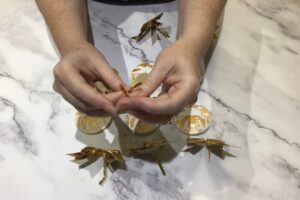
- Reassemble the bow again with a clay ornament disc in the centre. The short bow component sits in front of the disc, and the long bow component sits behind.
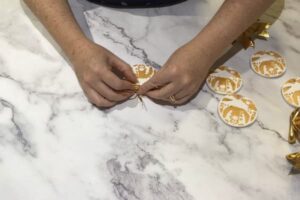
- Push the twist tie through the hole in the clay disc, wind it around the disc and bow components, then pull it tight and wind the twist tie around itself to secure the bow and clay disc in place.

- Manoeuvre the remaining length of the twist tie into a loop (so the ornament can be hung).
- Repeat steps 14 -17 to assemble the remaining ornaments.
- Hang them on your Christmas tree or place them in a small organza bag and gift to a teacher, friend or relative.
Notes
Enjoy!

