
So I’ve been scouting around for an Easter project that I could share with the kids for the upcoming holidays, and a simple melt and pour project came to mind – Easter Soap.
It really is ridiculously simple to make and you can get the kids involved by letting them pick their own personalised colours and scents.
This post contains affiliate links. If you buy something through one of those links, I will receive a small commission at no extra cost to you. As an Amazon Associate I earn from qualifying purchases.
Thank you for supporting my site!
Easter Soap Mould
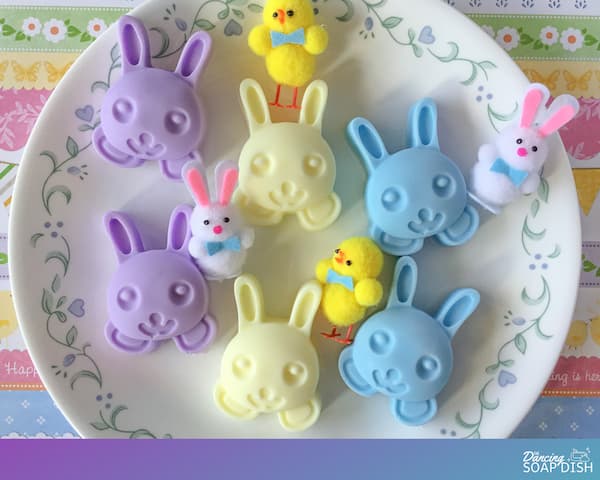
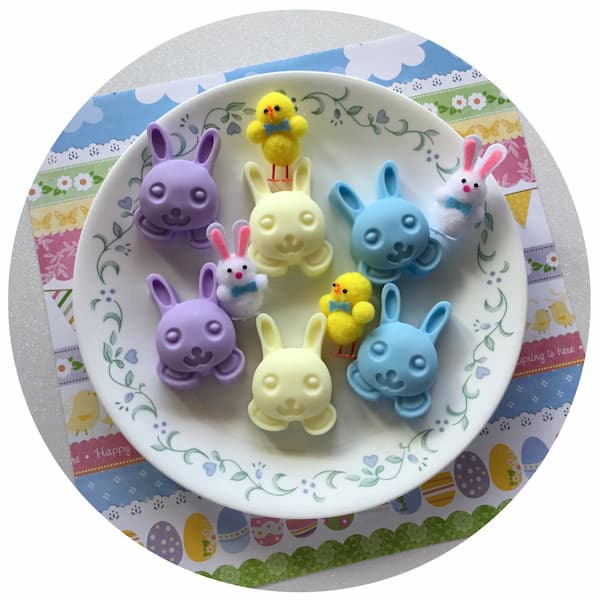
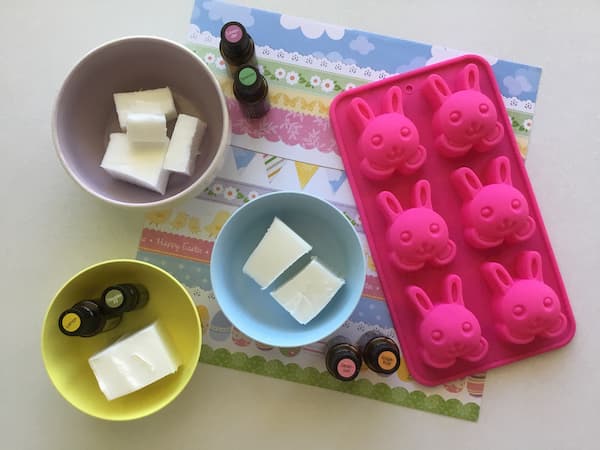
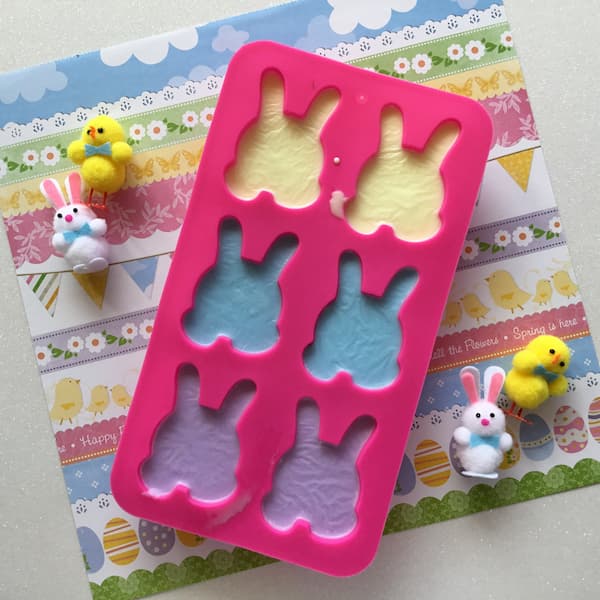
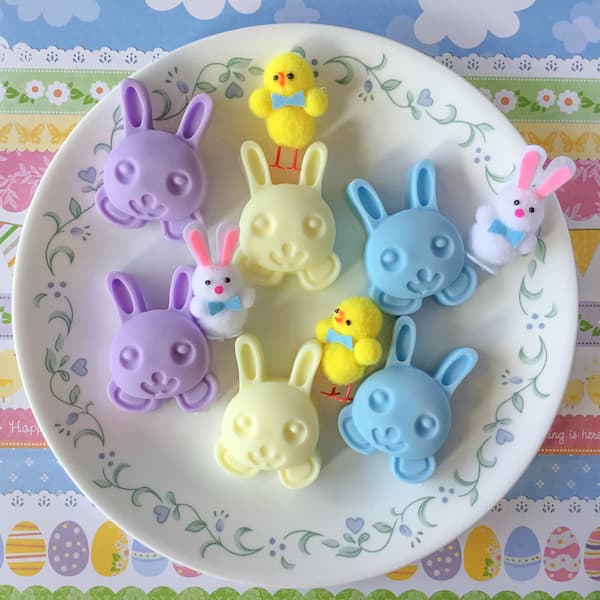
While there are lots of cute Easter moulds around this time of year, I couldn’t go past this bunny soap mould. It’s super cute and I used it to make six 50g (~1¾oz) soaps in three different colours.
I purchased my mould from Australian online retailer, Mouldtastic, but I’ve also added some Amazon alternatives below.
Easter Soap Colours and Scents
The kids chose purple, blue and yellow soap liquid pigment dyes and we got to work smelling our essential oils to come up with the perfect scent combinations.
Our favourites were Lavender and Spearmint, Grapefruit and Geranium, and Lemon and Douglas Fir (I just love this combo – smells like lemonade!).
The melt and pour soap manufacturer recommended 10-40 drops of essential oil per 100g of soap, so we ended up with the following combinations:
Purple
- 100g of soap
- 1 drop of purple soap colouring
- 25drops Lavender Essential Oil
- 15drops Spearmint Essential Oil
Blue
- 100g of soap
- 1 drop of blue soap colouring
- 20drops Grapefruit Essential Oil
- 20drops Geranium Essential Oil
Yellow
- 100g of soap
- 1 drop of yellow soap colouring
- 20drops Lemon Essential Oil
- 20drops Douglas Fir Essential Oil
Additional Items Required
Rubbing Alcohol or Vodka in a Small Spray Bottle – Spraying your soap with alcohol will help remove any bubbles sitting on the surface.
Kitchen Scales – I’ve used grams in this recipe because the amounts are easier to manage compared with ounces. Most kitchen scales these days are interchangeable between grams and ounces. Check your scale’s instruction booklet for how to change you scale to measure in grams and then change it back when finished.
Glass Measuring Jug – I have a separate glass measuring jug dedicated to essential oil DIY (soap making, lotion bars, lip balm etc) to avoid any cross-contamination of non-ingestible ingredients with food. I recommend you do the same.
Metal or Bamboo Skewer – Skewers are super handy for stirring and can be easily cleaned or disposed of. Of course you can use a metal spoon for stirring, but as I mentioned with the measuring jug, I recommend you don’t use the spoon for food afterwards.
Paper Towel – Make sure you have some paper towel on hand for cleaning up (there may be drips) and for resting your skewers on after stirring.

Easter Soap Method
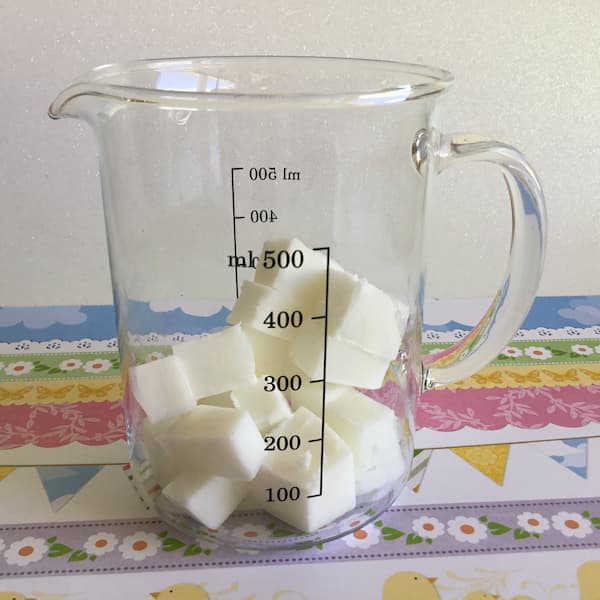
Measure out 3 lots of 100g of melt and pour soap (NOTE: You may want to add up to 5% for wastage depending on the size of the jug you are using).
Cut up one of your 100g soap lots into small cubes (for easy melting) and then place them in a glass measuring jug. Melt in the microwave for 30 seconds and then stir well.
If your soap is not fully melted return to the microwave for 10 seconds and then stir again. Repeat until your soap is melted (watch it carefully, don’t let it boil!).
Add 1 drop of your preferred soap colouring and your essential oils. Stir well until the essential oils are well combined and you have an even colour. If your soap mixture has lots of bubbles in it, spray the surface with alcohol and then gently stir again to get rid of the bubbles.
Position your Easter soap mould on your kitchen scales with the two mould cavities you wish to fill in the centre, and press tare to reset your scale to zero.
Pour your soap into one mould cavity until your scale reads 50g, then pour your soap into the next soap cavity until your scale reads 100g.
If there are bubbles present on the surface of your soap, a couple of sprays of alcohol should remedy this.
Wipe any excess soap out of your glass measuring jug with a paper towel. Then soak your measuring jug in water for ten minutes before rinsing it out and wiping it dry with another paper towel. Your measuring jug is now ready to make the next batch of soap.
Repeat the above process for the other two colours until all of your mould cavities are filled.
Set your soap aside to harden over night.
To release your Easter soap gently stretch the silicone to release the edges of your soap. Then turn your mould over and gently press on the face and ears of the rabbit to release your soap from the mould (I let the kids do this part – they loved it!!).
Your Easter soap is now ready for immediate use, or you can add one to a cellophane bag tied up with a pretty ribbon to give as a gift.
Supplies
You can purchase an identical mould and soap making accessories from Amazon if they are your preferred online supplier.

