
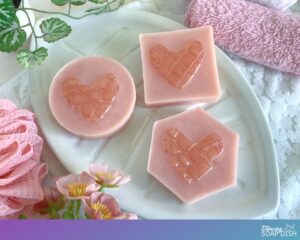
A nice, hot shower can thaw these frozen hearts. How? Because they’re soap of course!
It’s time to master a new melt and pour soap technique, and these frozen heart soap bars are the perfect way to get started!
This post contains affiliate links. If you buy something through one of those links, I will receive a small commission at no extra cost to you. As an Amazon Associate I earn from qualifying purchases.
Thank you for supporting my site!
Table of Contents
My Inspiration for Frozen Heart Soap
What You Need to Make Frozen Heart Soap
Frozen Heart Soap Video Tutorial
Frozen Heart Soap Instructions and Printable Tutorial
My Inspiration for Frozen Heart Soap
I discovered the cracked ice melt and pour soapmaking technique about a year ago, but I just haven’t had the time to give it a go.
What is the cracked ice soapmaking technique you ask?
Well, it involves piercing a clear bar of melt and pour soap with a knife or other sharp instrument in order to give the soap a crystallised look, or the look of an ice cube that has just cracked as it was dropped into a drink (hence, the ‘cracked ice’ technique, get it?).
What I love about this technique is that because the crystal pattern is created all through the soap, it doesn’t wash off after a few uses.
The pattern is retained for the entire life of the soap bar (even when it’s just a thin little sliver).
Cool huh?
With Valentine’s Day approaching, I was looking for a heart-themed project and I decided to pair the two ideas and create heart-shaped soap bars that look like they are made of ice, or frozen.
And so became my frozen heart melt and pour soap bars.
This project also involves another melt and pour soapmaking technique you may not have heard of, blanching the soap.
I call it ‘blanching’ because it is a similar process to blanching vegetables. You dip the soap bar quickly into (just) boiled water and the heat melts off the outer layer of soap.
Then you spray it with rubbing alcohol.
This cleans up any nicks or grooves in the soap, brings out the clarity of the soap bar, and gives it a glossy appearance.
What You Need to Make Frozen Heart Melt and Pour Soap Bars
Melt and Pour Soap Base
Melt and pour soap is sold as large blocks that you can cut up and then weigh out the amount of soap you need.
You will need 15oz (425g) of ultra clear melt and pour soap base to make frozen heart soap bars.
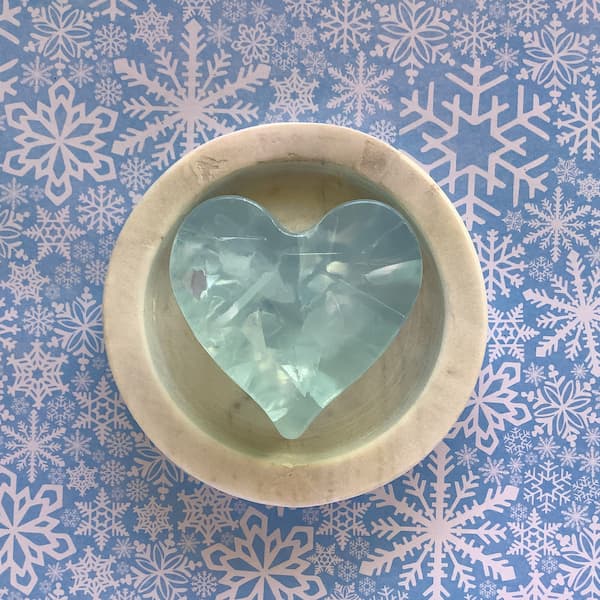
Soap Mould
I used a six-cavity, heart-shaped silicone mould that I already had on hand for this project, but you can find plenty of heart-shaped soap moulds online.
Soap Colouring
Colouring your frozen heart soap bars is optional, but if you choose to tint them, only a very tiny amount of liquid soap colouring is required.
Sorry, coloured micas are not suitable. You want the soap bars to be as clear as possible.
Essential Oils or Fragrance Oils
Scenting your soap is optional, but most of us prefer a pretty smelling soap bar.
Some fragrance and essential oils are coloured or ‘coudy’, which means they are not suitable for this project.
However I successfully used two ‘clear’ coloured essential oils, lavender and spearmint, to scent my purple and green soaps.
Rubbing Alcohol or Vodka in a Small Spray Bottle
Spraying the soap with alcohol (rubbing alcohol/isopropyl alcohol or vodka) once it’s poured will remove any bubbles sitting on the soap’s surface.
Retractable Craft Knife
The long blade of a retractable craft knife is perfect for the ice crack technique, as it yields great results. Just make sure you use a knife with a narrow blade.
Assorted Clay Tools
The different shapes of clay tools can make really interesting patterns when piercing soap using the ice crack technique.
Additional Items Required
Kitchen Scales – I’ve used grams in this recipe because the amounts are easier to manage compared with ounces. Most kitchen scales these days are interchangeable between grams and ounces. Check your scale’s instruction booklet for how to change you scale to measure in grams and then change it back when finished.
Glass Measuring Jug – You will need a small (250ml/8oz) measuring jug to melt the soap base. I have a separate glass measuring jug dedicated to creative projects (soap making, lotion bars, lip balm etc) to avoid any cross-contamination of non-ingestible ingredients with food. I recommend you do the same.
Metal or Bamboo Skewer – Skewers are super handy for stirring and will also be used in this project to add a tiny amount of liquid soap colouring.
Paper Towel – Make sure you have some paper towel on hand for cleaning up (there may be drips) and for resting your skewers on after stirring.
A Tray Lined with Greaseproof Paper – Positioning your soap moulds on a tray allows for easy transportation while the soap is still setting. The same tray can be used for the soap to rest on after it has been blanched.
A Large Bowl Filled with Boiling Water – a bowl filled of boiling (or just boiled) water is required to blanch the soap.
Rubber Gloves – Thick rubber gloves (a.k.a. washing-up gloves) are required to protect your hands from the heat of the boiling water.
Microwave or Double Boiler – Melt your soap base in either a microwave or a double boiler.
Frozen Heart Soap Bars Video Tutorial
To make it easier for you to grasp the process, I created a video tutorial about how to make frozen heart melt and pour soap bars.
How to Make Frozen Heart Soap Bars
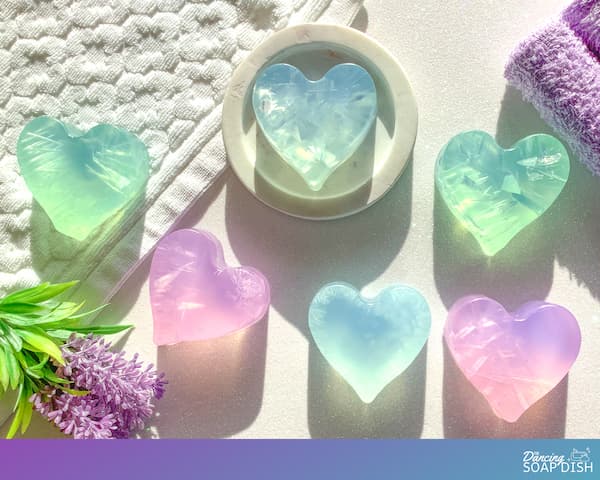
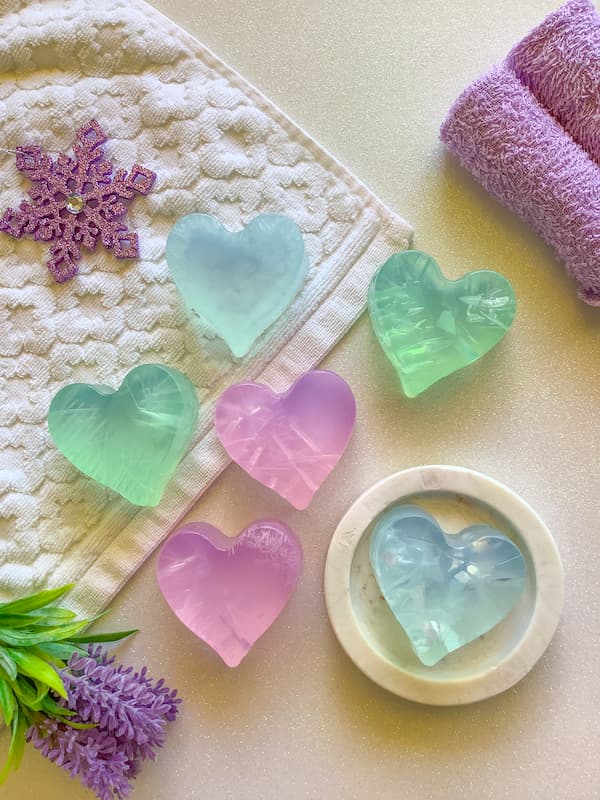
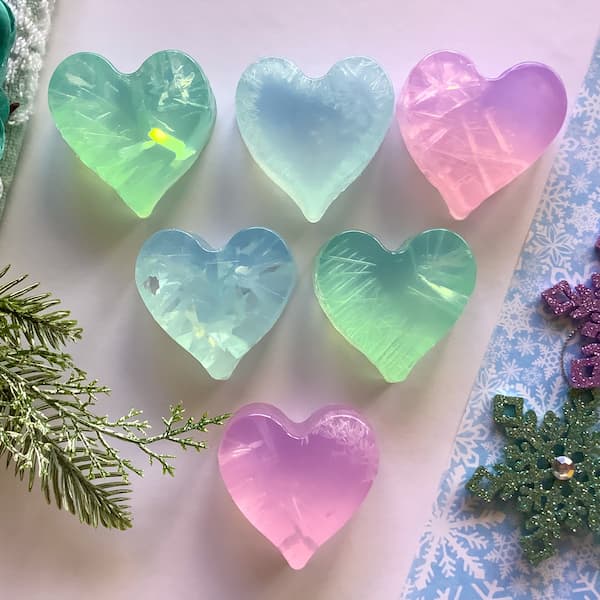
Want your frozen heart soap bars to look like mine?
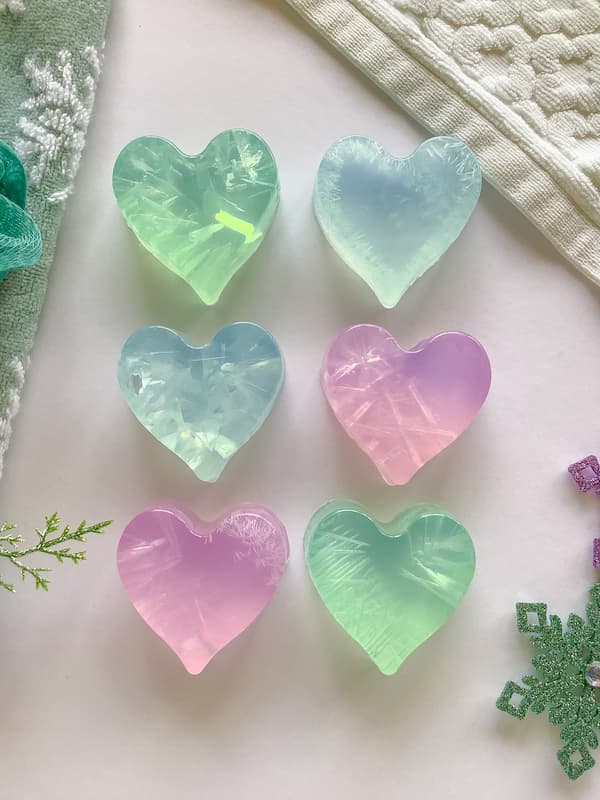
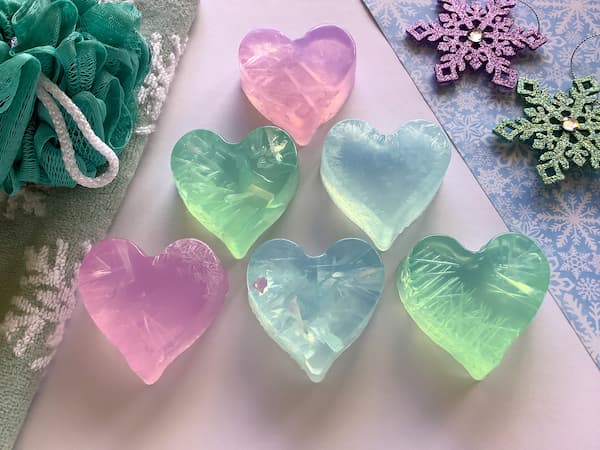
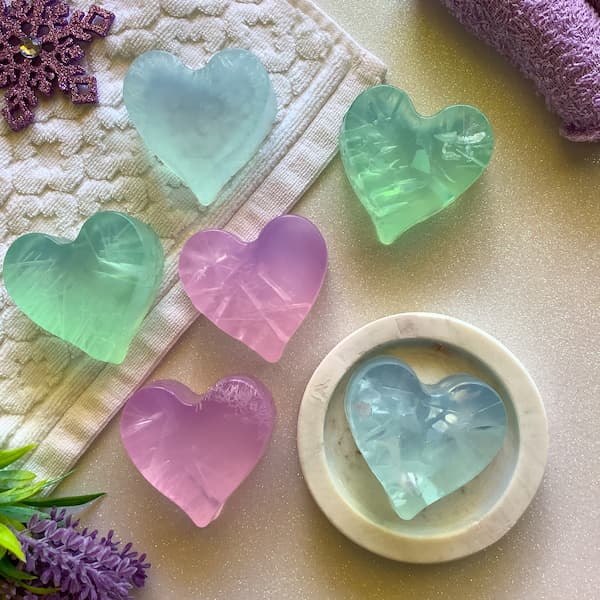
I made six heart-shaped soap bars using an ultra clear melt and pour base.
I coloured them purple, green and blue (two bars of each colour), and scented the purple bars with lavender essential oil and the green bars with spearmint essential oil.
I left the blue bars unscented.
Once they were set I used several tools such as a retractable craft knife and assorted clay tools to pierce the soap to create a cracked ice effect.
Then I blanched the soap bars in boiling hot water to clean them up and sprayed them with rubbing alcohol to give them a glossy finish.
You can find a step-by-step, printable tutorial below.
Frozen Heart Soap Bars Printable Tutorial
Frozen Heart Melt and Pour Soap Bars
Equipment
- Glass Measuring Jug
- Kitchen Scales
- Bamboo or Metal Skewer
- Alcohol in a Small Spray Bottle (rubbing alcohol, isopropyl or vodka)
- Paper Towel
- Tray lined with Grease-Proof Paper
- Lage Bowl of Boiling Water
- Rubber Gloves
- Double Boiler or Microwave
Ingredients
- 425 g Ultra Clear Melt and Pour Soap Base (15oz)
- Liquid Soap Colouring
- Soap Fragrance or Essential Oils (optional)
- Heart Soap Mould
- Retractable Craft Knife (with a narrow blade)
- Assorted Clay Tools
Instructions
- Position the heart mould ready to be filled. Putting it on a paper-lined tray allows for easy clean-up of any drips, and allows for transportation while the soap is still setting.
- Weigh out 140g (5oz) of ultra-clear melt and pour soap base and cut it up into small cubes. Put it in a small glass measuring jug in a microwave or double boiler.
- Melt your soap base as per the instructions.
- Add the soap scent (if applicable).
- Add soap colouring by dipping the end of a skewer into liquid soap colouring and then stirring it through the melted soap base to give it a light tint of colour.
- Stir gently (to prevent bubbles) until the colour and scent is fully mixed into the soap base.
- Carefully pour your soap base into two of the heart mould cavities ensuring there is close to an even amount of soap in each.
- Spray the surface of the soap with alcohol to get rid of surface bubbles.
- Repeat steps 2-8 twice so that you have six heart shaped soap bars in three different colours.
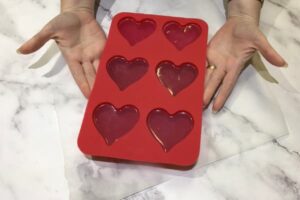
- Let the soap set overnight (12hrs) and then peel back the silicone mould to release the heart-shaped soap bars.

- Take a retractable craft knife, or a clay tool, and pierce the soap at different angles, from every direction.
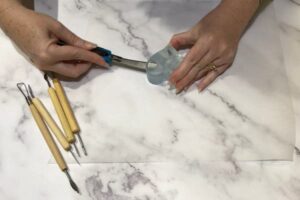
- Repeat until all six bars have been appropriately ‘crystalised’.
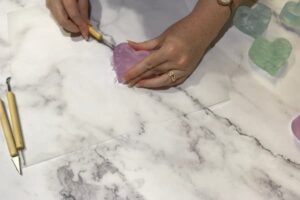
- Use your thumb to smooth over the rough edges around your soap bars and brush off any loose particles of soap.
- Place your frozen heart soap bars back on the paper-lined tray and prepare a large bowl of boiling (or just boiled) water.
- Put on your rubber gloves and remove the lid from your rubbing alcohol, ready to be used.
- Holding a bar of soap upside down, quickly dip it into the bowl of boiling water. Dip it in deep enough to cover the front and sides of the soap bar, but do not get the base wet if possible.
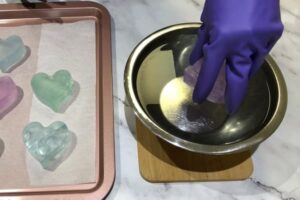
- Quickly flip the bar of soap back over and place it back on the tray.
- Spray it immediately with rubbing alcohol.
- Repeat steps 16-18 for each bar of soap.
- Allow the frozen heart soap bars to dry (this should only take a few minutes as the water should evaporate quickly because it’s so hot) and then they are ready to use.
Enjoy!

