
I like to make Christmas tree ornaments every year, and I’m really excited about this year’s version!
This post contains affiliate links. If you buy something through one of those links, I will receive a small commission at no extra cost to you. As an Amazon Associate I earn from qualifying purchases.
Thank you for supporting my site!
Table of Contents
My Inspiration for Reindeer Family Essential Oil Diffuser Ornaments
How Does an Essential Oil Diffuser Ornament Work?
What You Need to Make Reindeer Family Essential Oil Diffuser Ornaments
Reindeer Family Essential Oil Diffuser Ornaments Video Tutorial
Reindeer Family Essential Oil Diffuser Ornaments Instructions and Printable Tutorial
My Inspiration for Reindeer Family Essential Oil Diffuser Ornaments
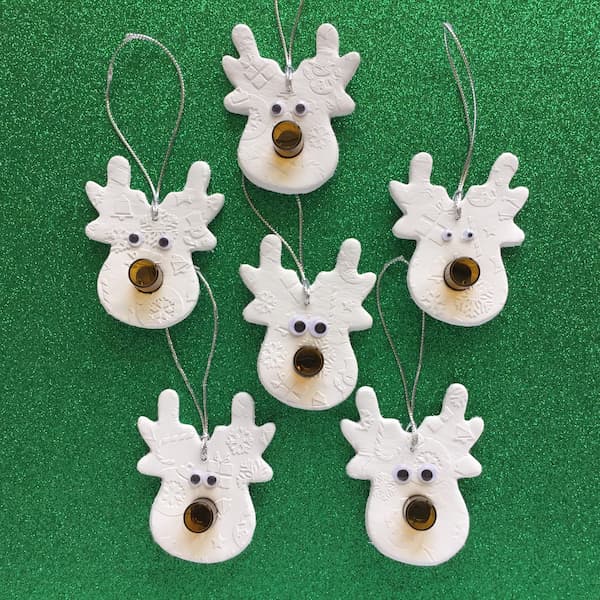
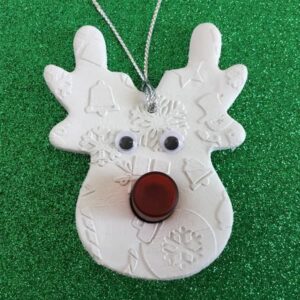
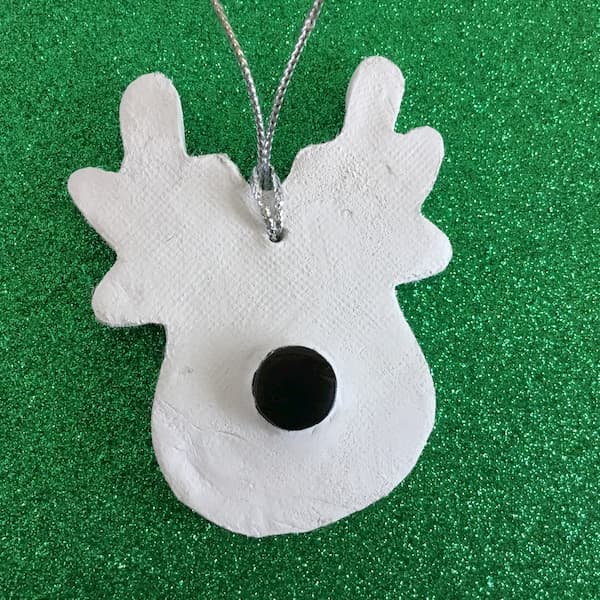
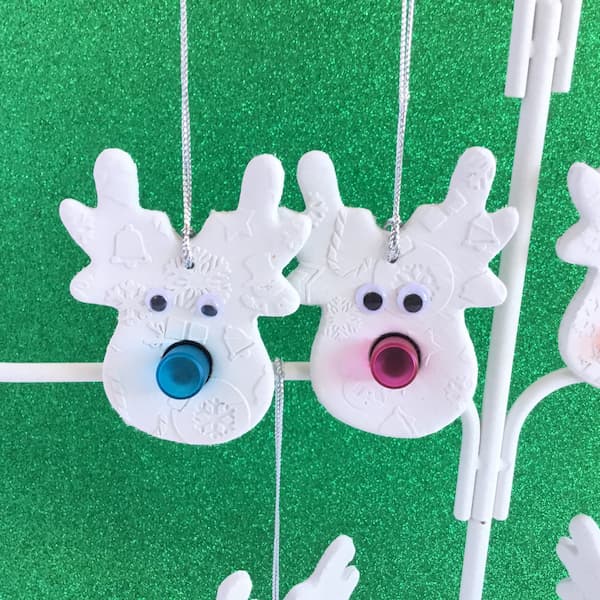
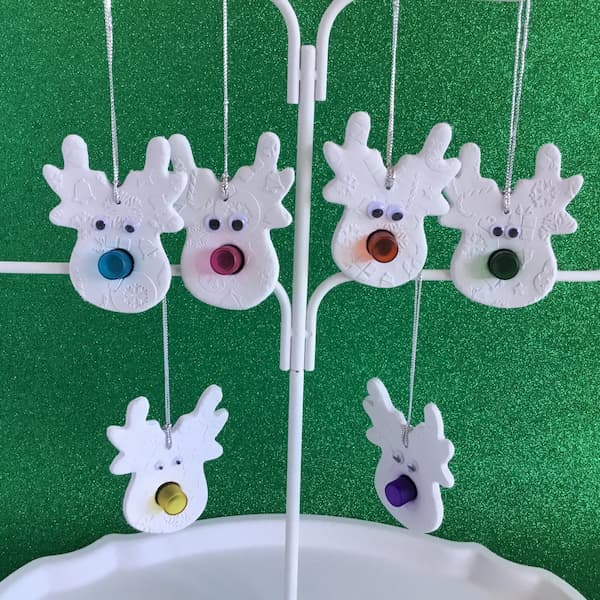
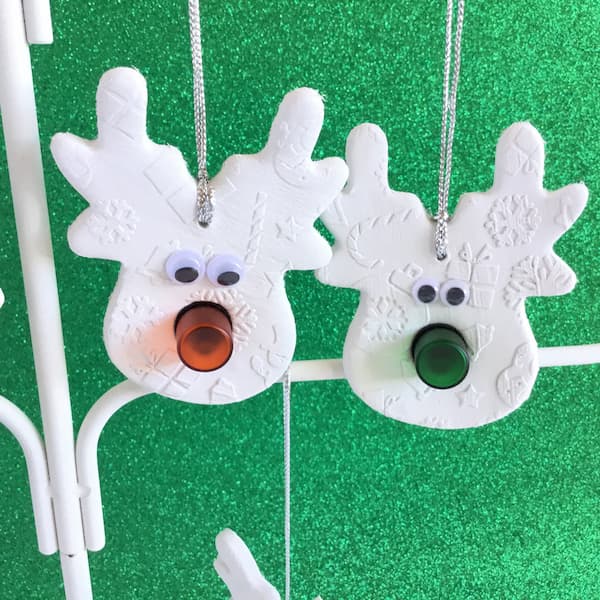
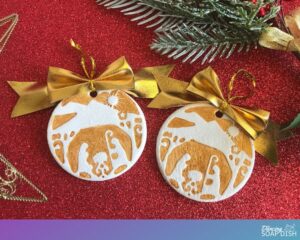
This project is inspired by a Christmas favourite, Rudolph the Red-Nosed Reindeer.
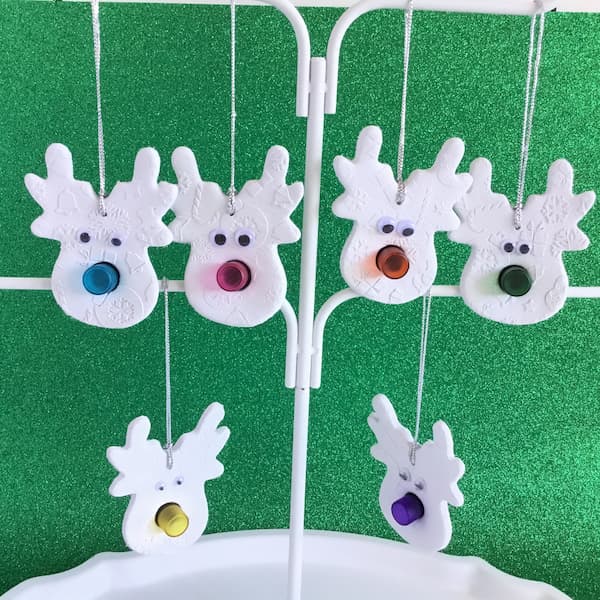
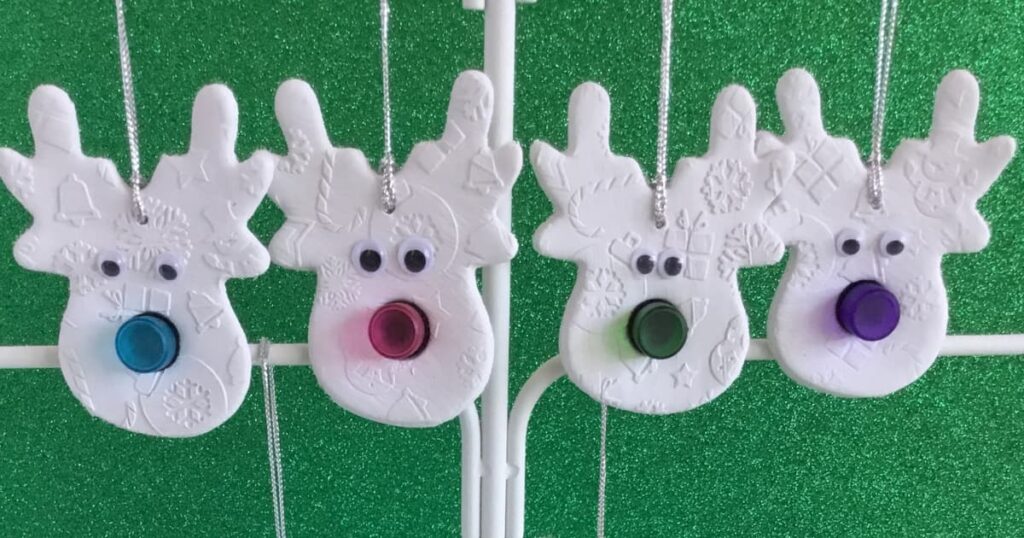
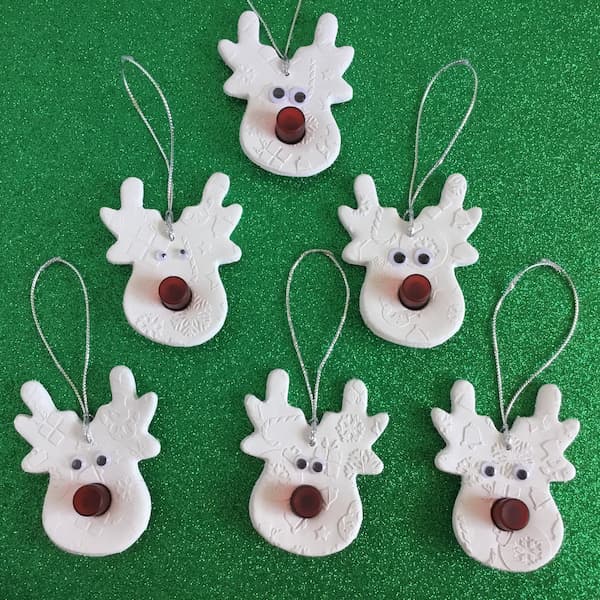
I’ve created reindeer family essential oil diffuser ornaments with their very own essential oil storage so you can replenish the scent at any time.
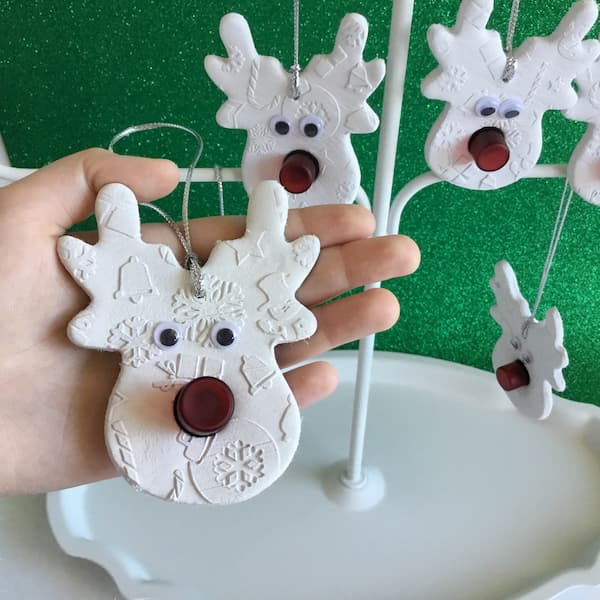
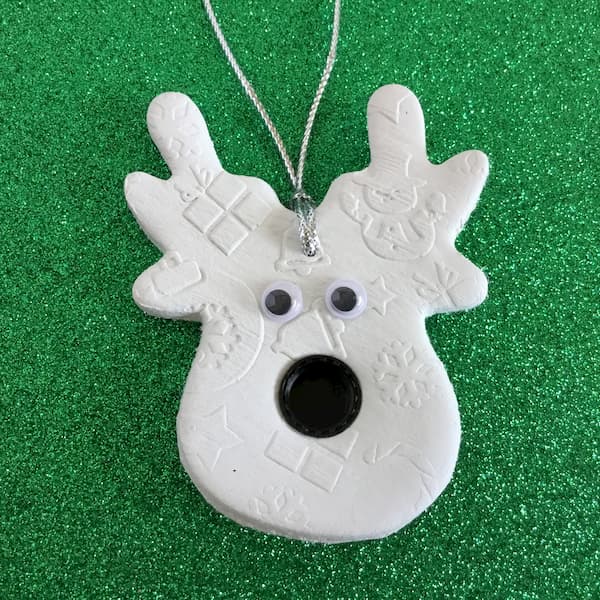
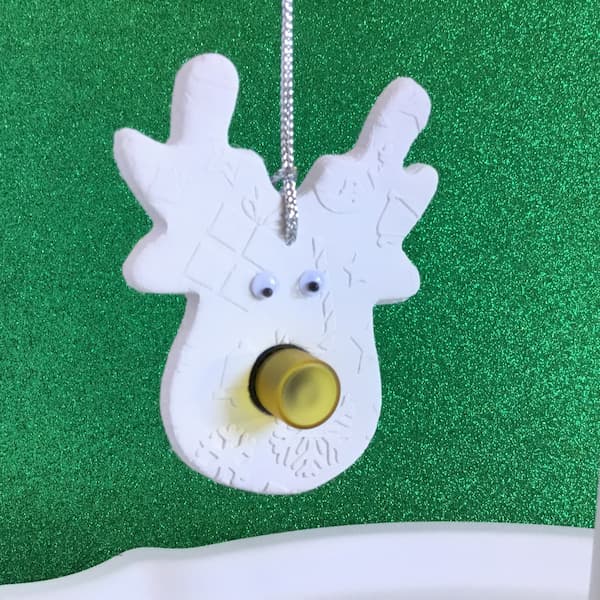
Yep it’s Rudolph and his whole family! Every member has shiny nose of a different colour.
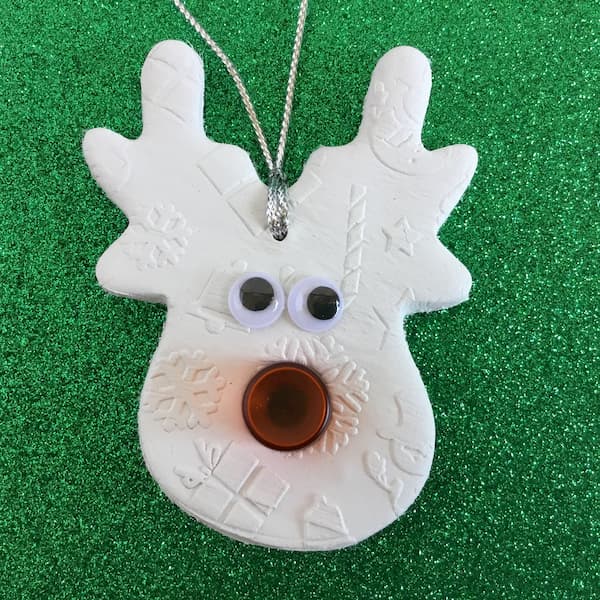
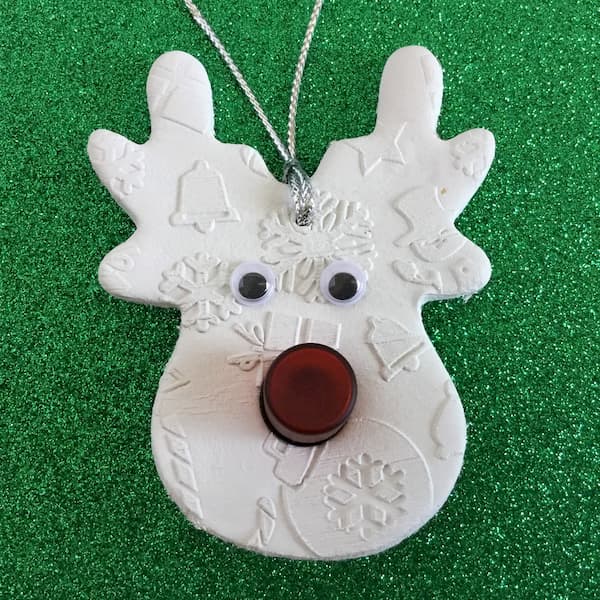
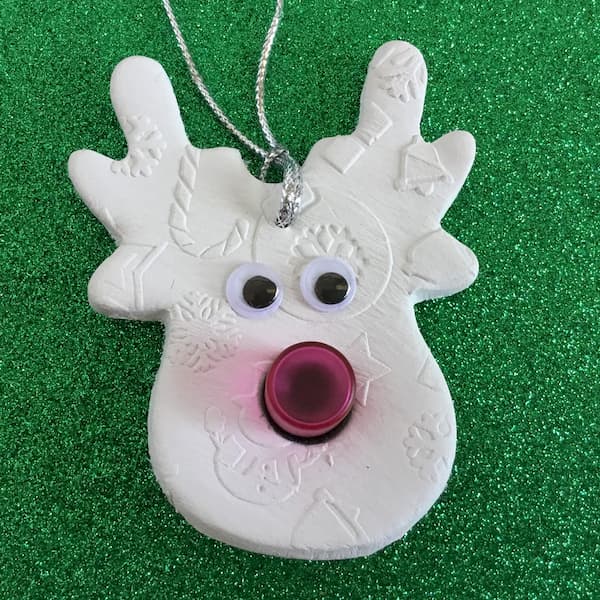
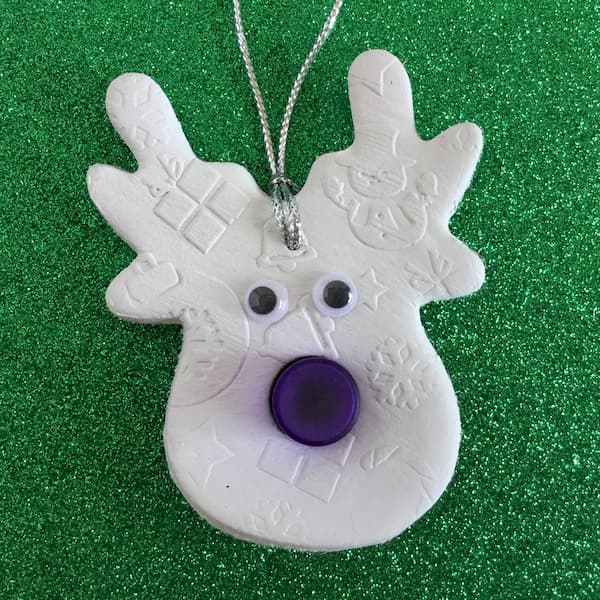

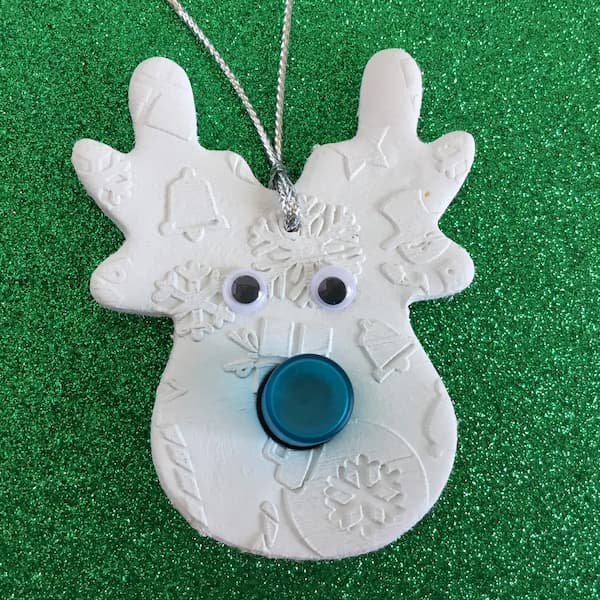
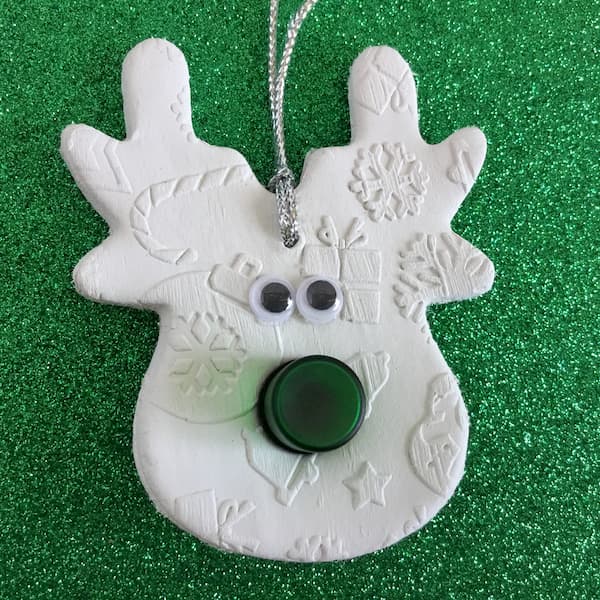
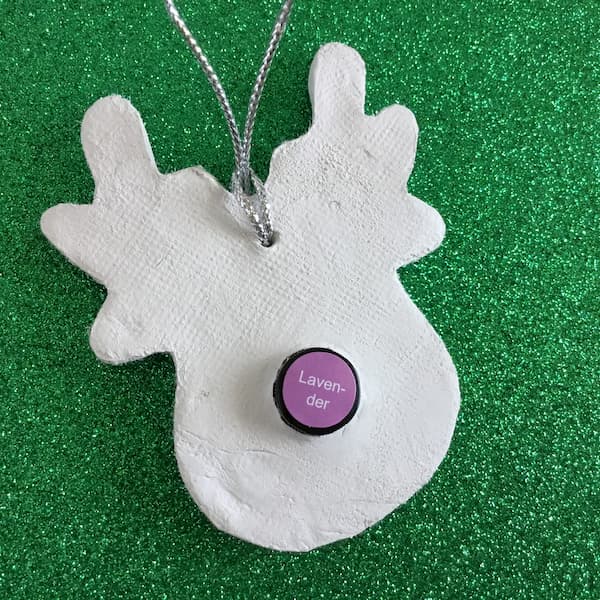
But there is something special about these noses, they are actually coloured glass sample vials that you can use to store the essential oils that scent the ornament.
These reindeer family essential oil diffuser ornaments are super simple to make and you can put the kids to work making them too. If they can use play dough, then they will find making these ornaments a breeze.
How Does an Essential Oil Diffuser Ornament Work?
Air hardened clay (i.e. not fired or glazed) is a porous substance and will soak up any liquid it comes in contact with (in this case, essential oils). This makes them perfect essential oil diffusers as they stop the essential oil from immediately evaporating.
You can make your own clay ‘ornaments’ using air hardening clay and then add your favourite essential oils to enjoy the scent for several days.
Just like any diffuser, you will eventually need to replenish your oils to maintain the scent. Once the scent fades just unscrew the sample vial from its cap that is embedded in the ornament, add more oil, and they will be as good as new again. These diffusers work best in small spaces, and the strength of the scent will vary depending on where they are.
Here are some ideas for you to try:
- Add you favourite ‘Fir’ or ‘Spruce’ essential oils (i.e. Douglas Fir, White Fir, Siberian Fir, Black Spruce) to the reindeer family essential oil diffuser ornaments and then use them to decorate your artificial Christmas tree to have it smelling just like the real thing.
- Hang one from an air vent in your car to use as a festive deodoriser.
- Have your child make one to give to their teacher as a Christmas/End of Year Thank You gift.
- Add an invigorating, festive scent to your reindeer family essential oil diffuser ornaments and decorate your office space. When you pass one you’ll receive a fresh burst of scent to help keep you focused throughout the day.
- Run out of gift tags? Turn your diffuser ornament over and write on the back with a fine felt-tip pen. Tie your ornament to a gift and, voila, you have two presents in one!
What You Need to Make Reindeer Family Essential Oil Diffuser Ornaments
Air Hardening Clay
I prefer to make my essential oil diffuser ornaments out of air hardening clay. The lead up to Christmas can be a busy and chaotic time, so I have decided to skip making my own salt dough or baking soda dough. However if you have a recipe for either of those that you want to try out then this project is perfect for you. Give it and try and post your pics in the comments below.
Embossed Christmas-Themed Rolling Pin
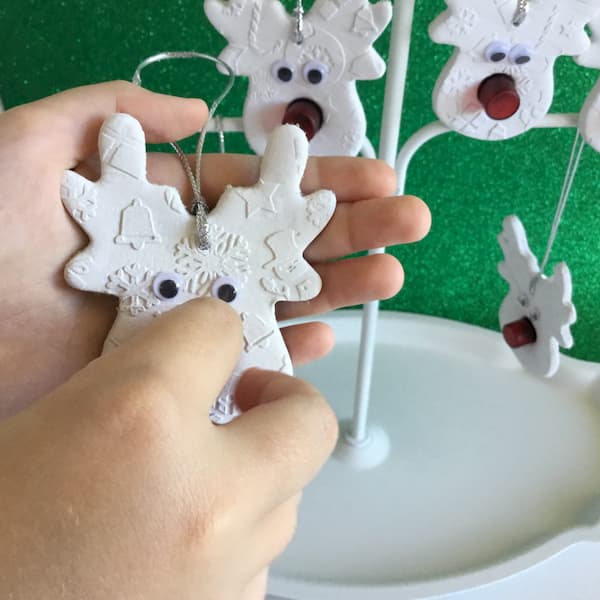
Your clay ornaments will look more interesting with a bit of texture. I used this embossed rolling pin for a little bit of extra decoration. But you can also use Christmas-themed cookie stamps or rubber stamps to give your ornaments just the right touch.
Live outside of the United States? You can also buy Christmas embossed rolling pins on AliExpress.
Helpful Hint: If you are embossing or stamping your ornaments, this should be done before cutting.
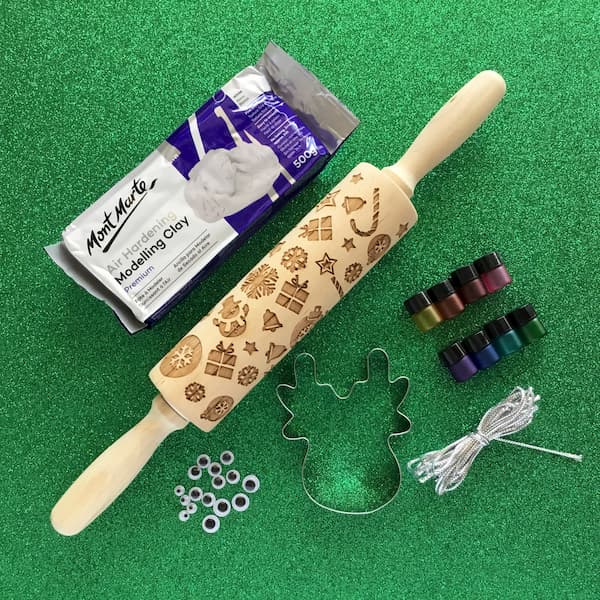
Reindeer Cookie Cutter
A reindeer head cookie cutter is ideal for this project. Ensure it has a nice round face with plenty of room for the sample vial nose and googly eyes.
Live outside of the United States? You can also buy a reindeer cookie cutter on AliExpress.
Essential Oil Sample Vials
The essential oil sample vials that double as the reindeer’s nose are a key component of this project.
I used 1/4 dram (1ml) coloured glass sample vials with black caps (available here from Amazon or available here from Aliexpress)
If different colours aren’t your style then you can also get red sample vials only and make all the diffusers look like Rudolf the Red-Nosed Reindeer.
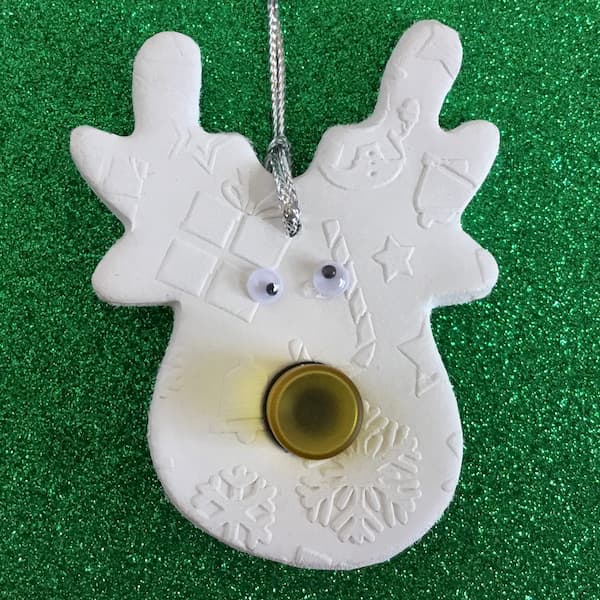
Alternatively if you already have some amber 1ml essential oil vials on hand you can give all of your reindeers amber noses for a more natural look.
Essential Oils
Many essential oil companies sell festive essential oil blends around Christmas time. These blends are a great place to start. You can also check out my Pinterest Christmas Essential Oil Diffuser Blends board for heaps of inspiration.
Additional Materials
Rolling Pin – you will need a standard rolling pin to roll out your clay, preferably one with rings for an even thickness.
Toothpicks – these are useful as a clay sculpting tool and also to poke a hole in your ornament.
Ribbon, String or Twine – use some pretty tinsel string to thread through the hole so you can hang your ornament.
Googly Eyes – add some googly eyes in assorted sizes to give your reindeers some character (and so they can see 😁).
Craft Glue – for sticking on the reindeers eye and securing the sample vial cap if necessary.
Reindeer Family Essential Oil Diffuser Ornaments Video Tutorial
To make it easier for you to grasp the process, I created a video tutorial about how to make mosaic Christmas soap bars (part two).
Printable Tutorial for Making Reindeer Family Essential Oil Diffuser Ornaments
Reindeer Family Essential Oil Diffuser Ornaments
Equipment
- Rolling Pin
- Craft Glue
- Cutting Board or Vinyl Tablecloth
Ingredients
- 1 Pack White Air Hardening Clay
- 1 Each Christmas-Themed Embossed Rolling Pin
- 1 Each Reindeer Head Cookie Cutter
- 8 Each 1ml or 1/4 dram glass sample vials
- 1 Roll Ribbon, Twine or String
- 8 Pairs Googly Eyes
- 20 Drops Essential Oils
Instructions
- Prepare a non-porous surface on which to roll out your air hardening clay. I like to use glass or plastic cutting boards, or a vinyl tablecloth.
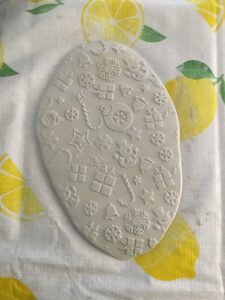
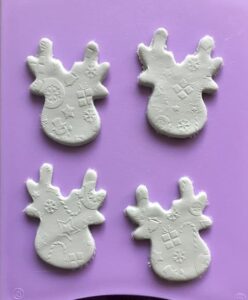
- Roll your clay out to about 2mm or 1/16” thick with a rolling pin. While applying a deep and even pressure, roll your Christmas-themed embossing rolling pin over your clay to create a patterned texture on the surface of the clay.
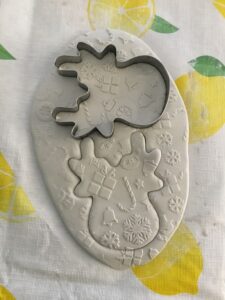
- Now position the reindeer head cookie cutter in the desired location over your embossed clay and cut out as many ornaments as will fit. Peel away the surrounding clay and move your ornaments to the side so you can roll the remaining clay out again to make more ornaments.
- Once you have the desired number or ornaments, smooth any frayed edges with a finger dipped in water or snip them off with a pair of scissors (scissors can also be used after the clay has dried to snip off frayed edges).
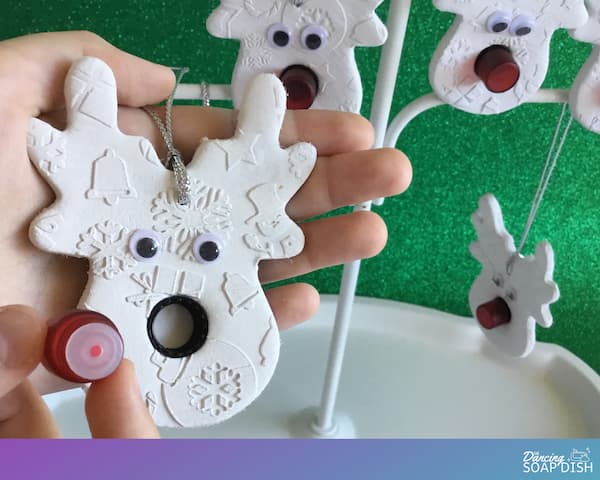
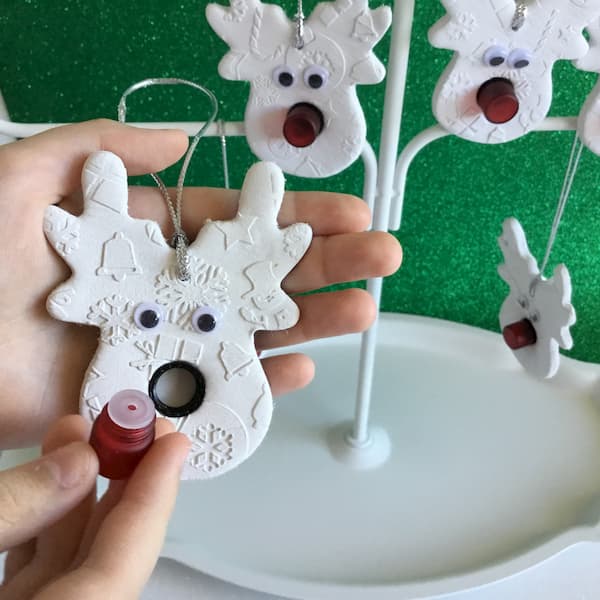
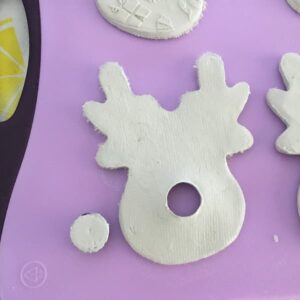
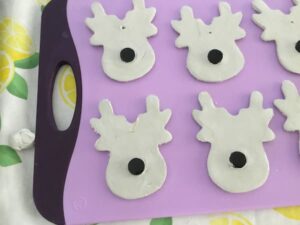
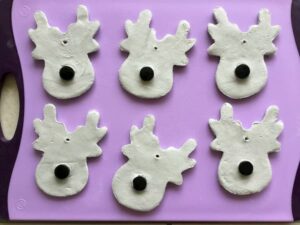
- Place your ornaments on a clean surface. Remove a cap from a glass sample vial and position it in the middle of the reindeer ornament’s face, right about where you think the nose should be. Push the cap into the clay in order to cut out a cap-shaped hole in the clay. Peel away and discard the small circle of clay that was cut out by the cap. Put this cap aside as you will use it to cut out the nose shapes of all of your ornaments.
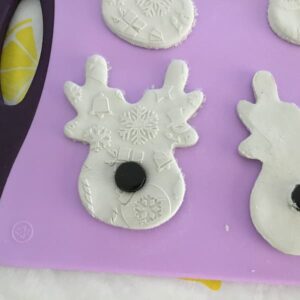
- Grab another sample vial cap and put it top-side-up on your working surface. Carefully flip the clay ornament over and place the nose hole over the sample vial cap. The cap will be sticking up through the nose of the face-down reindeer ornament.
- Use a toothpick like a small rolling pin to carefully flatten the clay tightly around the cap. The clay needs to dry face down with the cap in place. As the clay dries it will shrink and fit snug around the sample vial cap. If you let the clay dry and then try to push the cap through later, it may not fit.
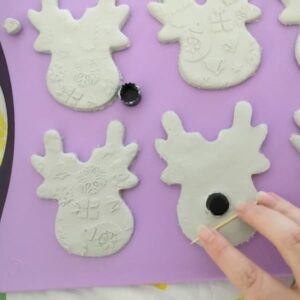
- Continue to punch nose holes and position your clay ornaments over the sample vial caps until they are all complete. When you get to the last ornament, wipe down clean the cap you were using to punch the nose holes before embedding it in the clay ornament.
- Finally, take a toothpick and poke a hole through the top of your ornaments (for ribbon or string to be threaded through).
- Put your ornaments aside to dry face down. After 24 hours or so, when they are mostly dry and very stiff, you can flip them over to dry on the other side. Refer to the instructions on your packet of clay to determine a suitable time frame for drying.
- Once dry, thread your twine, ribbon or string through the hole and tie it off or glue it together. Screw the sample vial back onto the cap and this will make the nose of your reindeer. Use craft glue to stick on some googly eyes to complete your reindeer’s face.
- Fill your sample vial with essential oils (approximately 20 drops) and add the dripper lid.
Directions for Use
- To use, apply the essential oils to the back of the ornament (depending on which oils you use there may be colouring or staining, so best to apply to the back). When the scent fades, simply unscrew the reindeer’s nose and reapply the essential oils.Hang them on your Christmas tree or place them in a small organza bag and gift to a teacher, friend or relative.

Notes
Directions for Use
Apply the essential oils to the back of the ornament (depending on which oils you use there may be coloring or staining, so best to apply to the back). When the scent fades, simply unscrew the reindeer’s nose and reapply the essential oils.
Don’t forget a cap sticker so you can remember which essential oil is in the sample vial.
Hang them on your Christmas tree or place them in a small organza bag and gift to a teacher, friend or relative.
Enjoy!
