
I’ve recently been scrolling through the pages of my my favourite online stores looking for silicone moulds with a Christmas theme.
This post contains affiliate links. If you buy something through one of those links, I will receive a small commission at no extra cost to you. As an Amazon Associate I earn from qualifying purchases.
Thank you for supporting my site!
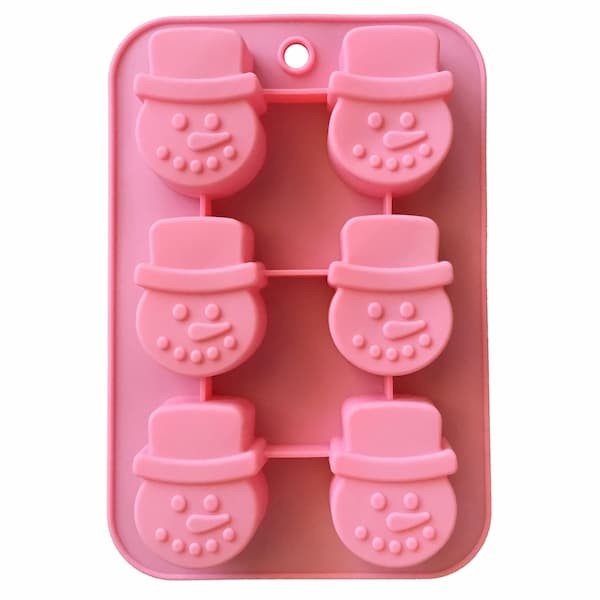
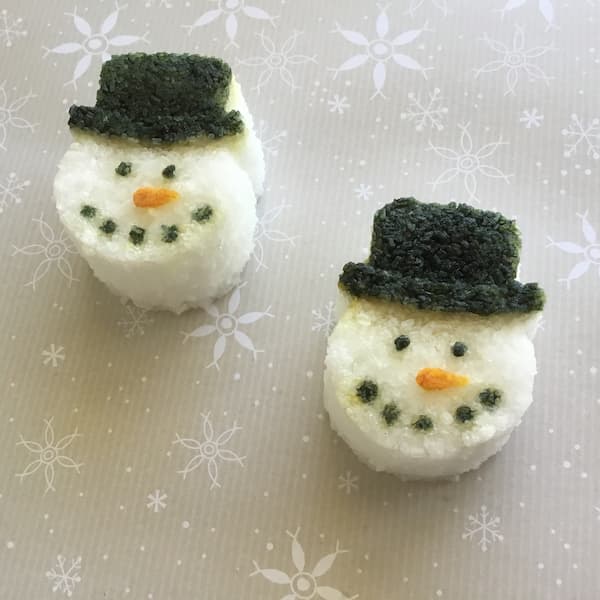
This snowman mould instantly stood out because it is just so darn cute. I set aside my initial thoughts of bath bombs or melt & pour soap (don’t worry though, I’m totally going to make some of these too) and settled instead on snowman bath salt cakes.
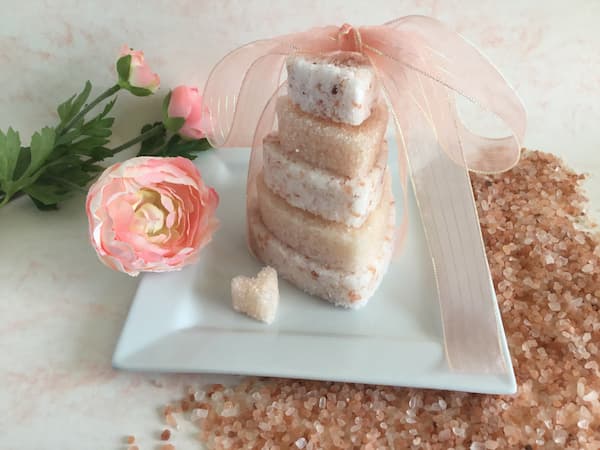
Earlier in the year I shared these Rosie Pink Himalayan Bath Salt Cakes I made for Mother’s Day.
Here’s why I love this recipe:
- Super simple to make
- The colours are beautiful and 100% natural
- All the ingredients can be found at your local supermarket
So I set out to adapt this recipe to fit my snowman mould and I think the results are just stunning.
A fresh, festive scent
I wanted to create a Christmassy scent for my bath salt cakes so I chose a blend of Siberian Fir and Patchouli essential oils with some added Vanilla Absolute. If that sort of scent isn’t your style then feel free to use any of your favourite blends – the sky’s the limit.
If you are looking for some essential oil blend inspiration then I recommend Pinterest. They have tonnes of essential oil diffuser blend recipes that you can adjust to fit this recipe.
Safety First
A word of warning though, Cinnamon, Cassia and Clove essential oils are very popular Christmas scents but are unsuitable for the bath as they are prone to causing considerable skin sensitivity when used topically. I suggest that you stick with the more calming Fir, Floral or Fruity essential oils when choosing a festive scent for your bath salt cakes.
How to Make Snowman Bath Salt Cakes
Ingredients
For snowman hats
- 1/3 Cup Epsom Salt
- 1/3 Cup Pink Himalayan Rock Salt
- 1/3 Fine Pink Himalayan Salt
- 1 Tbsp Bicarb Soda (Baking Soda)
- 1 tsp Fractionated Coconut Oil
- 20 Drops Essential Oil
- 1-2 Tsp Water*
For snowman face
- 1 ¼ Cups Epsom Salt
- 1 Tbsp Bicab Soda (Baking Soda)
- 1 Tsp Fractionated Coconut Oil
- 20 Drops Essential Oil
- 1-2 Tsp Water*
You will also need
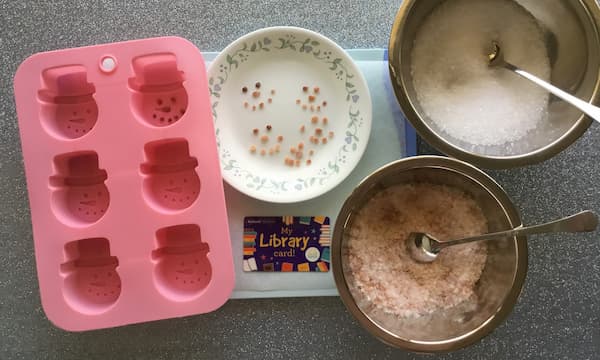
- Extra Pink Himalayan Rock Salt for eyes, nose and mouth
- Plastic Card (e.g. a library card or a rewards card from your purse)
- Grease-proof paper-lined tray or bread board
- Snowman Mould
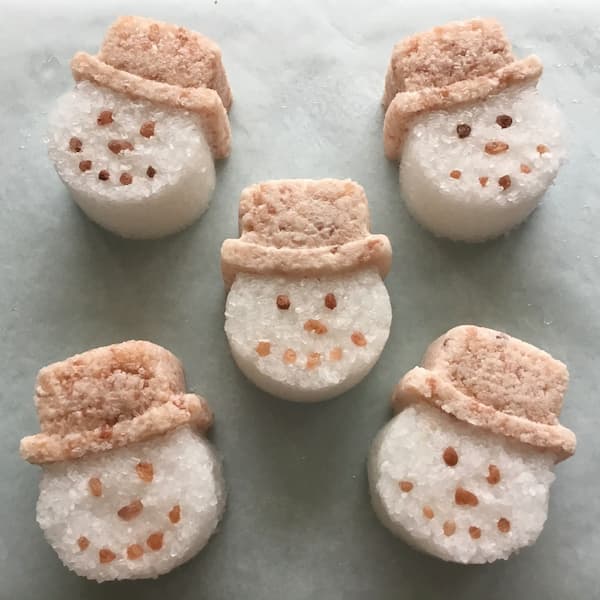
Makes 5 bath salt cakes
* Water – to increase the storage longevity of your essential oil project, do not use water from the tap in the recipe. Instead I recommend distilled, demineralised, or water that has been boiled and then cooled. Alternatively rose water (also available from the supermarket) is a great idea (and will add to the beautiful scent of your bath salt cakes).
Method
Make A Face
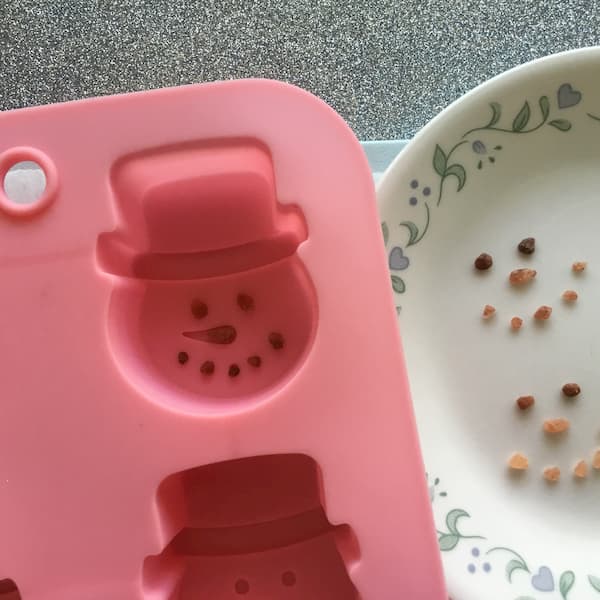
First things first – your snowman needs a face. Sift through your extra pink Himalayan rock salt and pull out some dark, rounded pieces for your eyes and mouth. Search for longer, dark pieces to act as the snowman’s nose. Lay your ‘faces’ out on a plate so they are readily available when you need them. You will need five in all.
Make Your Salt Mixtures
Now make up your ‘snowman hat’ and ‘snowman face’ salt mixtures in two separate bowls. Here’s how: Add salts and sifted bi-carb to a non-plastic bowl and mix well. Add wet ingredients and stir until fully incorporated. Your mixture should be damp but not so soggy that the salt starts to dissolve.
Fill the Mould
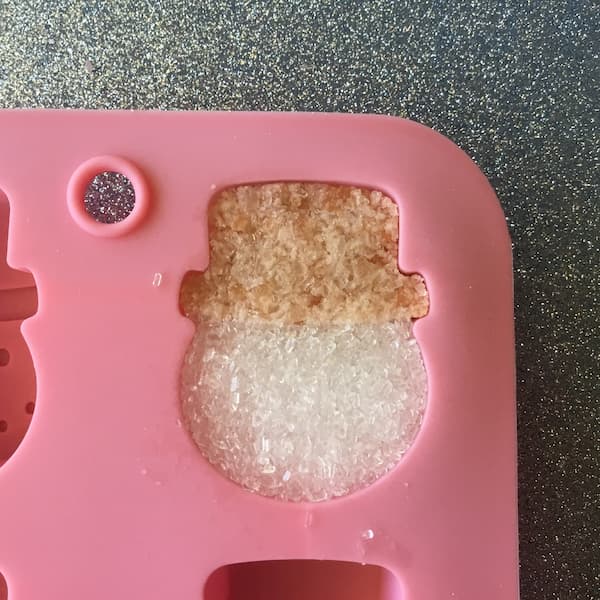
Choose a cavity in the top corner of your mould and lay the rock salt pieces into the eyes, nose and mouth indents of the mould. Next, place your plastic card on its end into the mould cavity to separate the hat section from the face section.
Holding the plastic card in place, fill the hat section with the pink Himalayan salt mixture and compact it with your finger (do not press too hard or you may misshape the mould). Try and keep your plastic card slightly curved to the shape of the hat brim when doing this. Then fill the face section with the white Epsom salt mixture and compact it with your finger also.
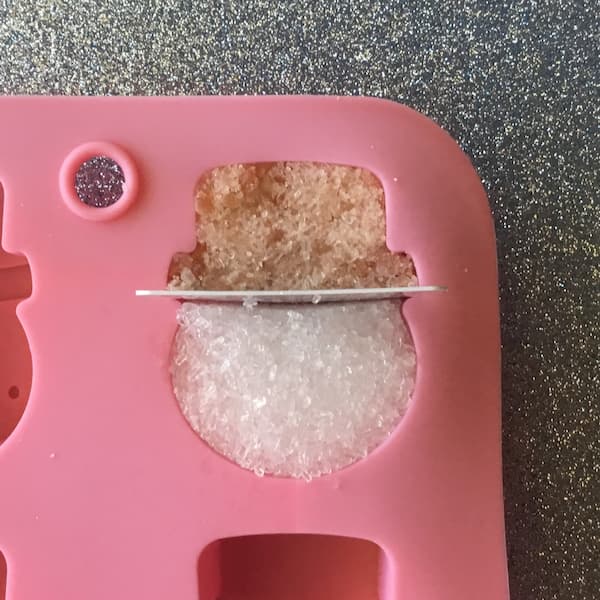
Gently and carefully pull the plastic card out of the mould and then gently compact the salt cake into the mould pushing the two sections of salt together. Make sure this is done properly to stop your two sections coming apart later when the salt cake is dry.
Turn It Out
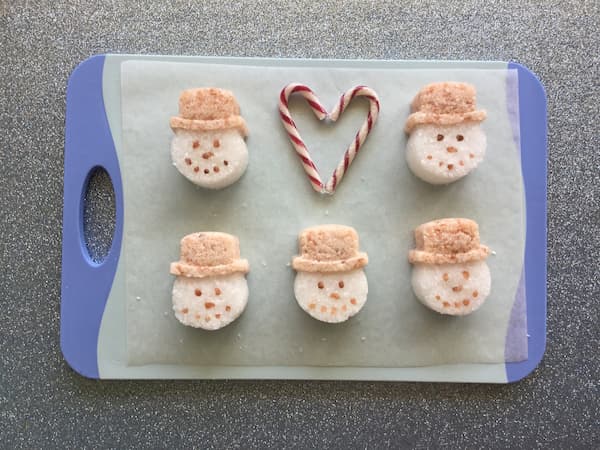
Now quickly but carefully turn your mould out onto your paper-lined tray or board. Tap the back of the mould lightly with your finger then remove it from the salt cake in a slow, upwards motion. Use your finger to pat down the edges of your salt cake if necessary.
Rinse & Repeat
Working quickly so the salt does not dry out, repeat all steps until you have used up all of your salt mixture.
Let Them Dry
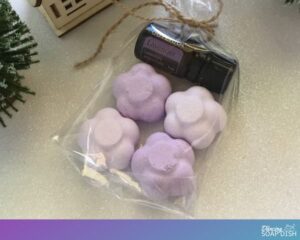
Set your salt cakes aside to dry overnight, and then move them to a cake cooling rack to let the underside dry. Store them in a plastic zip-lock bag for scent longevity. To give as a gift, place two salt cakes in a cellophane bag and tie off with a pretty ribbon.
Troubleshooting Tips
If your salt cake does not remove easily from your mould, your salt mixture is too dry. Add some more water and try again.
If your salt cake starts to sag or lose its shape after being removed from the mould, your salt mixture is too wet. Add some more salt and try again.
Directions for Use
To use, drop two into a bath or one in a bucket or foot spa for a relaxing foot soak.
Try this variation!
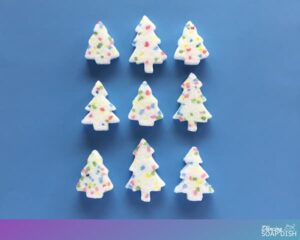
Don’t have any pink Himalayan salt? You can try this recipe variation instead. I made a complete salt cake using just Epsom Salts and then painted on the detail with food colouring once it was dry! These turned out a treat too!
Enjoy!
