
Taking cupcakes to school to share with your classmates on your birthday is a time-honored tradition. It’s my son’s first year of school so I wanted him to share in the excitement and pride that comes with sharing your homemade creations with your class.
Buuuuuut, my son doesn’t eat cupcakes. He just doesn’t like them, plain and simple.
So I was on the hunt for a simple and fun birthday treat for school that was not made of cake.
This post contains affiliate links. If you buy something through one of those links, I will receive a small commission at no extra cost to you. As an Amazon Associate I earn from qualifying purchases.
Thank you for supporting my site!
Lightbulb Moment: Bath Bombs!
The more I thought about it the more I could see that taking homemade bath bomb birthday treats to school is the perfect solution.
Here’s why:
You can make large batches of them
They are a low-allergy treat (compared with the eggs, gluten and dairy found in cupcakes)
You can make them well ahead of time
Kids go nuts for them
Tick, tick, tick, tick, tick!
Plus, you can use any left-over bath bombs as party favours for friends and family.
Bath Bomb Do’s & Don’ts
When you’re making bath bombs to give as gifts, school birthday treats or party favours, there are some basic do’s and don’ts that I always abide by.
Do
- wrap or package your bath bombs for protection, easy transportation and to maintain colour and scent longevity
- clearly label your bath bombs with all the ingredients and directions for use (a ‘Do Not Eat’ warning is also recommended)
Don’t
- use essential oils that are likely to cause skin irritation to scent your bath bombs (Cassia, Cinnamon, Clove, Oregano, Sage (not Clary Sage) and Thyme. A small number of people also find Peppermint essential oil irritating to the skin so I would avoid this one too just to be on the safe side.
- use allergy-prone carrier oils such as Sweet Almond Oil
Related Posts
Fruit Cup Bath Bombs – Fun, Sensory Play for Kindergartners
Lemonade Essential Oil Fun Fizzies
Easter Cookie Stamp Bath Bombs
Gather Your Supplies
Baking Soda
Baking soda (or bi-carb soda) is one of the two ingredients required to create fizzing and bubbles when a bath bomb is dropped in water. If your baking soda is lumpy, sift it as you add it to your mixture.
Citric Acid
Citric acid is the second ingredient required to create the chemical reaction that causes the release of carbon dioxide bubbles when a bath bomb is dropped in water. Using a fine-grain citric acid is best when making bath bombs.
Essential Oils and a Carrier Oil
As this recipe uses essential oils, I have included a carrier oil for dilution purposes. Essential oils should always be diluted, especially in the bath (where they have access to all sorts of nooks and crannies they might not ordinarily have).
The carrier oil in this recipe also has the secondary function of being the ‘glue’ that holds the bath bombs together so they can be moulded into the desired shape.
Common carrier oils include fractionated/liquid coconut oil (coconut oil that has had it’s fatty chains removed so it is liquid at room temperature), jojoba oil, sweet almond oil (beware of nut allergies if you are giving these bath salt gems as a gift), grapeseed oil, avocado oil, and the list goes on.
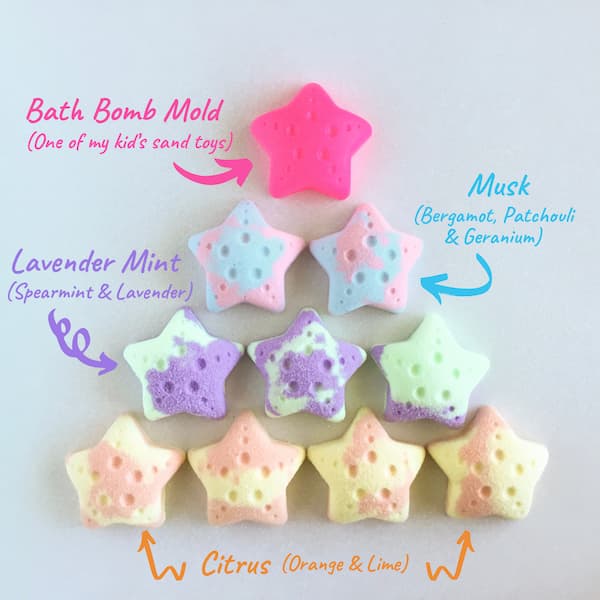
I used Fractionated Coconut Oil in my bath bombs and made three batches in three different scents:
Lavender Mint – Scented with Lavender and Spearmint essential oils at a ratio of 2:1
Citrus – Scented with Orange and Lime essential oils at a ratio of 1:1
Musk – Scented with Bergamot, Patchouli and Geranium essential oils at a ratio of 3:3:1
Colouring
You’re probably gonna want to colour your bath bombs because, let’s be honest, coloured bath bombs are way cooler than just plain white.
Food colouring is what most people reach for and, while you can have success using food colouring to colour your bath bombs, I want to warn you that food colouring can contain ingredients that may cause your bath bombs to fizz prematurely, or crack and crumble once dry. Food colouring is also prone to fading after a relatively short time.
I used soap colouring for my bath bombs because the ingredients are stable and consistent across all colours.
A Bath Bomb Mould
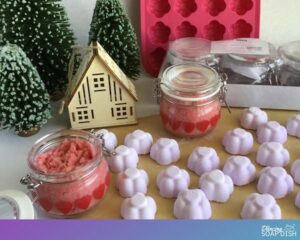
A mould is a necessary requirement when making bath bombs, but don’t worry if you don’t have a bath bomb mould on hand. There are a number of everyday items you can find around the home that will suffice.
I’ve used one of my kid’s sand toys to make my bath bombs. Sand toys are a perfect substitute for a bath bomb mould since bath bomb mixture has the consistency of damp sand.
Mixing Bowl & Spoon
You will require a mixing bowl and spoon to make this recipe. To be on the safe side, I recommend you use a non-plastic bowl and spoon for this activity as essential oils can quickly corrode some plastics. A glass, ceramic or stainless steel bowl and a metal spoon is the way to go.
Grease-Proof Paper Lined Tray
Bath bombs need to stand for 48-72 hours to set in a cool and dry location. Turning them out onto a baking tray or serving tray is the perfect solution as you can then pick them up and move them to a safe place to dry. The grease-proof paper allows for easy clean-up once your project is finished.
Packaging
Homemade bath bombs must be packaged or wrapped once they are set. If you leave them out in the open their scent (and even colour) will evaporate over time.
Un-packaged bath bombs also have the potential to react with the moisture in the air, especially if it is a humid day.
Bath bombs are also known to be quite fragile, so this is another reason you will need to package them. This will allow you to easily transport them to school.
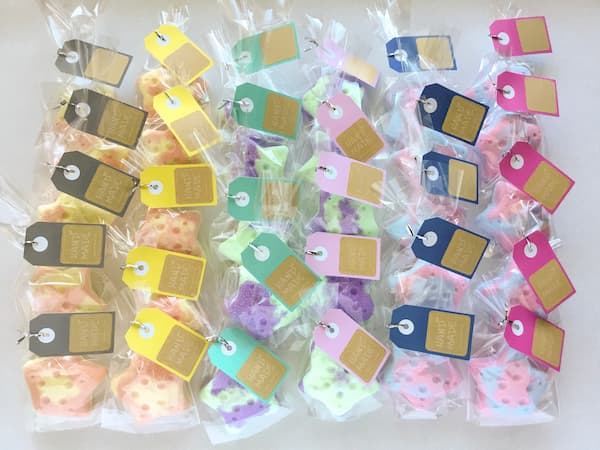
You will often find bath bombs you buy from the store shrink-wrapped in plastic, but it’s not necessary to go to so much trouble with your homemade bath bombs. Cellophane bags such as these are a super convenient way to package your bath bombs and are readily available at your favourite craft store.
If you can’t locate cellophane bags even just plain cellophane will do the trick. Just cut out a square, wrap your bath bomb, and tie it with a pretty ribbon.
Labels
As I mentioned above I highly recommend you label your homemade bath bombs with the ingredients you have used plus directions for use. The easiest way to do this is with printable sticker paper. Just create a basic label in your favourite word processing program and print it onto the adhesive backed paper using your home printer.
Use a ruler and a craft knife to cut up your labels and then stick them onto an existing gift tag. You can find blank gift tags at craft and department stores.
It’s also a great idea to put a little happy birthday message on the tag also. Something like this is super cute:
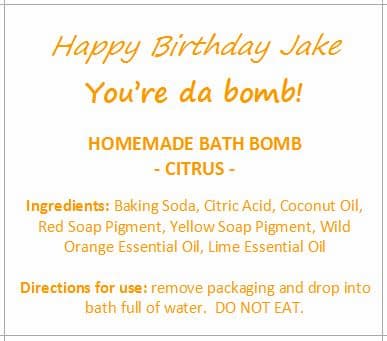
I even added a cute “Hand Made Especially for You” label. Happy Birthday stickers also work well.
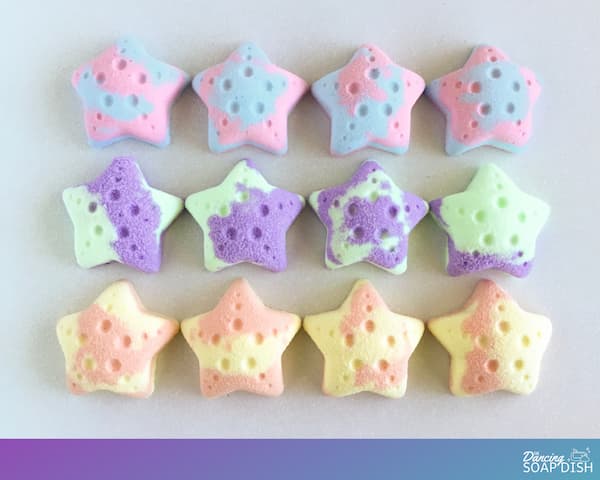
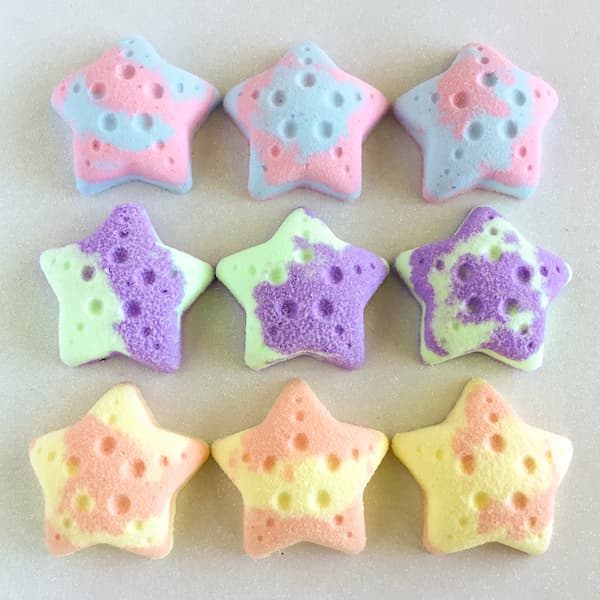
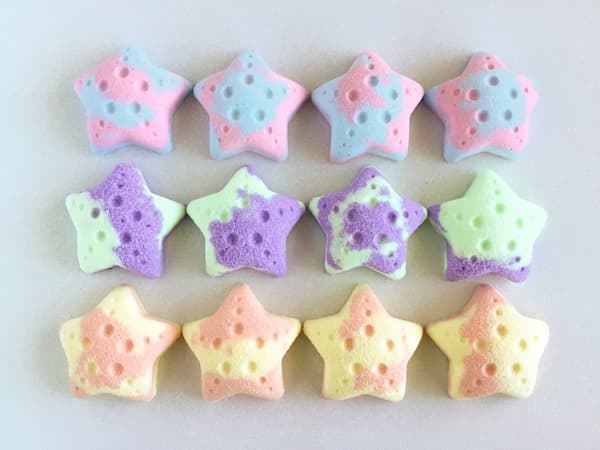
Want your bath bombs to look like mine?
I made two batches of bath bomb mixture (as per the recipe below), each with the same scent but in two different colours. When spooning mixture into my bath bomb mould I alternated between the two colours to create a two-tone colour effect.
Bath Bomb Birthday Treats for School
Equipment
- Glass, Ceramic or Metal Mixing Bowl and Spoon
- Tray lined with Grease-Proof Paper
- Cellophane Bags
- Blank Gift Tags
- Printable Sticker Paper
- Ruler and Craft Knife
Ingredients
- 1 cup Baking Soda aka Bi-Carb Soda
- 1/2 cup Citric Acid
- 4 tsp Carrier Oil
- 20 drops Essential Oil
- Soap Colouring
- Bath Bomb Mould
Instructions
- Sift the baking soda and citric acid into a bowl and mix well. Add the carrier oil, essential oils and soap colouring. Use your hands to combine the mixture, rubbing it between your fingers to evenly disperse the wet ingredients. You’ll know your mixture is ready when it sticks together/packs down and can keep its shape. It will still look kind of dry, but if you take a handful of the mixture and squeeze it, it should pack easily into a ball. If your mixture is too dry add a few more drops of carrier oil and mix again.
- Now grab your bath bomb mould and place a couple of spoonfuls of mixture in it. Push the mixture down firmly to cover the bottom of the mould as this will ensure your mixture is compacted well. Continue to fill your mould, pushing down the mixture and compacting it into place. Compaction is an important step as it may mean the difference between hard or crumbly ‘bombs’ once they are dry.
- Starting at the top left and working in rows, turn your bath bombs out on to your paper-lined tray. Keep filling your mould and turning it out until you have used all of your bath bomb mixture.
- Set your bath bombs aside to air dry in a cool, dry place for 24-72 hours.
- While your bath bombs are drying, create some labels for your bath bombs using your favourite word processing/publishing program. Be sure to include an ingredients list, directions for use, and a 'DO NOT EAT' notification.
- Print your labels on to printable sticker paper. Use a ruler and a craft knife to cut up your labels and stick them onto blank gift tags.
- Once your bath bombs are dry, place individually into cellophane bags. Tie up/seal each bag and attach a tag.
- Take your bath bombs to school and hand them out to your child's classmates to celebrate their birthday.
Notes
Enjoy!


You mentioned all sorts of essential oils which may be irritating to the skin, but are actually fine so long as they are properly diluted. Yet you use orange essential oil, which makes the skin photo sensitive and can make it easier (especially for children) to get sun burnt. I will agree, the oils you mentioned can be irritating to the skin, but all essential oils will cause contact dermatitis if they are not properly diluted. On the other hand EOs that cause photo sensivity will cause it (to varying degrees) no matter how much it is diluted.
Hi Ronds Pub,
Thanks for taking the time to comment. I love discussing essential oil safety because I believe it plays an important role in how we experience and enjoy our essential oils. I refer to Tisserand & Young’s text ‘Essential Oil Safety'(2nd Ed) when creating recipes for my blog and this text was the basis for some of the items listed in my ‘Do’s & Don’ts’ section. Yes it is true that you can enjoy skin-irritating essential oils if you dilute them at the proper rate, however the essential oils I cautioned against are commonly purchased essential oils that have maximum dermal use levels below the dilution rate I used for this recipe. Hence my warning.
With regards to phototoxicity, “There is generally no phototoxic risk if the oils are used in a product that is either not applied to the body or is washed off the skin, such as shampoo, bath preparation or soap.” (Essential Oil Safety, p88). This is why you will never see phototoxic oils in my lip balm or lotion bar recipes, but I do use them freely in my bath, shower and soap recipes. It’s also interesting to note that there are safe dilution levels to avoid a phototoxic reaction. For grapefruit essential oil it is as high as 4% (Essential Oil Safety p297).
Thanks again for your comment, you have brought up some really interesting points.