It’s birthday time at our house and you know what that means? Making birthday treats to take to school!
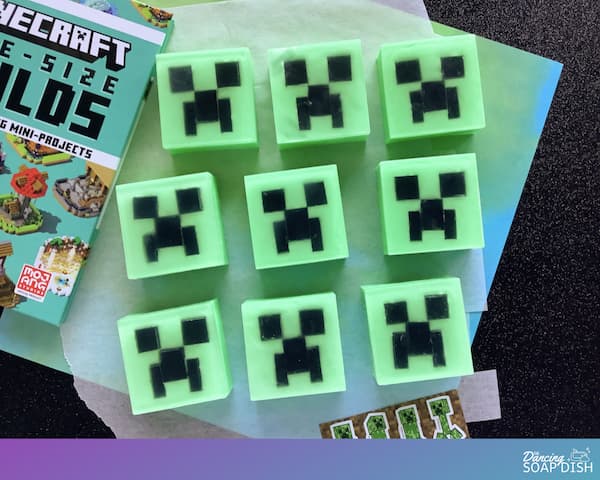
Cupcakes aren’t really our style and the last few years I’ve made bath bombs, so I was brainstorming for something new and different.
I know a lot of kids love Minecraft so that’s where I turned for some inspiration.
The Minecraft Creeper character has a face that is a simple enough design, but I’m not thinking bath bombs this time – no this time I’m making soap!
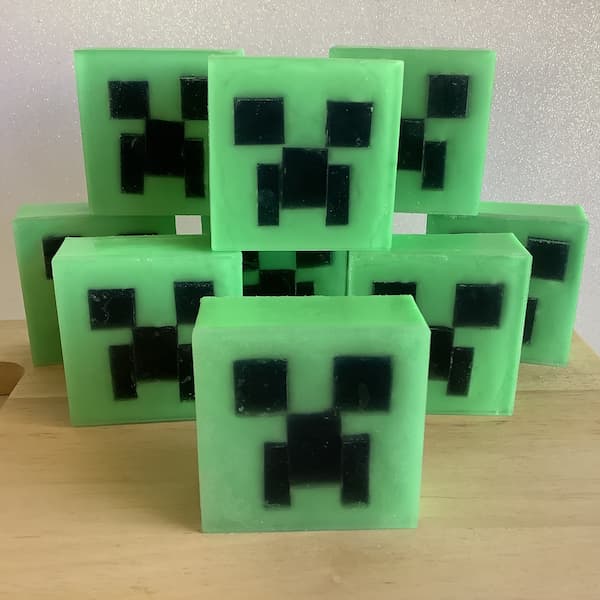
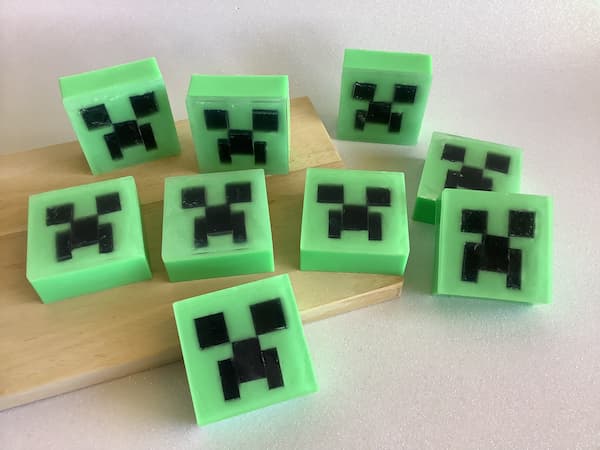
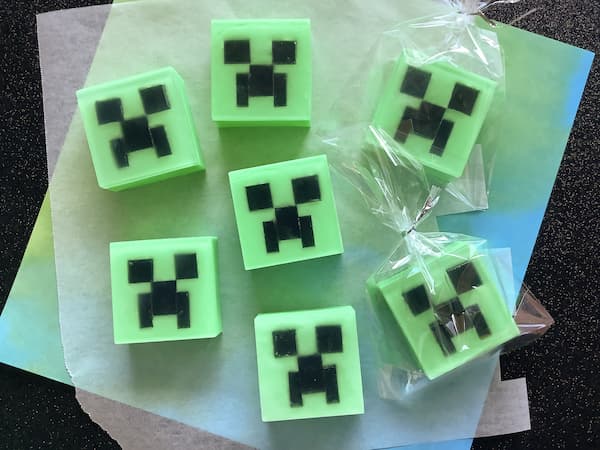
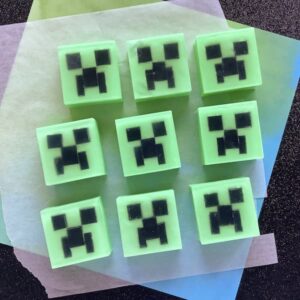
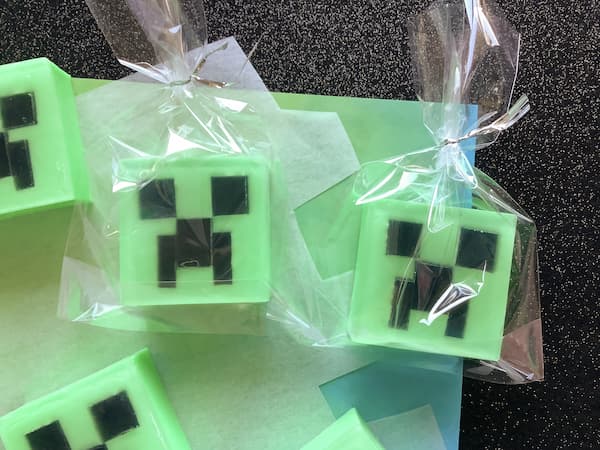
And here they are, Minecraft Creeper melt and pour soap bars. Aren’t they cool?
This post contains affiliate links. If you buy something through one of those links, I will receive a small commission at no extra cost to you. As an Amazon Associate I earn from qualifying purchases.
Thank you for supporting my site!
What You Need to Make Minecraft Creeper Melt and Pour Soap Bars
Melt and Pour Soap Base
Melt and pour soap is sold as large blocks that you can cut up and then weigh out the amount of soap you need. I used white and clear melt and pour soap base to make my Minecraft Creeper melt and pour soap bars. Each of my bars weighs approximately 100g/3.5oz.
The clear melt and pour soap base is for the eyes, nose and mouth, as you get the best results with black soap colouring and a clear base (a white base + black colouring = grey). I also used a thin layer of clear in the bottom of the mould to anchor the face in place before pouring the green soap. I used a special ‘no sweat’ formula to avoid glycerine dew beading on the outside of the soap bars.
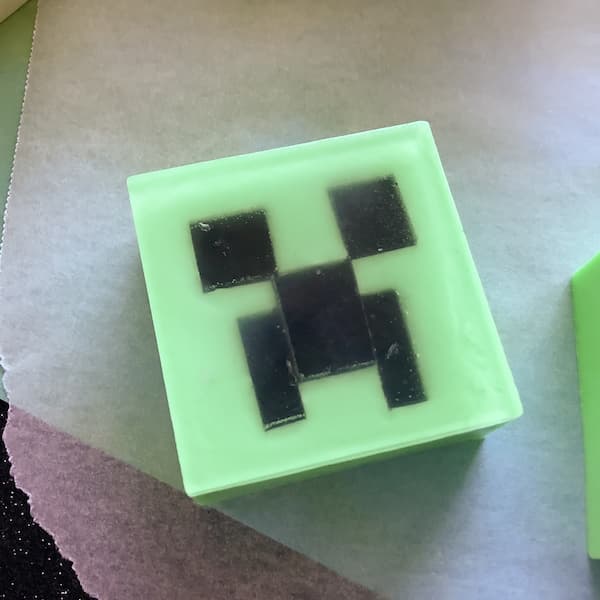
The white melt and pour soap base will be tinted green for the remainder of the face. Technically you could also use clear soap base for the face but I prefer the opaque look of the white base as it helps the black facial features stand out and so you can only see the eyes and mouth embeds from the front.
Soap Mould
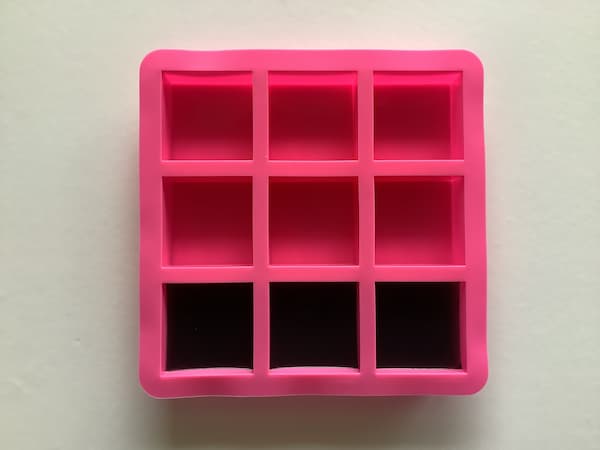
Minecraft Creeper faces are square, so you need a square mould to make Minecraft Creeper melt and pour soap bars. If you are after smaller bars for party favours, there are smaller square moulds available that should also work just fine.
Soap Colouring
As I said before, a Minecraft Creeper face is quite a simple design and is made up of two colours – green and black. You’ll need some liquid soap colouring to tint your soap, though you could also use coloured mica if that’s what you have on hand.
‘Apple green’ is the ideal shade of green, but if you don’t have that you could add yellow to a forest green, or blue to a lime green to get the same result.
Soap Cutting Tool
The eyes and mouth embed for the Minecraft Creeper melt and pour soap bars need to be cut from bigger blocks of black soap. This is easily done with a soap cutting tool or a large paint scraper.
Cutting Mat
I also recommend a cutting mat with gridlines for cutting up your soap embeds as it will help you make more accurate cuts.
Essential Oils or Fragrance Oils
Scenting your soap is optional, but most of us prefer a pretty smelling soap bar.
For this project, I used a blend of Lavender and Spearmint essential oils at a ratio of 5:3, but you can feel free to use your favourite combination of essential oils or your preferred fragrance oil.
If you are looking for ideas, check out my list of perfect essential oil soap scents.
A Paper Cup
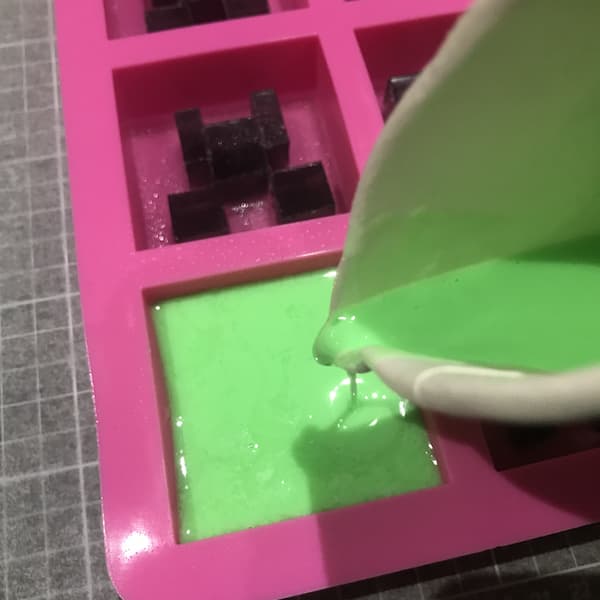
This is optional, but I really found using a paper cup very helpful when pouring the green part of my Minecraft Creeper melt and pour soap bars.
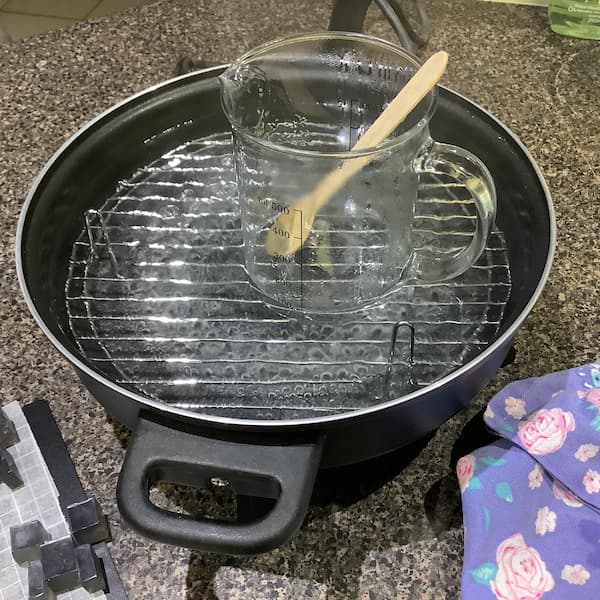
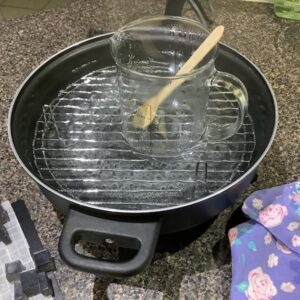
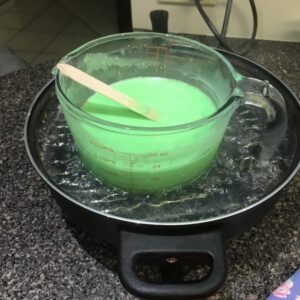
I melted all of the white soap base in a glass measuring jug, tinted it green, and then kept it warm in a double boiler.
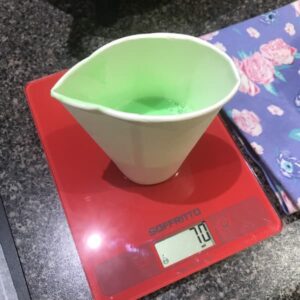
I then weighed out and scented each bar of soap separately in a paper cup before pouring into the mould.
Why?
For starters it allowed me to be super accurate when measuring out each bar of soap. If I pour too much into the paper cup, I can just put some back. That’s not an option when pouring direct into a mould.
Secondly, I am using essential oils to scent my soap and I didn’t want any of the fragrance evaporating while the soap sat in the double boiler.
Finally, it allows a little more time for the soap to cool before pouring (I don’t want to melt the clear soap already in the mould) and gives me more control when pouring the soap into the mould.
Rubbing Alcohol or Vodka in a Small Spray Bottle
Alcohol has a number of uses when making melt and pour soap:
- Spraying the soap with alcohol once it’s poured will remove any bubbles sitting on the soap’s surface.
- Spraying alcohol on embeds and between soap layers helps the soap bar adhere together.
- Spraying the soap mould with alcohol before pouring the soap helps the soap spread quickly and evenly across the bottom of the mould.
Clear Packing Tape or Transfer Tape
It’s so much easier to work with the face embeds if you use clear packing tape or transfer tape to keep them in the correct positions.
Additional Items Required
Kitchen Scales – I’ve used grams in this recipe because the amounts are easier to manage compared with ounces. Most kitchen scales these days are interchangeable between grams and ounces. Check your scale’s instruction booklet for how to change you scale to measure in grams and then change it back when finished.
Glass Measuring Jug – You will need a larger (500ml/16oz) measuring jug to melt the melt and pour soap base. I have a separate glass measuring jug dedicated to creative projects (soap making, lotion bars, lip balm etc) to avoid any cross-contamination of non-ingestible ingredients with food. I recommend you do the same.
Metal or Bamboo Skewer – Skewers are super handy for stirring and can be easily cleaned or disposed of. A wooden popsicle stick or disposable spoon will also suffice.
Paper Towel – Make sure you have some paper towel on hand for cleaning up (there may be drips) and for resting your skewers on after stirring.
Tray or Bread Board – Positioning your soap mould on a tray or bread board allows for easy transportation (while the soap is still setting if necessary).
Microwave or Double Boiler – Melt your soap base in either a microwave or a double boiler.
How to Make Minecraft Creeper Melt and Pour Soap Bars
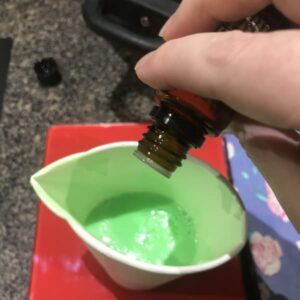
I scented my soap with Lavender and Spearmint essential oil at a ratio of 5:3. I added 15 drops of Lavender essential oil and 9 drops of Spearmint essential oil for every 70g of soap base.
Minecraft Creeper melt and pour soap bars need to be made in two stages, first the face embeds (black eyes, nose and mouth), and then the remainder of the soap bars.
Minecraft Creeper Face Embeds
To make the black face embeds for Minecraft Creeper Soap you need three 70g (~2 ½ oz) square bars of black soap.
Weigh out 220g (~7 3/4 oz) of clear soap base and cut it up into small cubes. Put it in a glass measuring jug in a microwave or double boiler. This amount includes ~5% wastage.
Position a 6cm x 6cm square, nine-cavity mould on a tray or breadboard ready to be filled, then put your tray or breadboard on top of a set of kitchen scales so you can weigh each soap bar as you pour it.
Melt your soap base as per the instructions.
Add black soap colouring and soap scent (if using) and mix well.
Pour 70g (2 ½ oz) of soap into three cavities of the soap mould, ensuring all three mould cavities have exactly the same amount of soap in them.
Spray the surface of the soap with alcohol to get rid of surface bubbles.
Set the soap aside for 12 hours to set.
Once set, pop the black soap bars out of the mould.
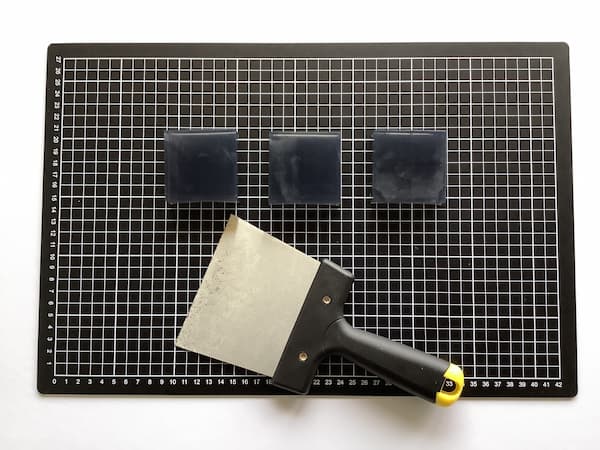
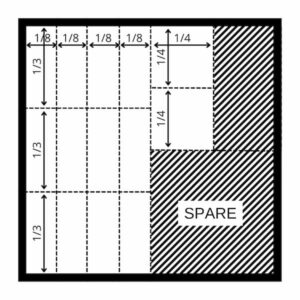
Use a cutting mat with gridlines and a soap cutting tool to cut the bars up in the following configurations:
Bar 1 – Cut in quarters, and then cut each quarter in quarters again. This will yield you sixteen 1.5cm x 1.5cm squares (eight pairs of eyes).
Bar 2 – Cut in thirds and then cut each third into four equal pieces. Then cut three of those pieces in half lengthways. This will yield you eight 2cm x 1.5cm rectangles (noses) and six 2cm x 0.75cm rectangles (three mouths).
Bar 3 – Cut in half and then cut one half into thirds and then quarters. This will yield you twelve 2cm x 0.75cm rectangles (six mouths).
Cut the other half in half, then that half in quarters. You need two 1.5cm x 1.5cm squares (the last pair of eyes) and the rest goes spare.
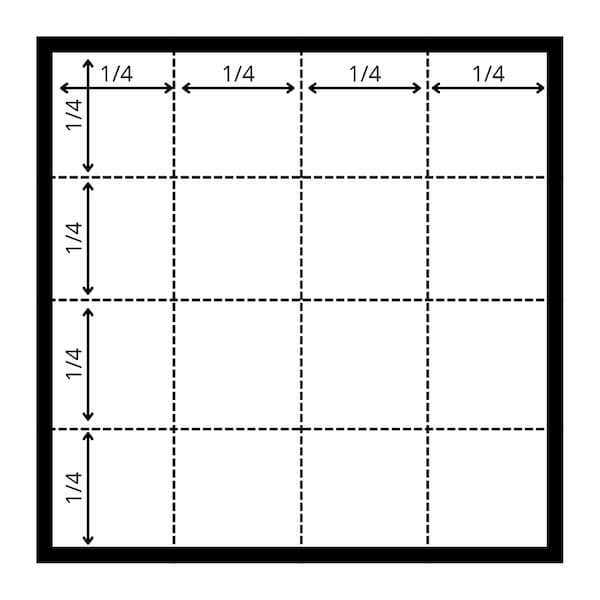
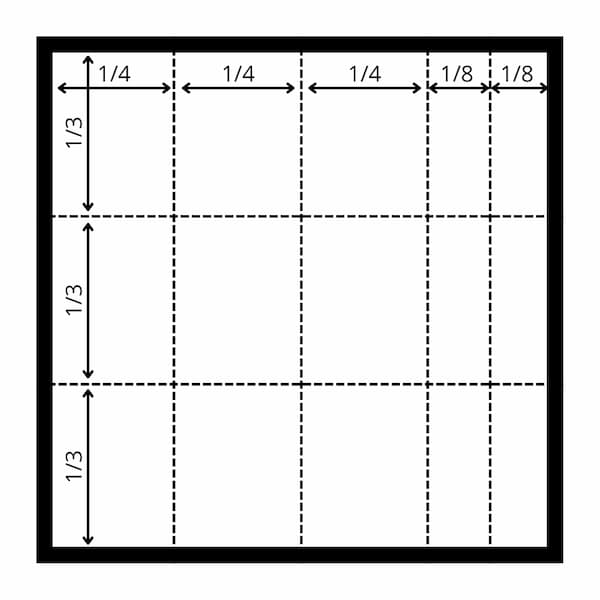
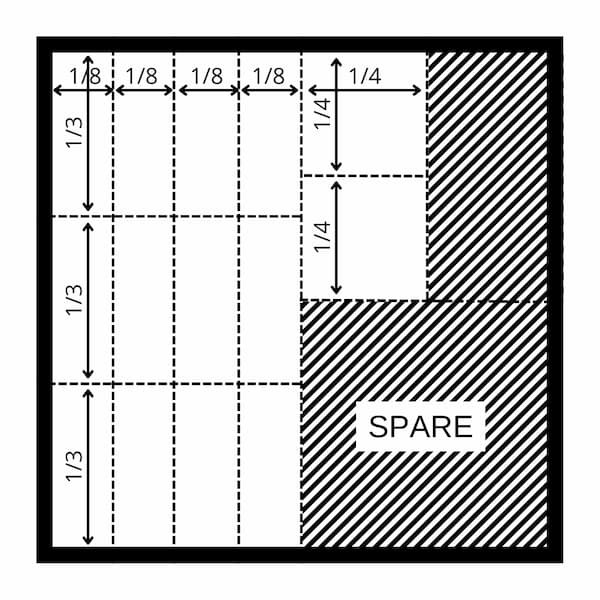
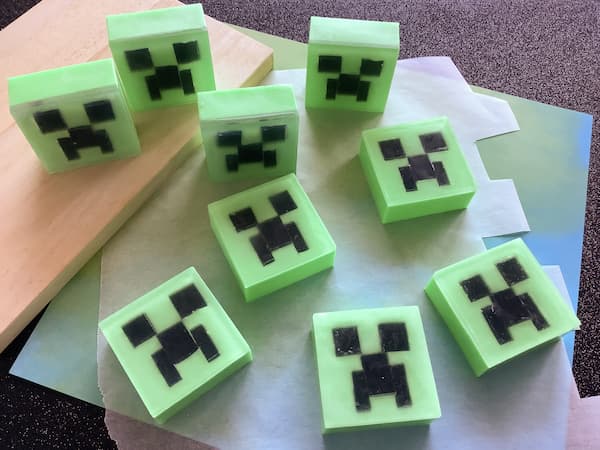
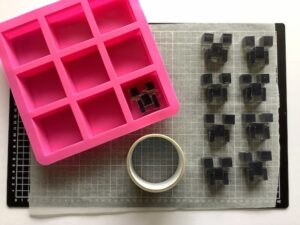
Then assemble nine Minecraft Creeper faces by positioning two eyes with a nose in between. The bottom corners of the eyes and the top corners of the nose should be touching. Then the two mouth pieces sit either side of the nose a third of the way down from the top of the nose.
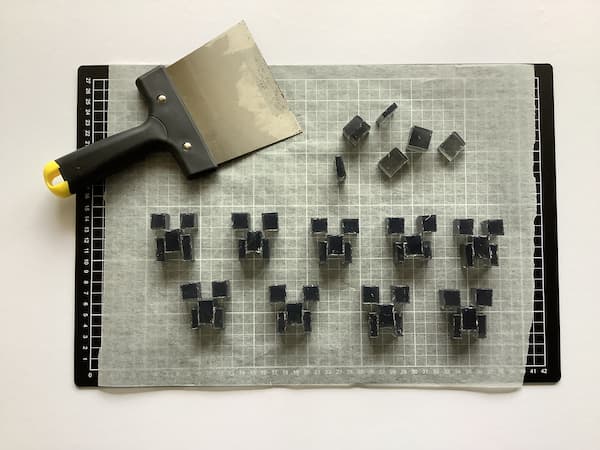
Assemble your embeds face down and then stick a piece of clear packing tape or transfer tape on the back to keep the face in position.
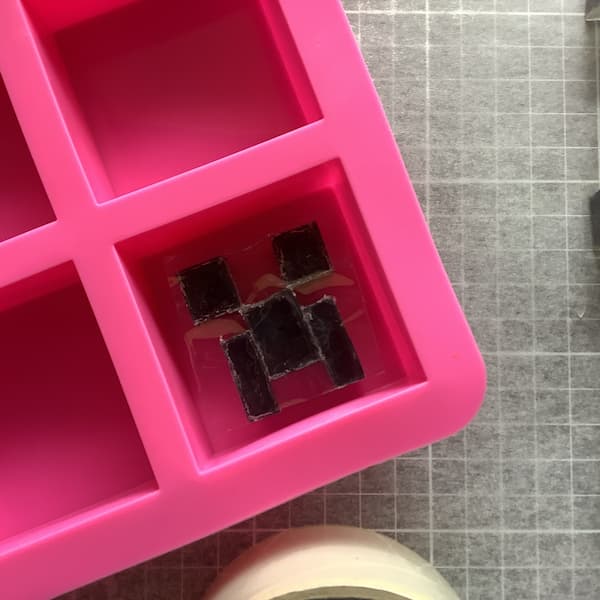
Continue until you have all nine Minecraft Creeper faces assembled.
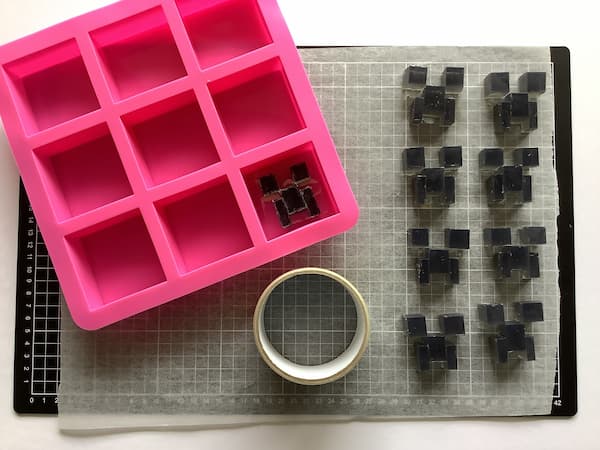
Minecraft Creeper Melt and Pour Soap Bars
Weigh out 130g (~4 1/2 oz) of clear soap base and cut it up into small cubes. Put it in a glass measuring jug in a microwave or double boiler. This amount includes ~5% wastage.
Position a 6cm x 6cm square, nine-cavity mould ready to be filled. Putting it on a tray or breadboard allows for easy transportation while the soap is still setting.
Melt your soap base as per the instructions.
Spray the surface of the soap with alcohol to remove any bubbles.
Spray the base of one on the soap mould cavities with alcohol and pour in just enough clear soap base to coat the bottom of the mould cavity. Spray the surface of the soap with alcohol to remove any bubbles.
Working quickly, position the Minecraft Creeper face embeds in the centre of the mould cavity.
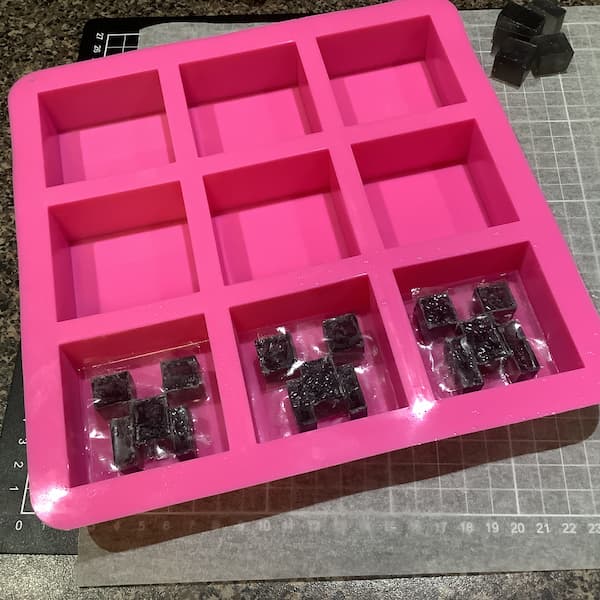
Repeat the last two steps until all nine mould cavities are complete.
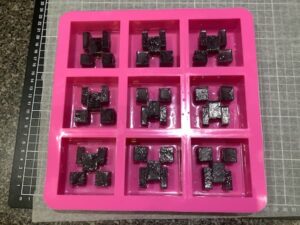
When the clear soap has set solid, remove the transfer tape from the back of the face embeds.
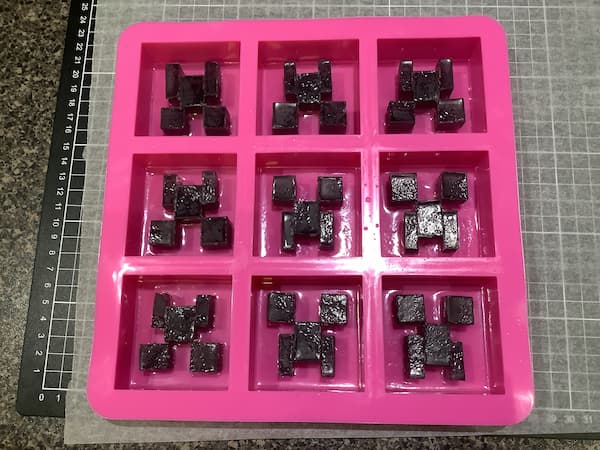
Weigh out 660g (~23 1/4 oz) of white soap base and cut it up into small cubes. Put it in a glass measuring jug in a microwave or double boiler. This amount includes ~5% wastage.
Melt your soap base as per the instructions.
Add green soap colouring and stir well until you have reached your desired shade of Minecraft Creeper green.
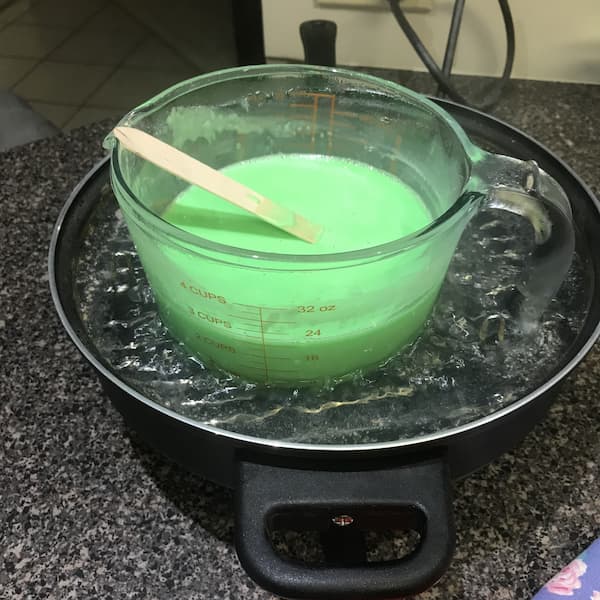
Place a paper cup on a set of kitchen scales and weigh out exactly 70g of melted soap base.
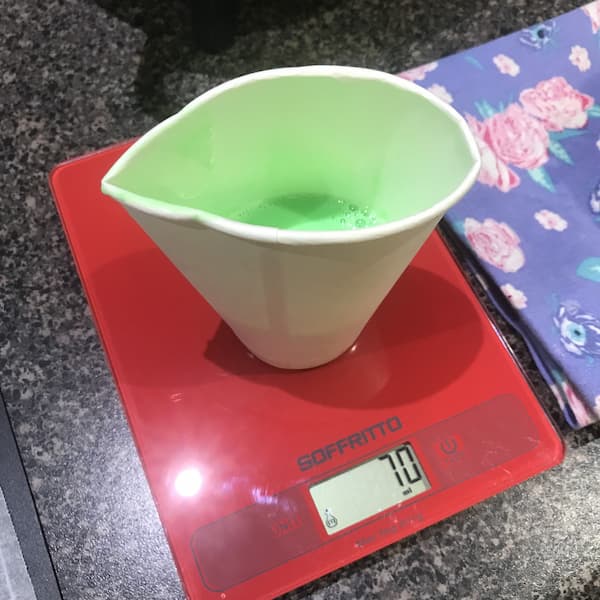
Add your fragrance oil or essential oil (if using) and stir well.
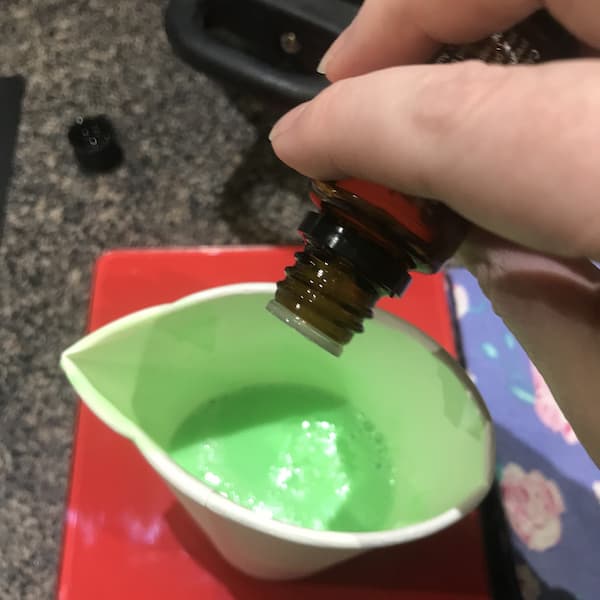
Spray the clear soap base and face embeds of one soap cavity with alcohol.
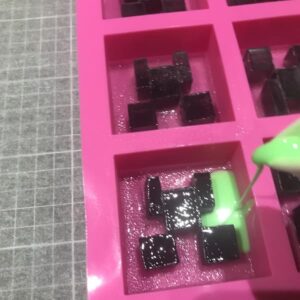
Pinch the edge of your paper cup to make a spout, and gently pour the soap base into the mould cavity.
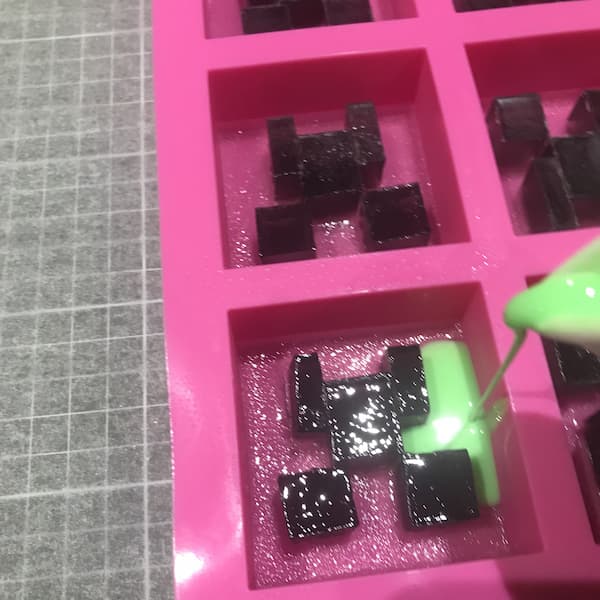
Spray the surface of the soap with alcohol to get rid of surface bubbles.
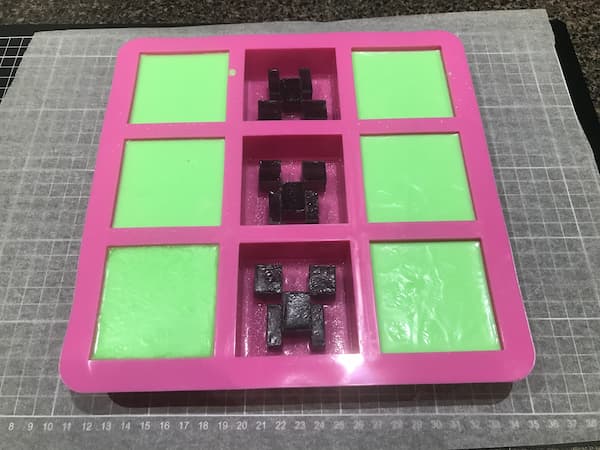
Repeat the last five steps until all nine mould cavities are complete.
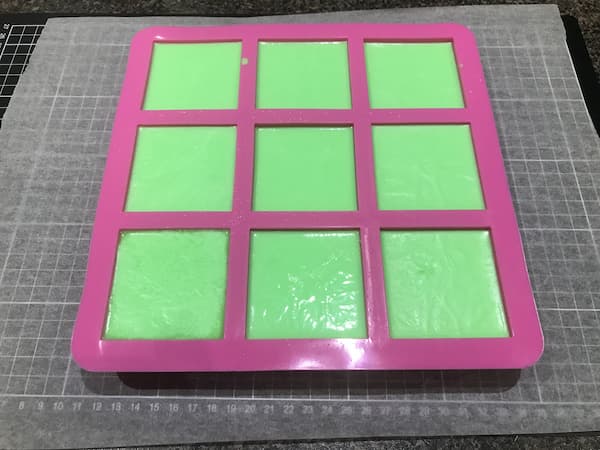
Let the soap set overnight (12hrs) and then peel back the silicone mould to release the Minecraft Creeper melt and pour soap bars.
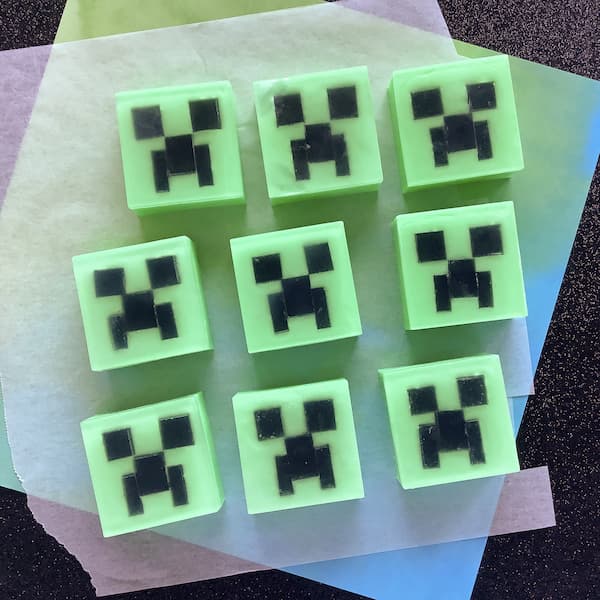
Printable Tutorial for Minecraft Creeper Melt and Pour Soap Bars

Minecraft Creeper Melt and Pour Soap Bars
Equipment
- Alcohol in a Small Spray Bottle (rubbing alcohol, isopropyl or vodka)
- Soap Cutter and Cutting Mat
- Kitchen Scales
- Glass Measuring Jug
- A Paper Cup
- Bamboo or Metal Skewer
- Paper Towel
- Tray or Bread Board
- Microwave or Double Boiler
Ingredients
- 350 g Clear Melt and Pour Soap Base
- 660 g White Melt and Pour Soap Base
- Black Soap Colouring
- Green Soap Colouring
- Soap Fragrance or Essential Oils (optional)
- 9-Cavity Square Soap Mould
- Clear Packing Tape or Transfer Tape
Instructions
Black Face Embeds
- To make the black face embeds for Minecraft Creeper Soap you need three 70g (~2 ½ oz) square bars of black soap.
- Weigh out 220g (~7 3/4 oz) of clear soap base and cut it up into small cubes. Put it in a glass measuring jug in a microwave or double boiler. This amount includes ~5% wastage.
- Position a 6cm x 6cm square, nine-cavity mould on a tray or breadboard ready to be filled, then put your tray or breadboard on top of a set of kitchen scales so you can weigh each soap bar as you pour it.
- Melt your soap base as per the instructions.
- Add black soap colouring and soap scent (if using) and mix well.
- Pour 70g (2 ½ oz) of soap into three cavities of the soap mould, ensuring all three mould cavities have exactly the same amount of soap in them.
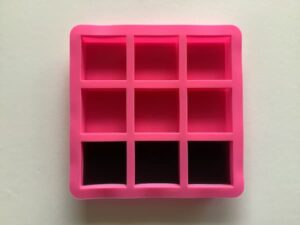
- Spray the surface of the soap with alcohol to get rid of surface bubbles.
- Set the soap aside for 12 hours to set.
- Once set, pop the black soap bars out of the mould.
- Use a cutting mat with gridlines and a soap cutting tool to cut the bars up in the following configurations:
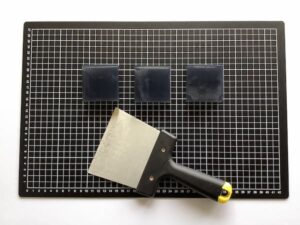
- Bar 1 – Cut in quarters, and then cut each quarter in quarters again. This will yield you sixteen 1.5cm x 1.5cm squares (eight pairs of eyes).
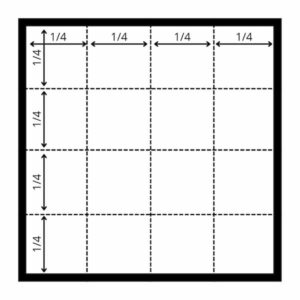
- Bar 2 – Cut in thirds and then cut each third into four equal pieces. Then cut three of those pieces in half lengthways. This will yield you eight 2cm x 1.5cm rectangles (noses) and six 2cm x 0.75cm rectangles (three mouths).
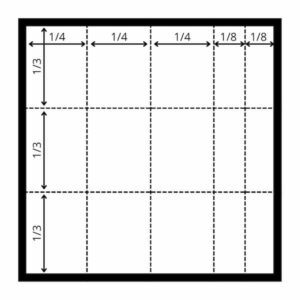
- Bar 3 – Cut in half and then cut one half into thirds and then quarters. This will yield you twelve 2cm x 0.75cm rectangles (six mouths).Cut the other half in half, then that half in quarters. You need two 1.5cm x 1.5cm squares (the last pair of eyes) and the rest goes spare.
- Then assemble nine Minecraft Creeper faces by positioning two eyes with a nose in between. The bottom corners of the eyes and the top corners of the nose should be touching. Then the two mouth pieces sit either side of the nose a third of the way down from the top of the nose.
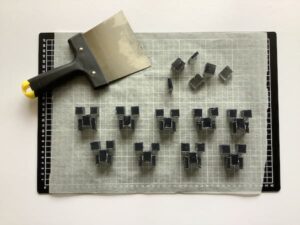
- Assemble your embeds face down and then stick a piece of clear packing tape or transfer tape on the back to keep the face in position.
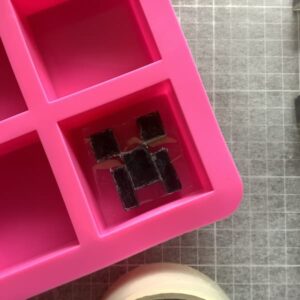
- Continue until you have all nine Minecraft Creeper faces assembled.
Minecraft Creeper Melt and Pour Soap Bars
- Weigh out 130g (~4 1/2 oz) of clear soap base and cut it up into small cubes. Put it in a glass measuring jug in a microwave or double boiler. This amount includes ~5% wastage.
- Position a 6cm x 6cm square, nine-cavity mould ready to be filled. Putting it on a tray or breadboard allows for easy transportation while the soap is still setting.
- Melt your soap base as per the instructions.
- Spray the surface of the soap with alcohol to remove any bubbles.
- Spray the base of one on the soap mould cavities with alcohol and pour in just enough clear soap base to coat the bottom of the mould cavity. Spray the surface of the soap with alcohol to remove any bubbles.
- Working quickly, position the Minecraft Creeper face embeds in the centre of the mould cavity.
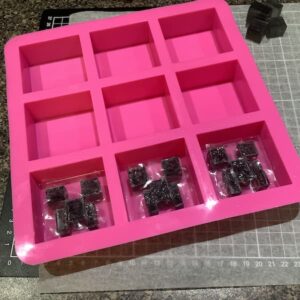
- Repeat steps 5 – 6 until all nine mould cavities are complete.
- When the clear soap has set solid, remove the transfer tape from the back of the face embeds.
- Weigh out 660g (~23 1/4 oz) of white soap base and cut it up into small cubes. Put it in a glass measuring jug in a microwave or double boiler. This amount includes ~5% wastage.
- Melt your soap base as per the instructions.
- Add green soap colouring and stir well until you have reached your desired shade of Minecraft Creeper green.
- Place a paper cup on a set of kitchen scales and weigh out exactly 70g of melted soap base.
- Add your fragrance oil or essential oil (if using) and stir well.
- Spray the clear soap base and face embeds of one soap cavity with alcohol.
- Pinch the edge of your paper cup to make a spout, and gently pour the soap base into the mould cavity.
- Spray the surface of the soap with alcohol to get rid of surface bubbles.
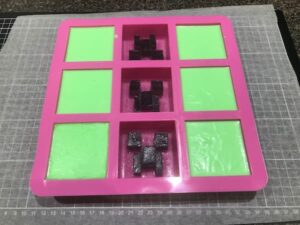
- Repeat steps 12 – 16 until all nine mould cavities are complete.
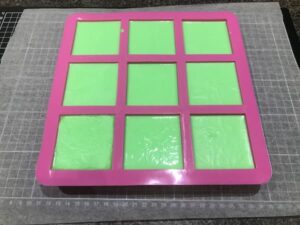
- Let the soap set overnight (12hrs) and then peel back the silicone mould to release the Minecraft Creeper melt and pour soap bars.
Notes
Enjoy!



This is such a cool idea – thank you for sharing all the steps you did. I’ll bet the kids loved these!