
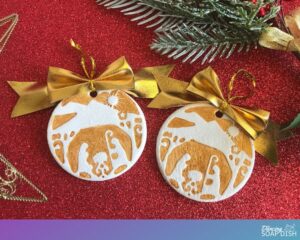
Diffuser Ornaments with Embedded Essential Oil Vials – A Genius Idea!
Looking for a quick and easy essential oil DIY project for Christmas? Essential oil diffuser ornaments are about as simple as it gets.
My last Christmas essential oil diffuser ornament project was a huge hit, but this year I’m looking to make a slight variation to improve the original design.
This post contains affiliate links. If you buy something through one of those links, I will receive a small commission at no extra cost to you. As an Amazon Associate I earn from qualifying purchases.
Thank you for supporting my site!
These snowflake-shaped pastry cutters recently caught my eye, and I pondered what to make with them.
A tower of snowflake bath salt cakes came to mind, but I couldn’t resist the idea of Christmas diffuser ornaments.
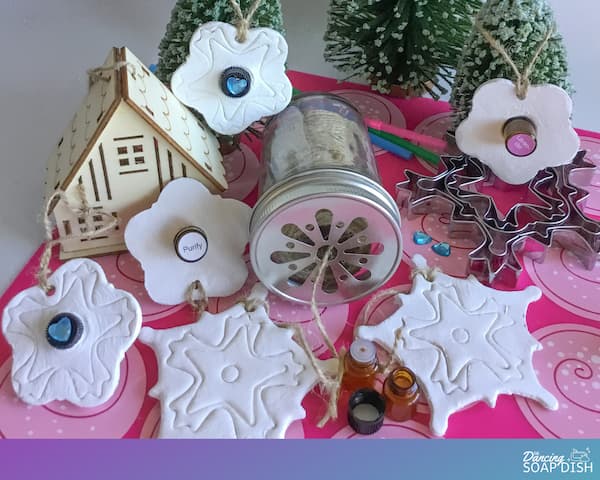
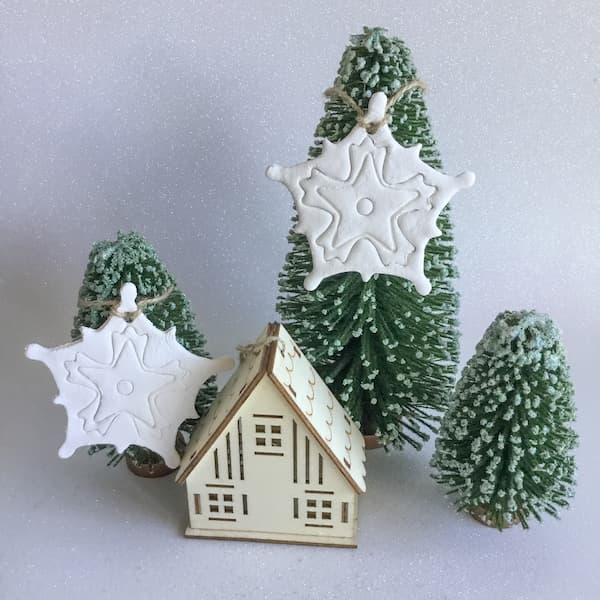
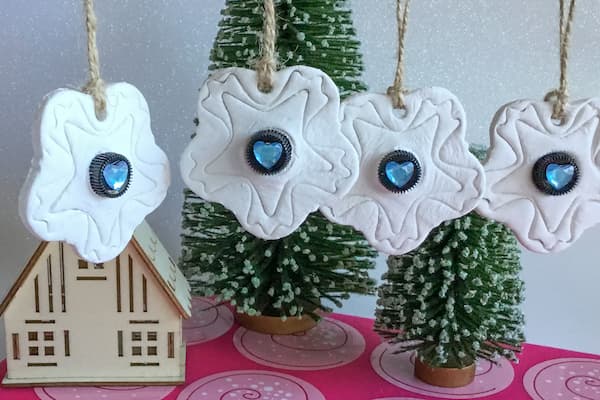
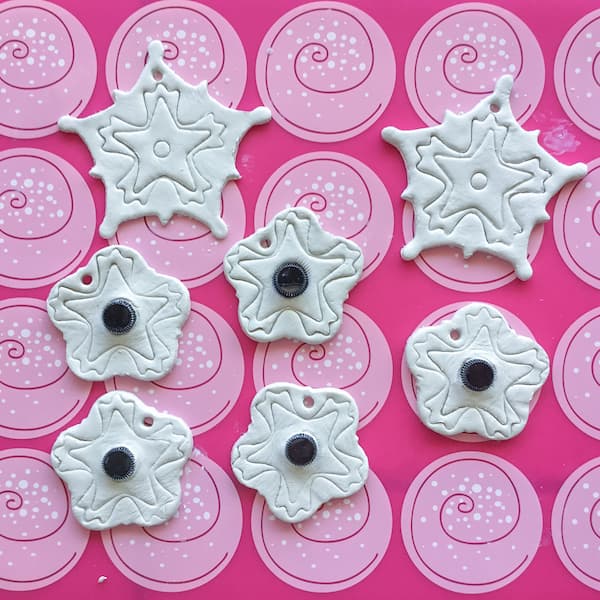
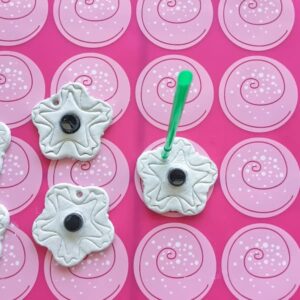
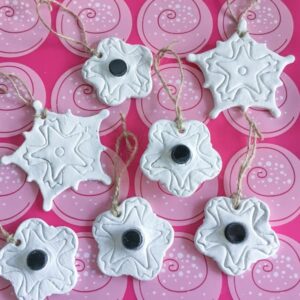
First I made snowflake-shaped ornaments embossed with the pastry cutter shapes – aren’t they elegant?

But then the way these pastry cutters are nestled inside each other in their tin also gave me a great idea.
What if I ‘nestled’ an essential oil sample vial into the centre of my diffuser ornament?
Essential oils would be close to hand any time I felt the scent of my diffuser needed replenishment AND it would be an awesome way to ‘dress up’ any essential oil sample I gave to family and friends this Christmas.
So I got to work and created these diffuser ornaments with embedded essential oil vials.
Here are some other ways to use an essential oil diffuser ornament:
- tie it to the rail in your closet to use as a wardrobe deodorizer
- tie it to an air vent in your car
- add a festive sent and hang it on your Christmas tree
How Does an Essential Oil Diffuser Ornament work?
Air hardened clay (i.e. not fired or glazed) is a porous substance and will soak up any liquid it comes in contact with (in this case, essential oils). This makes it perfect for making essential oil diffusers as it stops the essential oil from immediately evaporating.
You can make your own clay ‘ornaments’ using air hardening clay and then add your favourite essential oils to enjoy the scent for several days.
Just like any diffuser, you will eventually need to replenish your oils to maintain the scent.
Once the scent fades just unscrew the sample vial from its cap that is embedded in the ornament, add more oil, and they will be as good as new again.
Diffuser ornaments with embedded essential oil vials work best in small spaces, and the strength of the scent will vary depending on where they are.
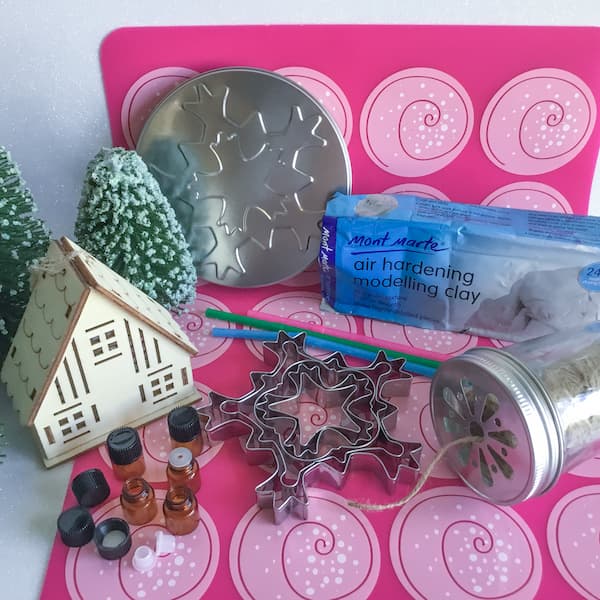
What You Need to Make Diffuser Ornaments with Embedded Essential Oil Vials
Air Hardening Clay
I prefer to make my essential oil diffuser ornaments out of air hardening clay. The lead up to Christmas can be a busy and chaotic time, so I have decided to skip making my own salt dough or baking soda dough.
If you have a recipe for either of those that you want to try out then this project is perfect for you. Give it and try and post your pics in the comments below.
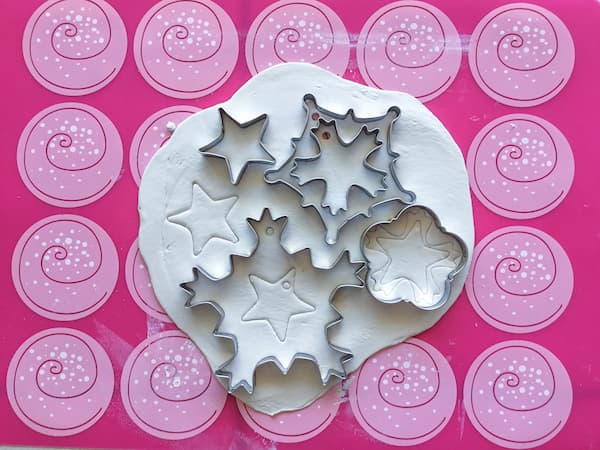
Snowflake Cookie Cutters
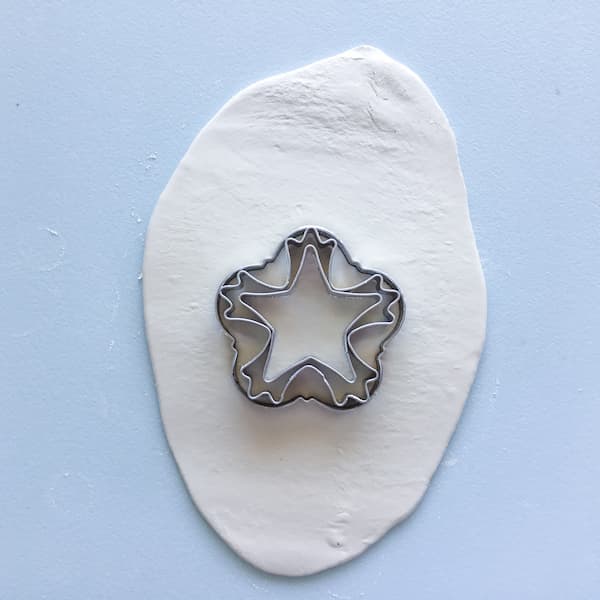
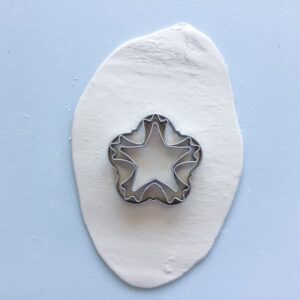
You’ll need snowflake cookie cutters in a variety of shapes and sizes for this project. I used VINTER 2018 pastry cutters from IKEA, but there are other great options available from elsewhere too.
I used these cutters for both cutting and embossing my ornaments. I arranged the shapes inside each other on a piece of clay, pressed lightly on the inner cutters (just to emboss the clay), but pressed down firmly on the outer cutter to cut through the clay.
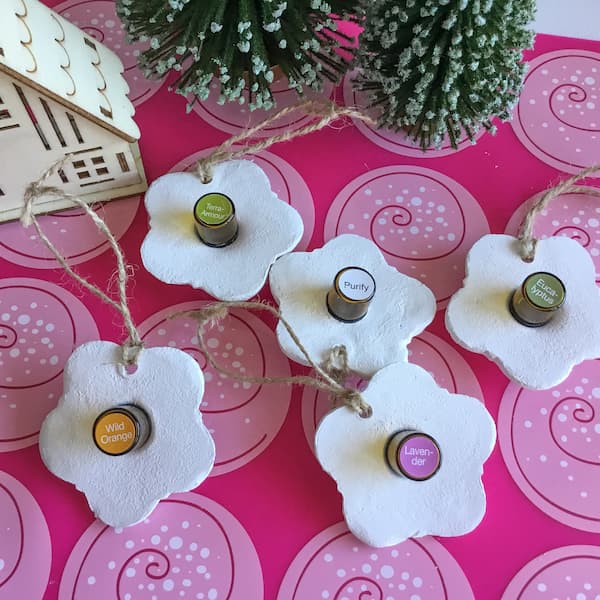
Essential Oil Sample Vials
Essential oil sample vials come in a range of sizes and cap configurations.
I used ¼ dram (1ml) amber glass essential oil bottles with a dropper and black cap, because this is what I had on hand.
However, different coloured 1ml sample vials are available if you prefer.
Essential Oils
Many essential oil companies sell festive essential oil blends around Christmas time. These blends are a great place to start. You can also check out my Pinterest Christmas Essential Oil Diffuser Blends board for heaps of inspiration.
Essential Oil Cap Stickers
Essential oil cap stickers are optional but recommended if you want to remember which essential oil is being used with each diffuser.
Instead of putting the sticker on the cap however, I put it on the bottom of the vial so it can only be viewed from the back of the diffuser.
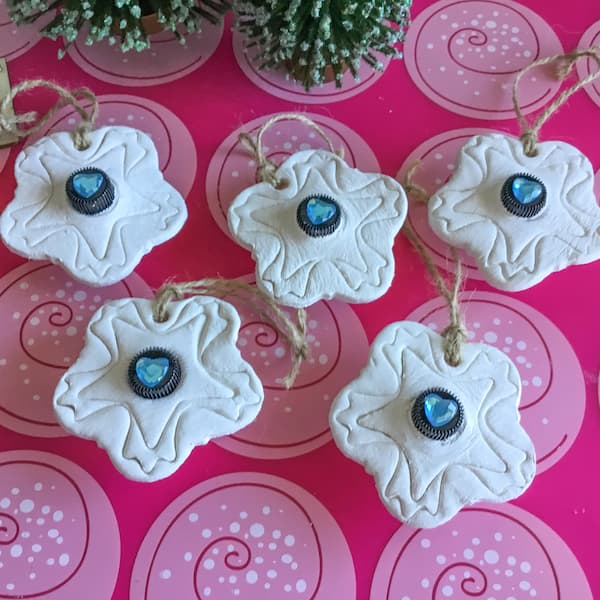
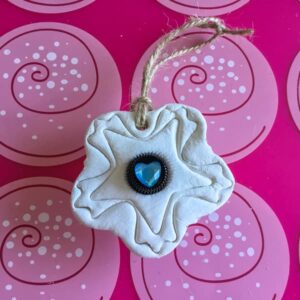
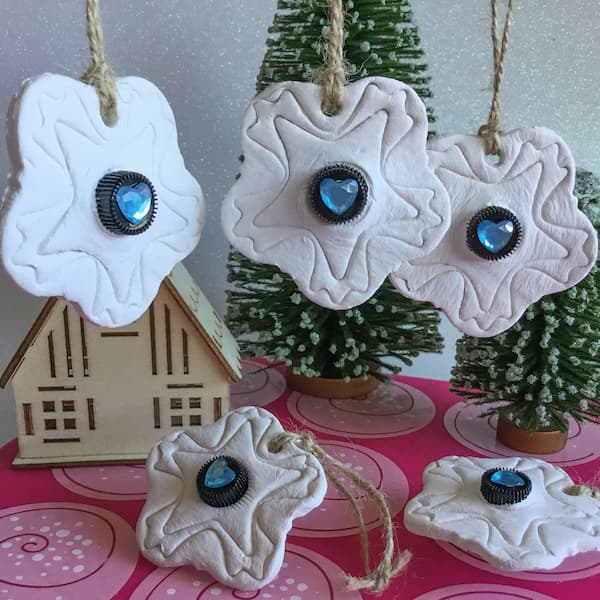
Craft Gems for Decoration
The plain, black caps were a little too boring for me, so I decided to dress them up with some craft gems. I chose blue heart gems, but you can use anything that sits well on the cap of the vial.
Additional Materials
Rolling Pin – you will need a standard rolling pin to roll out your clay, preferably one with rings for an even thickness.
A Cutting Board or Vinyl Table Cloth – for rolling out the clay.
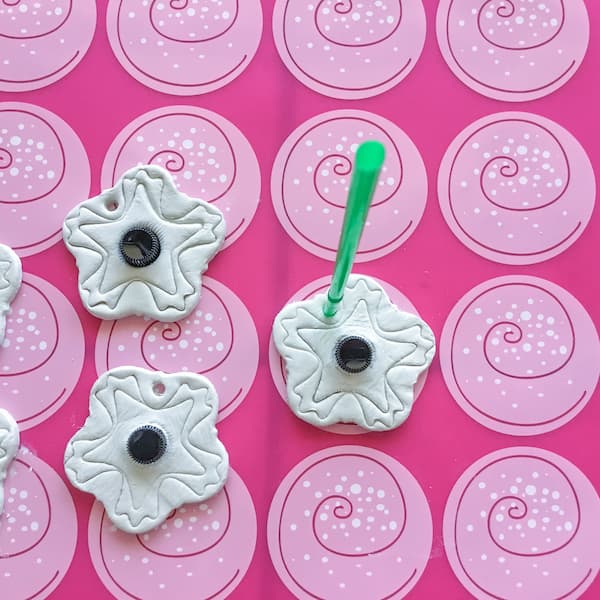
Drinking Straws – these are useful as a clay sculpting tool and will also be used to poke a hole in your ornament.
A Cup of Water – have a cup of water close by for smoothing out the clay.
Craft Glue – for sticking the craft gems to the caps and securing the sample vial cap within the clay diffuser if necessary.
Ribbon, String or Twine – use some hessian twine to thread through the hole so you can hang your ornament.
How to Make Diffuser Ornaments with Embedded Essential Oil Vials
Want your diffuser ornaments with embedded essential oil vials to look like mine?
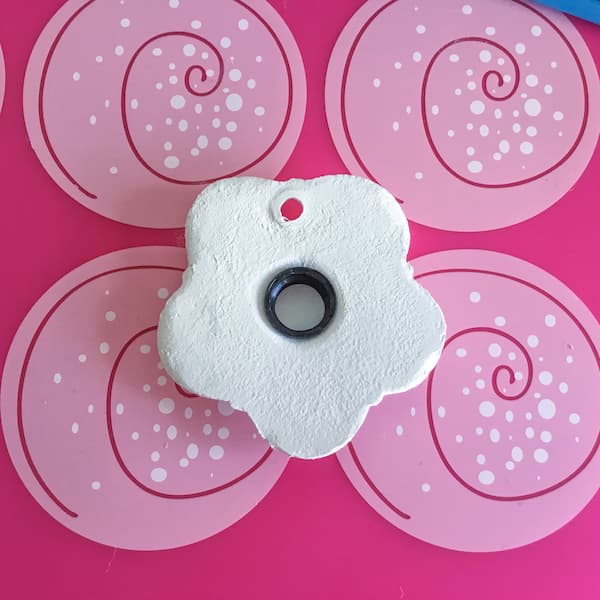
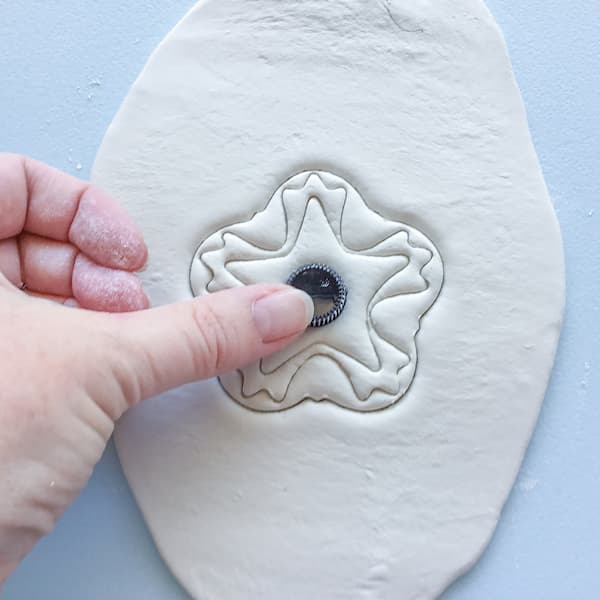
I rolled out white air hardening clay, embossed and cut it, then pushed a essential oil sample vial cap through the centre.
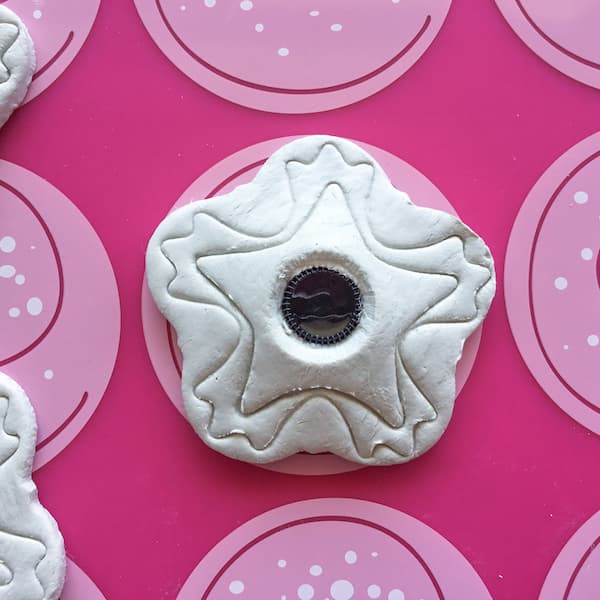

I let the ornament dry with the cap still in the centre so the clay can shrink snugly around it. Then I finished the ornament of with a decorative craft gem and some hessian twine.
Full step-by-step instructions can be found below.
Printable Tutorial for Diffuser Ornaments with Embedded Essential Oil Vials
Diffuser Ornaments with Embedded Essential Oil Vials
Equipment
- Rolling Pin
- Cutting Board or Vinyl Tablecloth
- Cup of Water
- Drinking Straw
- Craft Glue
- Ribbon or Twine
Ingredients
- White Air Hardening Clay
- Snowflake Cookie Cutters
- 1ml Essential Oil Sample Vials
- Essential Oils
- Craft Gems (Optional)
- Essential Oil Cap Stickers (Optional)
Instructions
- Roll out white air hardening clay to 1/8" (3-5mm) thick.
- Use IKEA VINTER 2018 pastry cutters to cut and emboss your desired design.
- Pull away excess clay and smooth out any rough edges with a finger dipped in water.
- Take the cap of an essential oil sample vial and push it through the centre of your design.
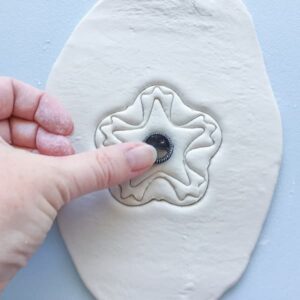
- Remove the punched-out circle of clay from underneath the cap and ensure your ornament fits snugly around the cap (I did this by actually laying my design over the cap and using a drinking straw to gently roll down the edges).
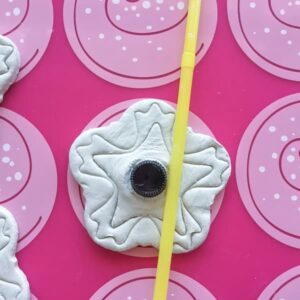
- Now use a drinking straw again to punch a hole in your ornament for the string to be tied through.
- Set your ornaments aside to dry WITH THE SAMPLE VIAL CAP NESTLED INSIDE IT.This is an important step. Your clay will shrink as it dries and close firmly around the cap. If you let your ornament dry and try to add the cap later, it will not fit.

- Once dry, clean up any clay residue on the sample vial cap with a damp cloth. If the cap is still loose, secure it to the ornament with craft glue.
- Thread some hessian twine through the hole in your essential oil diffuser ornament.
- Affix a craft gem to the cap with craft glue.
- Fill your sample vial with your desired essential oil and screw it onto the back of the ornament.

- Add a cap sticker to the base of the vial so you know which oil is in it and your essential oil diffuser ornament is complete.

Enjoy!
